Showing posts with label Baking. Show all posts

Wednesday, September 12, 2012

#BundtaMonth-Banana Zucchini Bundt Cake

banana-zucchni-bundt-cake-1
I’ve loved baking Bundt cakes since my kids were little. Baking a Bundt is homey and comforting. There’s something about a round Bundt with the glaze drizzled down the side that is irresistible. Perfect for coffee or tea time with friends or to bring to a party.


It’s lovely that Lora (Cake Duchess)and Anuradha (Baker Street) collaborated to form a monthly baking group dedicated just to Beautiful Bundts: Bundt a Month!

What is #BundtaMonth all about?


Here’s the challenge:
 
Anuradha and Lora will pick an ingredient and announce it the first week of every month. All you Bundt loving bakers need to do is use your imagination on how you’d like to incorporate it and bake a Bundt – mini Bundt or large Bundt – and link it up to their blogs throughout the month. It's that simple! 
We decided to be creative with zucchini in our September Bundts.

Check out what our Bundt loving baking friends created for this month:


Anuradha from Baker Street baked Chocolate Zucchini Bundt Cake


Here's how to bake with #BundtaMonth:

- Bake your September #BundtaMonth Zucchini Bundt.
- Post it before September 30, 2012.
- Use the #BundtaMonth hashtag in your title. (For ex: title should read - #BundtaMonth: Chocolate Zucchini Bundt)
- Join the Bundt baking party! Share your link it to our blog hop by clicking here or here.
- Link back to both Anuradha’s and Lora’s announcement posts.


banana-zucchini-bundt-cake-3

banana-zucchini-bundt-cake-2

banana-zucchini-bundt-cake-4
Mixing zucchini, banana and spices make a wonderful September Bundt cake.

DSCN9871

Banana Zucchini Bundt Cake

yield: one cake-serves 12 – 16
adapted from Martha Stewart and Dorie Greenspan

Ingredients:
3 cups all-purpose flour
2 tsp. baking powder
1 tsp. baking soda
1 tsp. cinnamon
¼ tsp. ground ginger
½ tsp. salt
2/3  cup canola oil
1 cup granulated sugar
2 whole eggs, room temperature
2 tsp. vanilla extract
1 cup sour cream
1 ½ cups mashed overripe banana (about 2 large bananas)
1 ½ cups grated zucchini, drained on towel (about 1 large zucchini)

Directions:
Preheat oven to 350 degrees. Butter and flour a Bundt pan, set aside.

In a medium bowl whisk together flour, soda, cinnamon, nutmeg, ginger, and salt. Set aside.

In a mixing bowl, mix together the oil and sugar until combined (about 2 minutes). Beat in the eggs one at a time until light and fluffy (about another 3 minutes). Beat in the vanilla and scrape down the sides of the bowl to incorporate all the ingredients.

With the mixer on low, mix in 1/3 of the flour mixture until fully incorporated and no streaks of flour remain. Stir in ½ cup of the sour cream and mix again until combined. Alternate with the remaining flour mixture and sour cream, ending with dry ingredients. Stir in bananas and zucchini until combined.
DSCN9872
Pour batter into prepared pan and bake in preheated oven for 50-60 minutes or until cake tester inserted into center comes out clean. *I check my cakes at 30 minutes and with this cake, I lowered the heat to 325 for the remaining baking time.

Lemon Glaze:
juice of 1 lemon
1 ½ cups powdered sugar

Juice lemon and whisk in the powdered sugar a little bit at a time until right consistency (I test it on my finger.If it doesn’t run down my finger, it’s ready). Remove cake from oven and allow to cool in pan on wire rack for 15 minutes before turning out onto rack and cooling completely. Drizzle glaze over cooled Bundt cake.

Have fun baking your Bundt!

...also linking to:Hearth and Soul Blog, @Zesty South Indian Kitchen


Enhanced by Zemanta

Saturday, August 25, 2012

Plum Upside-Down Cake


Since I've been food blogging for the last two years...I have not been thinking about that I would actually say,
"I have to bake something for my food blog"...hmm! wonder why did I say that to my daughter Lora, yesterday morning?
She told me the other day that her food blog is getting to be expensive...well, the reason for that is: She bakes every single day...really! There isn't a day that goes by when she does not bake...if nothing else, but the 'staple' banana bread, or homemade pancakes!
I was hoping to get this post up by yesterday...Friday, knowing that I did not have anything else worthwhile to post and that I don't do much baking cakes...although I love to put simple and yummy quick and easy desserts together!
We have such an abundance of plums...not the deep purple Italian ones, but the round ones which are so perfect just by themselves to snack on (which I did eat 3 yesterday)...and decide to make something with it. No time to start browsing through my cookbooks, old recipes, or favorite food bloggers' recipes...so what do you do first, if you don't have the basic recipe on hand?...The Internet...yes, that's the fastest way to google a recipe and do some adaptations of your own, which I did a little on my cake. Since I made this for my blog...still smiling to myself
about that one, I only kept one large piece for myself and shared the rest with my family.

Yesterday was such a stormy day on-and-off, with tropical storm Isaac on our heels by Sunday night...hopefully it's not turning into a hurricane!

Good day to be cooking and baking when you're stuck inside. I did go out on my balcony to take some photos of the beach, the clouds, and no less than 30 minutes wind, and a storm, but the worst is yet to come! We'll just have to be prepaired and be safe.

As you see, for my baking, I like to chose a comfy-cozy home type of dessert. For me they are super easy to make, and I do believe it will be easy for you, if you follow my easy and handy little tips. Don't let the layering of this beautiful upside-down all American simple cake intimidate you...and I DO recommend that you make this from 'scratch' and not from a mix, although I do use cake mixes, only to 'doctor' them up!
Here's the link to this awesome and easy cake!

Plum Upside-Down Cake 


Plum Upside Down Cake...click on, for the recipe

I did very little adaptation. I omitted the honey! The 1 cup of golden brown sugar was just right...no need to have it sweeter, and the glaze from the sugar and butter worked out fine. If you don't have a cast iron skillet that you could bake it in, just proceed with the recipe.

My cast iron skillet is an "Emeril" brand (not thrift find)
purchased it online from the HSN home shopping network! A 9x9 inch corn bread skillet, or for any other cooking...already pre-seasoned, so you don't have to do all that, just maintaining it!
I also sprinkled some cinnamon powder on the top of the fruit, that the recipe does not call for.


First, start out with the dry ingredients to mix together in a small bowl...then with an electric mixer, mix your butter with the sugar, (I used 1/2 cup sugar) less than what the recipe calls for, which is 1 cup.

Add the eggs, one at a time while mixing. Alternately add the flour, and the milk, mixing it into the sugar-butter mixture until it has a nice thick creamy consistency, as in the photo.


Make sure the oven is preheated to 350 degrees F.


With a plastic, or rubber cake spatula, spoon on top of the fruit...making sure to cover the entire fruit...caution!
this is NOT  a Cobbler mix, it is a CAKE batter...so be sure to cover the entire portion...being careful to spread the batter and not to push it down into the fruit and the glaze, disturbing it!


Using a rubber spatula will make it easier for you to scrape out all the batter from the bowl.


Well...we're getting there!


Try to get the batter as close to the edge of the pan, as possible. I was already concerned about the batter sinking into the fruit mixture...which some will, at baking time, but that's the beauty of it.


My actual done cake...is not uploading...but here's the finish part where you invert the cake over your serving platter:

Here's the real great TIP: Bake at 350 degrees F. for the first 30 minutes...lower the temperature to 325 d. F.
for an additional 30 minutes. If your oven is correct, than that is the exact time you need. When you take cake out of the oven, let it sit in the pan on top of a metal rack for 30 minutes. Make sure to take a dull knife to go around the cake to loosen it, before inverting it!


Just look it the golden bronze color of the fruit, and the part of the cake! Moist, perfectly sweet, and over the top delicious, that you will impress your family and your guest with...even more; Impress yourself, and pat yourself on the shoulder! Great job! Looks like you slaved away for hours making this amazing cake...but you know you didn't!


The cake is super easy to make...only takes 1 1/2 cups of all-purpose flour...that is why it isn't taller, but that is the correct portion you need. Just make sure you have enough fruit overlapping..


A little close up...just to try it out...I took a bite from the piece I saved for myself...and could not stop eating it. BTW-best way to serve this would be still warm! With a scoop of vanilla ice cream (which I didn't have...and you're in 'heave'...well I already felt like I was there...incredibly yummy! Did I convince you now to make it?...you can substitute fresh peaches if you don't like plums!
So, I'm guilty...but happy guilty...could not resist just one bite, or even half the portion...had this super  yummy cake for lunch, with a tall glass of ice cold fat-free milk!

More for later...will let you know how our weekend went with ISAAC...and on Monday paying us a visit!


Enhanced by Zemanta

Wednesday, August 1, 2012

Blueberry-Peach Bread...for "Twelve Loaves"

I decided to make some fruit filled bread, since we are in the midst of the summer season, with plenty of summer fruits available and at such cheap price. Blueberry happens to be one of my all-time favorite berries, and to combine it with juicy ripe peaches, is the first time for me...although I have seen it on other food
bloggers site.


If you love banana bread, or any fruit bread...you cannot help, but fall in love with this amazing peach-blueberry combination! The recipe is really just based on my banana bread recipe, that I know by 'heart'...just a few adjustments, and substitutions...here-and-there.

You're probably wondering what is the 'Twelve Loaves' about in the title?...well, it's a baking challenge created by my daughter Lora. I'm happy to join along as a hostess this month. I am happy to contribute, which I am doing now, this 1st homemade bread as the "blueberry challenge"...as long as un-yeasted breads are accepted...which is this one is, I'm fine with it!

Just look at the golden color of this beautiful fruit bread, and you can see the moistness, as well. The glaze is a Limoncello glaze...a special bottle that was a gift for me from Italy. In the meantime...I still have a couple of mango recipes that I would like to post. I already made one of the best mango sorbets that  was gone in minutes, as soon as it set. That will be my next post. No step-by-step prep photos on this one either, you can  follow the recipe...its self-explanatory.

So, my baking friends...please join us baking this month!Look how easy it us to link your Bread with Summer Fruit!


Bread with Summer Fruit
Bake a bread, yeast or quick bread, loaf or individual, filled, stuffed, studded or topped with your favorite fresh summer fruit or berries. It’s your bread…we want you to have fun with the idea!Check out the delicious breads that Lisa from Parsley, Sage and Line Drives baked and Jamie from Life's a Feast. Just wonderful!

Just follow the rules, it’s as easy as pie:

1. When you post your Twelve Loaves bread on your blog, make sure that you mention the Twelve Loaves challenge in your post and mention and link back to Lora's blog. Please make sure that your Bread is inspired by the theme! This is obligatory if you would like your link to be included!
2. Please link your post to the linky tool at the bottom of my blog or Lora's,   blog. It must be a bread baked to the Twelve Loaves theme.
3. Have your Twelve Loaves bread that you baked this August, 2012 posted on your blog by August 31, 2012.

Do you tweet? We sure do!

Follow @TwelveLoaves on Twitter


Blueberry-Peach Bread
created by; Elisabeth

1 1/2 cups unbleached  all purpose flour
1 teaspoon baking powder
1 teaspoon baking soda
1/2 teaspoon salt
3/4 cup sugar
1/4 cup vegetable, or canola oil
2 eggs
1 cup fresh, or frozen blueberries
1 cup pitted, and diced peaches
1 cup peach pulp

For the Glaze:
1 cup powdered sugar
1 Tblsp Limoncello, or lemon juice

First thing; have your pitted, and diced peaches ready in a small bowl...set aside. In a large bowl, add the flour, the baking powder, baking soda, and salt. Mix together with a fork. In a medium bowl, break the eggs, and lightly mix together with the oil, and sugar. You can add the peach pulp, by adding about 3 or 4 pitted peaches to your blender, add abt. 1 Tblsp water to blend. (if you don't want to use this process with the peach pulp, you can skip it) you can use 1/2 cup orange juice, in place of the pulp.

With a plastic spatula, or spoon, add the wet ingredients to the flour mixtures. Add the pulp, or the orange juice, slowly and fold in. Lastly, add the fruit, folding in carefully, not to break it up.

Preheat oven at 350 degrees F....bake for 25 minutes. Lower the temperature to 325 degrees F. and bake for an additional 35 minutes longer, or until toothpick inserted comes out clean. Cool on rack for at least 30 minutes. Mix the glaze ingredients, and drizzle over the top. Cut in slices...so very good!

Linking to: Full Plate Thursday @ Miz Helen's Country Cottage
Thursday Favorite Things @Katherines Corner


Enhanced by Zemanta

Friday, June 8, 2012

Summer Strawberry Cake....a Guest Post

We are so happy and honored to guest post for our friend Lizzy, from That Skinny Chick Can Bake!!! 

It’s a joy to be here guest posting with my daughter Lora, from Cake Duchess.
We have known Lizzy for nearly two years and she has always been such a great friend to the both of us. She is always ready to help in any way possible. Lizzy really needs no introductions since she has so many followers and friends who frequent her amazing and delicious baking blog. I’ve often mentioned about her having little elves that help her in the kitchen baking in her little baking factory. Thank you, Lizzy, for asking Lora and I to team up for a guest post. You are a sweet friend. 


My computer has been acting up since last night, and I could not have the post up by this morning. Our friend Lizzy, who is having the time of her life in Paris.


The fabulous sponge cake was made by Lora, I only created the cream, and the strawberry decorations...in other words, my part was only the filling and the decorations; but it was a team effort, and we will get this straight, I promise.


I also forgot to mention that it's my second blogaversary, and also, I wanted to pay forward some award which came from Lizzy, and Kathy...oh, well, I will catch up as soon as I get my technical issues straightened out on my computer....never fails...just like "Murphy's Law"
Thanks for your patience, and will get things in order ASAP...
Enhanced by Zemanta

Thursday, May 24, 2012

Popovers...and Good Bye!

No...I'm not saying Good Bye...although, I wanted to take a break, which I did for a week, and then again, just recently, with all the stress and making my final decision to have my precious, and loyal companion, Prince, my beautiful Maine Coon kitty. On Monday, May 21st, we had to part and say our last "Good Byes." I will tell you more about it at the end of my post. After all, this is a blog about food, and thrift, and I should concentrate on these, but it's very, very, difficult to do so while my heart is weighing so heavy with grief!

Since this Monday, I don't know how I functioned...well, not so good! I'm glad I had my guest post ready for Ping by last Sunday evening, and another 2 guest posts for the month of June for Lizzy, and Veronica. You know how it is with some people? When they are stressed and under pressure, they shop, and shop!

I also do that...did that in the past, spending money needlessly for some things that I didn't need. The only difference for the last 10 years, I have learned how to budget, save money, and shop wisely.

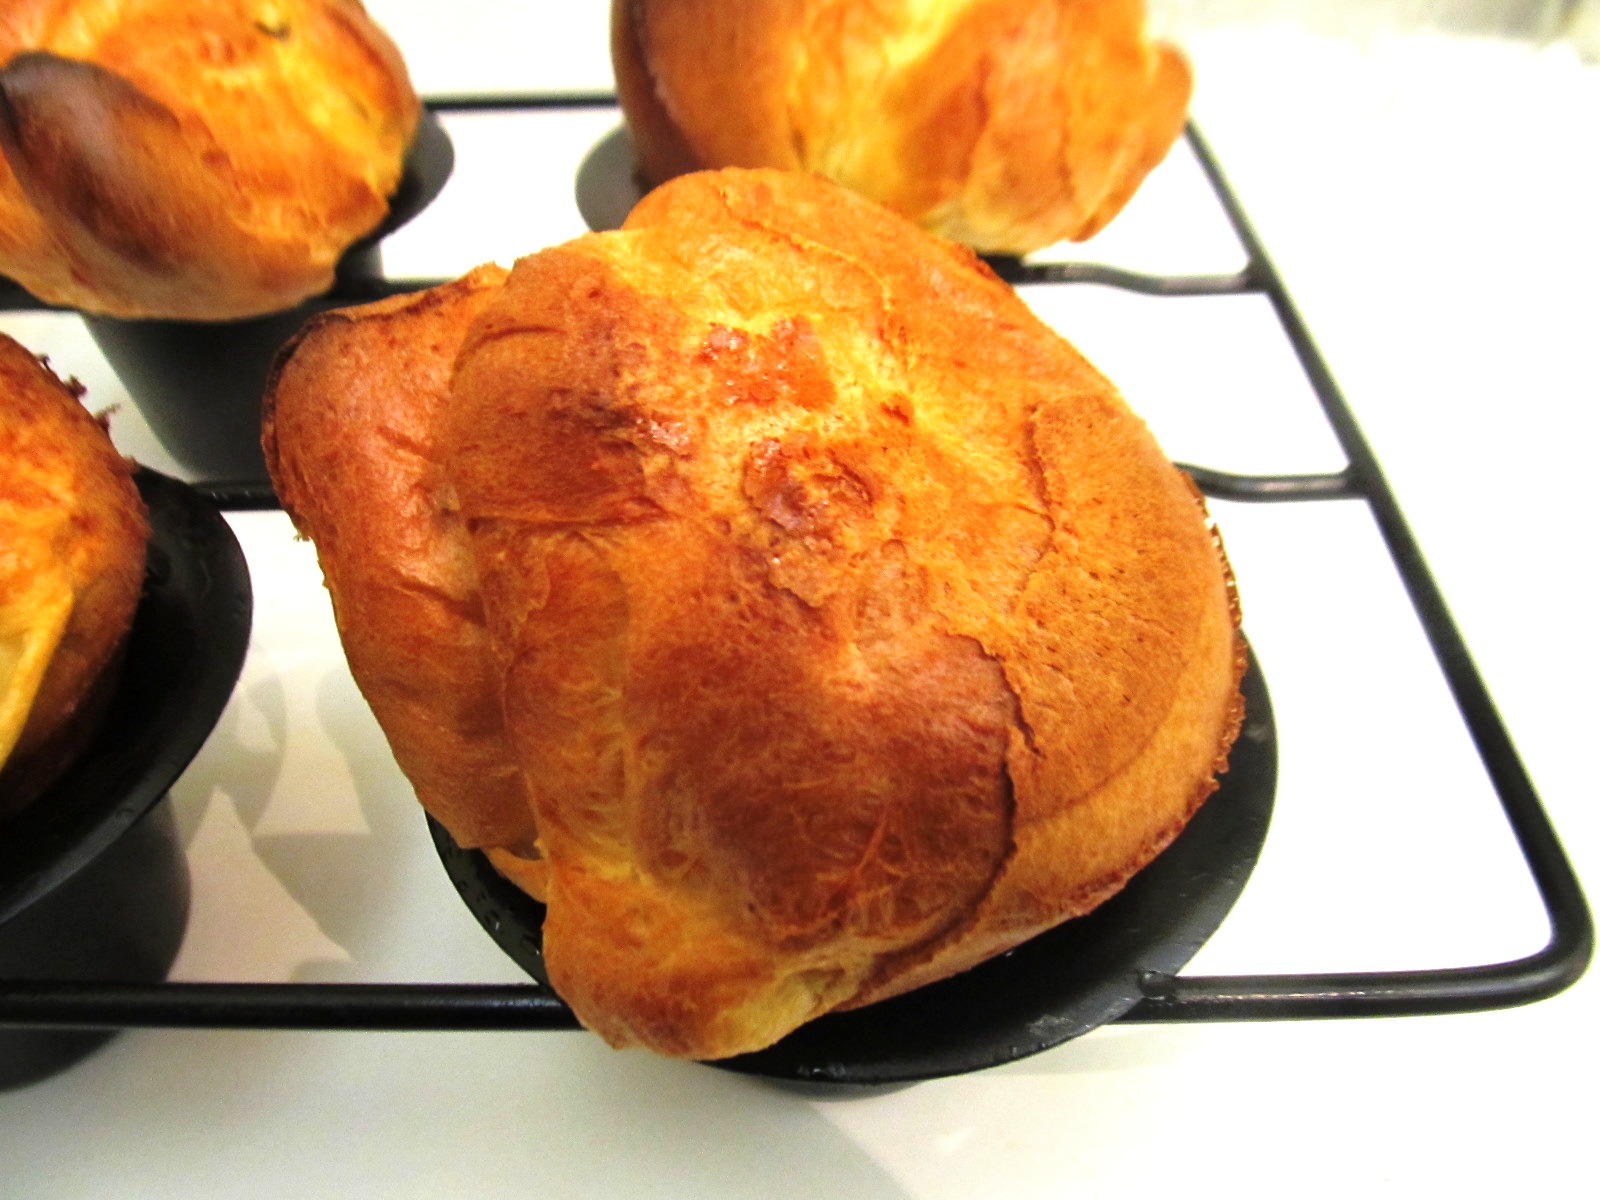
Thrift shopping is such a fun thing to do, especially when you find useful, expensive, sometimes practically all new items, for fraction of the cost that you would pay full cost. Just take a look at this cool popover separated cups...very heavy duty, and non-stick...it really was brand new, but I only paid $2.99 for it at my local Goodwill. I think you can even make mini cakes, or muffins in them...very, practical, and useful! I also found a great Bread Book, a soft covered 1983 HPBooks that has amazing yeasted breads and rolls, just don't know how the Popover recipe ended up in this book. It certainly does not have any yeast, and it oh, so easy to make.I love the breads, rolls, and biscuit recipes in this book. The cost?...$1.49 for a beautiful book with photos, instructions and great bread recipes! I also order amazing books from Amazon.com...just love, love all the things they have on Amazon!


Popovers
adapted; from HPBooks Breads

1 cup all-purpose flour
1/4 teaspoon salt
2 teaspoons sugar
1 cup milk, room temperature
2 eggs, room temperature
1 Tbsp. vegetable oil

Generously butter (I used cooking spray) 8 (5-to 6-ounces) custard cups, or 10 muffin cups, or 6 popover cups. Place custard cups on a heavy baking sheet. Place muffin cups, popover cups or baking sheet on center rack of oven.

Preheat oven to 450 degrees F. (230C) Combine all ingredients in a BLENDER. (seriously, a blender.) You can use a food processor or small bowl of electric mixer. Blend until batter is smooth, scraping sides of container, if necessary. Remove hot baking cups from oven; spoon in batter until 2/3 full. Immediately return filled cups to oven. Bake 20 minutes. Reduce heat to 350 degrees F. (175 C) Bake 20-25 minutes longer or until browned.

Run a knife around edge of baking cups to loosen popovers.

Note: After batter is prepared, it can be stored at room temp.. for 2 to 3 hrs. before baking. Keep oven door closed during the first 30 minutes of baking.  A draft will collapse popovers. Popovers have a moist interior. It's important that you have the milk and eggs at room temperature, and the popover, or muffin pans preheated.

My beloved kitty, Prince has ended his life on Monday afternoon, on May 21, 2012...after a long illness that he has endured for the last 2 years. He was my constant companion for the last 15 of his almost 20 years. My daughter is the one who originally had him for the first 5 years, after finding him at her apartment, during her early college days.
Prince has been  a loyal companion to all of us...a very sweet, intelligent kitty. He has literally wasted away at the end, and I insisted that I will not have him put down as long as he is able to eat, and be able to walk. A sudden change came over the last weekend...on Monday, he refused to eat, and his poor legs gave out after a few steps. I knew right there that I have to quickly make the choice. I was able to comfort him, and say my last Good Bye...as did my daughter, and grandchildren, when I brought Prince over to Dr. Eric, as instructed. He will surely be missed by all of us. I did all I could to keep him comfortable, and prolong his days...but there's a higher power, who decides the end is here!

IS THERE A PET HEAVEN?
While there is no decisive answer to the question, “Is there a pet heaven?” a few things are clear indeed. First, pets bring tremendous joy to their owners, and can teach them a great deal about compassion, kindness, and mercy. Second, many pets live their whole lives in the service of their owners, trying to please them, make them happy, and cheer them up when they need it. Third, if there is a heaven, then there is a God, and they are His creatures. All of these things give tremendous plausibility to the idea that.... yes, there is a pet heaven, waiting for all of the good animals, after they die!

Photo of my beloved Prince...at the young age of 5, when he came to live with me...nearly 15 years ago! May you rest in peace...you will always be in our hearts!


Enhanced by Zemanta

Sunday, May 20, 2012

Chocolate-Peanut Butter Pudding...a Guest Post

It's beautiful spring, everywhere...although here, in South Florida we do not know the difference, because for us, as they say "spring has sprung"...and it sprung quite early which we consider a truly spring weather, was back in February, and March. Even April is very nice, but soon as May is around the corner, our summer has begun, just like for all you folks up north. I hear it's about in the upper 80's in Cleveland, my old home town...less than what we have here today, in the low 80's.

Enough, about the weather. What I really would like to mention is my guest post for my dear friend Ping! Would you believe that when I first met her and we started following each other's blogs, which is almost 2 years for me...I was calling her blog Ping's Picklings...as in pickle?...she graciously corrected me that it's PICKINGS, and not the pickle kind!


I am so thrilled and honored to guest post for my dear friend Ping, whom I had the pleasure of meeting since we both started our food blogs, nearly two years ago... and have been supporting each other throughout the entire time. Ping has a meticulous food blog, and is very specific about her photos...no more than one, or two, and always a specific size...unlike my photos, which vary in sizes, and step-by-step directions when time permits. Ping has an amazing sense of humor, and always has the right thing to say, on any subject given...only in a "lighthearted" way! Her photos are always perfect, and immaculate, her choice of dishes, desserts, and baked goods are "dropped dead" gorgeous, and makes you want to see, and get more! She is kind, and caring, and you will feel blessed to have her as a friend...a beautiful friend, indeed!

Thank you Ping for asking me to guest post..."the second time around!" 


For my recipe...just click over to  Ping's lovely blog @ Ping's Pickings

Enhanced by Zemanta

Thursday, May 17, 2012

Mango Jelly Roll...a Guest Post

I finally have the privilege of introducing my sweet daughter, Lora @ Cake Duchess ...who is so kind to guest post for me, which I have already mentioned about 1 month ago when I had my hand injury. She already had this wonderful jelly roll ready for me but we just could not get together on the same day to post it. Be sure to check out Lora's lovely blog...and probably know her and follow her blog!

She is so very busy...like all young moms with work, kids, school, and all her own cooking and baking projects.
Lora, I'm so thrilled, and honored to have you guest post for me, and taking time out from your busy schedule and your amazing blog. I'm so proud to have you as my daughter!
xoxo

I have totally forgotten about my mango jam, that I make every summer, and it lasts for several months the way I carefully can it, and to make sure that it's properly sealed. Without further hesitation, here is Lora, and in her own words!


It’s such a pleasure to be guest posting on my mom’s blog. She’s an amazing woman and she was my first cooking inspiration.  She still inspires me every day with her creativity in cooking and in baking. I owe my love of cooking to my sweet mom. She’s taught me invaluable lessons in the kitchen that I am now teaching to my children.

The jelly roll is a recipe that brings back many memories for me. My mother’s aunt from Hungary used to make it very often. It was light as a feather and filled with her wonderful homemade jams. She was an expert at baking delicious Hungarian desserts. I have sweet memories of baking alongside my great-aunt with my mom.

Every summer my mom makes the most wonderful mango jam with the mangos from our tree. I thought it was about time to bake with some of it as our tree is filled again with more glorious mangos. You can fill the cake with your favorite jam or even some whipped cream and fresh berries.

Thank you very much for having me guest post today, mom. It’s a joy to be a part of your delicious blog.

Elisabeth's home made mango jam


Mango Jelly Roll:
 
This recipe makes enough for one 18″ x 13″ sheet  or one 9″ cake. Here’s the formula:
5 ounces (1 cup) all-purpose flour
4 tablespoons butter (preferably clarified)
½ teaspoon salt
6 eggs
7 ounces (1 cup) sugar
1 teaspoon vanilla extract 
Filling:
1 cup mango jam (or your favorite preserves)
Preheat your oven to 350. 
Set a saucepan big enough to hold your mixer bowl on the stove with an inch of water in it. Bring it to a simmer. Meanwhile, sift the flour and salt together into a medium bowl. Melt the butter in a small saucepan and set aside. 
Pour the sugar into the mixer bowl, add the eggs and whisk to combine. Set the mixer bowl over the pan of water and heat the mixture until it’s warm to the touch (no more than 120 degrees). What you’re trying to do is simply melt the sugar…don’t cook the eggs! It’ll only take a minute or so. 
Remove the bowl from the heat and, using the paddle attachment, beat the mixture on medium high until it’s very light and foamy, about triple its original volume (this will take up to ten minutes with a stand mixer). Add the vanilla and beat an additional 10-15 seconds. 
Pour a cup or so of the egg foam into the cooled melted butter and stir it until it’s completely incorporated, then gently pour the mixture back into the mixer bowl (this eases the incorporation of the butter into the batter). Next, sprinkle the flour mixture into the mixer bowl and carefully fold until the flour mixture and the butter mixture are completely incorporated. Gently pour the batter into the prepared pan.
Bake until the cake is a pale gold color and springs back lightly when touched. Bake cake until golden brown and springy to the touch, 6 to 7 minutes. Run a knife around sides of cake. Invert onto prepared towel, and remove parchment. 
While the sheet cake is still warm, gently roll, starting from one short side, into a log, incorporating the kitchen towel. Let the cake cool completely, rolled. (This will give the cake a "shape memory," so it will be easier to roll again with filling.)


Time to fill: Unroll cake.
Spread filling over cake leaving a 1/2-inch border all around. Carefully roll cake to enclose filling (without towel), starting at a short end. Refrigerate 30 minutes (or up to 3 hours). Dust with confectioners' sugar before serving.
Enhanced by Zemanta

Monday, May 7, 2012

Whole Wheat Focaccia...for #Breaking Bread

I love to bake a nice focaccia every now-and-then; but this time I was eager to bake an entirely different one than my usual simple rosemary focaccia. Just did not have my own recipe for a different focaccia, and I'm sure you are the same way as I am, that at that very moment, you are not going to go through all your cookbooks to look for a certain recipe...so in my case...just go to the "heart of the matter" which is get a trusty library book on the certain item you want to make. Internet is always helpful, but borrowing a beautiful book with pictures and plenty of recipes is much more helpful!
Linking to: Full Plate Thursday @ Miz Helen's Country Cottage 

Now that I finally baked this delicious and healthy whole wheat focaccia, Lora formed the group Breaking Bread Society with her friends Shulie, from Food Wanderings and Marnely from Cooking with Books. What a fun baking with yeast ventures! I'm proud and happy to link it to the
#Breaking Bread to Lora (daughter) @Cake Duchess who is this month's hostess.
Just look at this lovely coarsely chopped walnut, and caramelized onion infusion with fresh rosemary nestled in the little pockets along with the extra virgin olive oil, bake to a crispy-crunchy top, and a soft delicious texture on the inside!
As you know, focaccia is associate with Liguria, Italy and its capital city of Genoa. There are many ways to top focaccia, as there are to top pizza...but because focaccia takes (to bake than pizza, it is important to follow the topping guidelines to protect against burning.

Whole Wheat Focaccia
adapted from;Whole Grain Breads by: Peter Reinhart

4 cups (510g.) whole wheat flour (I used King Arthur)
1 1/4 teaspoons salt (I used 1 1/2)
1 1/4 teaspoons (4 g.) instant yeast (I used 1 envelope)
2 cups +2 Tbsp. (482 g) water. at room temperature
1 1/1 teaspoons honey, or agave nectar or brown sugar
(I used 2 teaspoons dark brown sugar)
1 1/2 Tbsp. olive oil  (I used 2 teaspoons)
extra whole wheat flour for adjustments


If using the stand mixer, use the paddle attachment.
Place all of the ingredients except the extra flour and the olive oil in the mixing bowl of your mixer, on low speed for 2 minutes. With the machine off, drizzle the olive oil over the dough for another 30 seconds.

Turn of mixer and let the dough rest for 5 minutes. Mix again, on medium speed for another 30 seconds. The dough will be smoother and stronger, but it will be sticky. If it is too wet and not enough structure, add a little flour.


This method is the standard method I used, rather than the overnight method that the book recommends.

In an oil lined glass bowl place the dough ball, turn over to get it oiled on the opposite side, cover with plastic wrap and a clean dish towel, and let it rise double for about 1 hr.- 1 1/2 hrs.


On a parchment lined baking sheet, carefully shape the dough to a rectangle. Cover loosely with a clean dishtowel, and let it rest for another 30-35 minutes.


In a large skillet, with 2 Tbsp olive oil, start sauteing one sweet onion, sliced. About halfway through, add 2 teaspoons light, or dark brown sugar, and keep sauteing until it gets nicely caramelized. Add about 1 cup of coarsely chopped walnuts and fold it in.


After about 45 minutes, you can start poking the dimples in the dough with your thumb. It's ready to top when you see the indentations stay down.


In a small bowl, pour about 1/2 of olive oil, and brush lightly with a pastry brush, making sure you fill the indentation, and you can add some fresh rosemary right into the holes. You can sprinkle coarse salt over the top, and also add the walnut-onion mixture into the indentations.


Bake in a preheated 450 degree F. (232 C.) oven bake for about 10 minutes, and lower the temperature to 425 degrees F. (200 C.) for another 20 minutes; being careful
not to burn the topping. (If any burns a little bit, you can just scrape the charred layers off. I added too much topping, but you don't have to!)


The result...a perfect crunchy, and golden brown top, ready to transfer to a cutting board, after cooling on a metal rack.


Now, you see what I mean? Look at the little pockets of the filled walnut-caramelized onion, the fresh rosemary, and the light sprinkling of the coarse sea salt I used!
Superb! Whole Wheat Focaccia that is amazingly healthy, and delicious. Using my method, I promise you will not go wrong!

Buon Appetito!


Last year's mangoes...star fruit is also home grown, as well!

Aren't these mangoes gorgeous?...from my daughter's mango tree! They will be fully ripe in another month for sure!
Hugs,
Enhanced by Zemanta