Showing posts with label Cheese. Show all posts

Monday, October 13, 2014

Pepperoni and Mushroom Pizza

Hi everyone! Not much to post since nearly 2 weeks of absence. Although, I did post my Pepperoni and Mushroom Pizza photo on facebook...which I have also been absent from for 3 months now. Wasn't a smart thing to post the pizza photos, since I didn't have it on my blog and it made it look like I just posted a 'random' store bought pizza.
I don't know about you, and how you feel about the 'follow' part on facebook...seems like I follow a lot of people, especially family relatives...ie. cousins, and close friends, but what I have discovered lately...duhh! (dummy me)...pondering over the fact that I have not gotten any feedback of my postings from any, or most of these close friends and relatives...I mean...what gives? I never stopped getting their latest 'tid-bits', photos of their kids mostly...their latest trips, etc. and I have always commented and 'liked'...so when I finally found out that they are NOT following me...I stopped following them...but not un-friending them, and at that point I gave up my interest in viewing what's going on out there. I discovered a totally new 'meaning' to my facebook page; just view what is being sent to my 'timeline' and keep 'liking' and commenting back to friends' that took the time to see my posts as well! So, that's that...getting back to my pizza!
It is really so easy to make your own fresh pizza dough by mixing the dough in a sturdy Kitchen-Aid mixer with a dough hook, or place the ingredients in a Bread Machine, and let it do its work. Just let the dough rise in a large oiled bowl, and the rest is so easy! I seem to be boring, but my favorite pizza topping is pepperoni, mushroom, and onions...although you can't see it all in the photo...it's in there!

MARTHA STEWART
Quick Basic Pizza Dough


  • 2 packets (1/4 ounce each) active dry yeast
  • 2 tablespoons sugar
  • 1/4 cup olive oil, plus more for bowl and brushing
  • 2 teaspoons coarse salt
  • 4 cups all-purpose flour (spooned and leveled), plus more for work surface

COOK'S NOTE

To freeze, you can wrap the dough in plastic and freeze it in a resealable freezer bag for up to 3 months. If you plan to use it in a recipe that calls for half a batch, divide it before freezing.

Note: This pizza is from half a batch...divide the dough in half, and wrap the other half in plastic wrap...freeze for another use, or make 2 pizzas with the recipe!

DIRECTIONS

  1. STEP 1

    Pour 1 1/2 cups warm water into a large bowl; sprinkle with yeast and let stand until foamy, about 5 minutes.
  2. STEP 2

    Whisk sugar, oil, and salt into yeast mixture. Add flour and stir until a sticky dough forms. Transfer dough to an oiled bowl and brush top with oil. Cover bowl with plastic wrap and set aside in a warm, draft-free place until dough has doubled in bulk, about 1 hour. Turn out onto a lightly floured work surface and gently knead 1 or 2 times before using.

After kneading the dough once or twice, let the dough rest on the floured board...and if you're not a practice 'pizza thrower'...just get a rolling pin and roll into a circle from each direction as dough gets more elastic and your can fit it onto the pizza pan.


As you carefully fit it into the pizza pan, you can brush olive oil, and sprinkle it with salt, pepper, and garlic powder (I also used hot chili pepper flakes). Let the dough rise a little longer, and you can form nice shapely rims around the edges.


Next, I saute my sliced mushroom, and onions just slightly. (nothing worse than topping pizza with raw sliced mushroom, and raw sliced onions)...and paying $18.99 for a large pizza...horrific idea!


Here's a little secret...I pre-bake my dough at 450 degrees F. for 7 minutes, (this assures you not getting a soggy finish) ...next, I spoon my tomato sauce, and topping on it.


I make my own sauce...no pre-cooking needed, just add the entire 28 oz can of your favorite sauce into a medium bowl, add some extra virgin olive oil, abt. 1/4 cup, salt, and pepper, a few fresh torn basil leaves. Now, you are ready to top the pre-baked dough...(seen in the above photo)


Bake for about 10 more minutes, and at the last process, add more cheese and top with pepperoni slices.


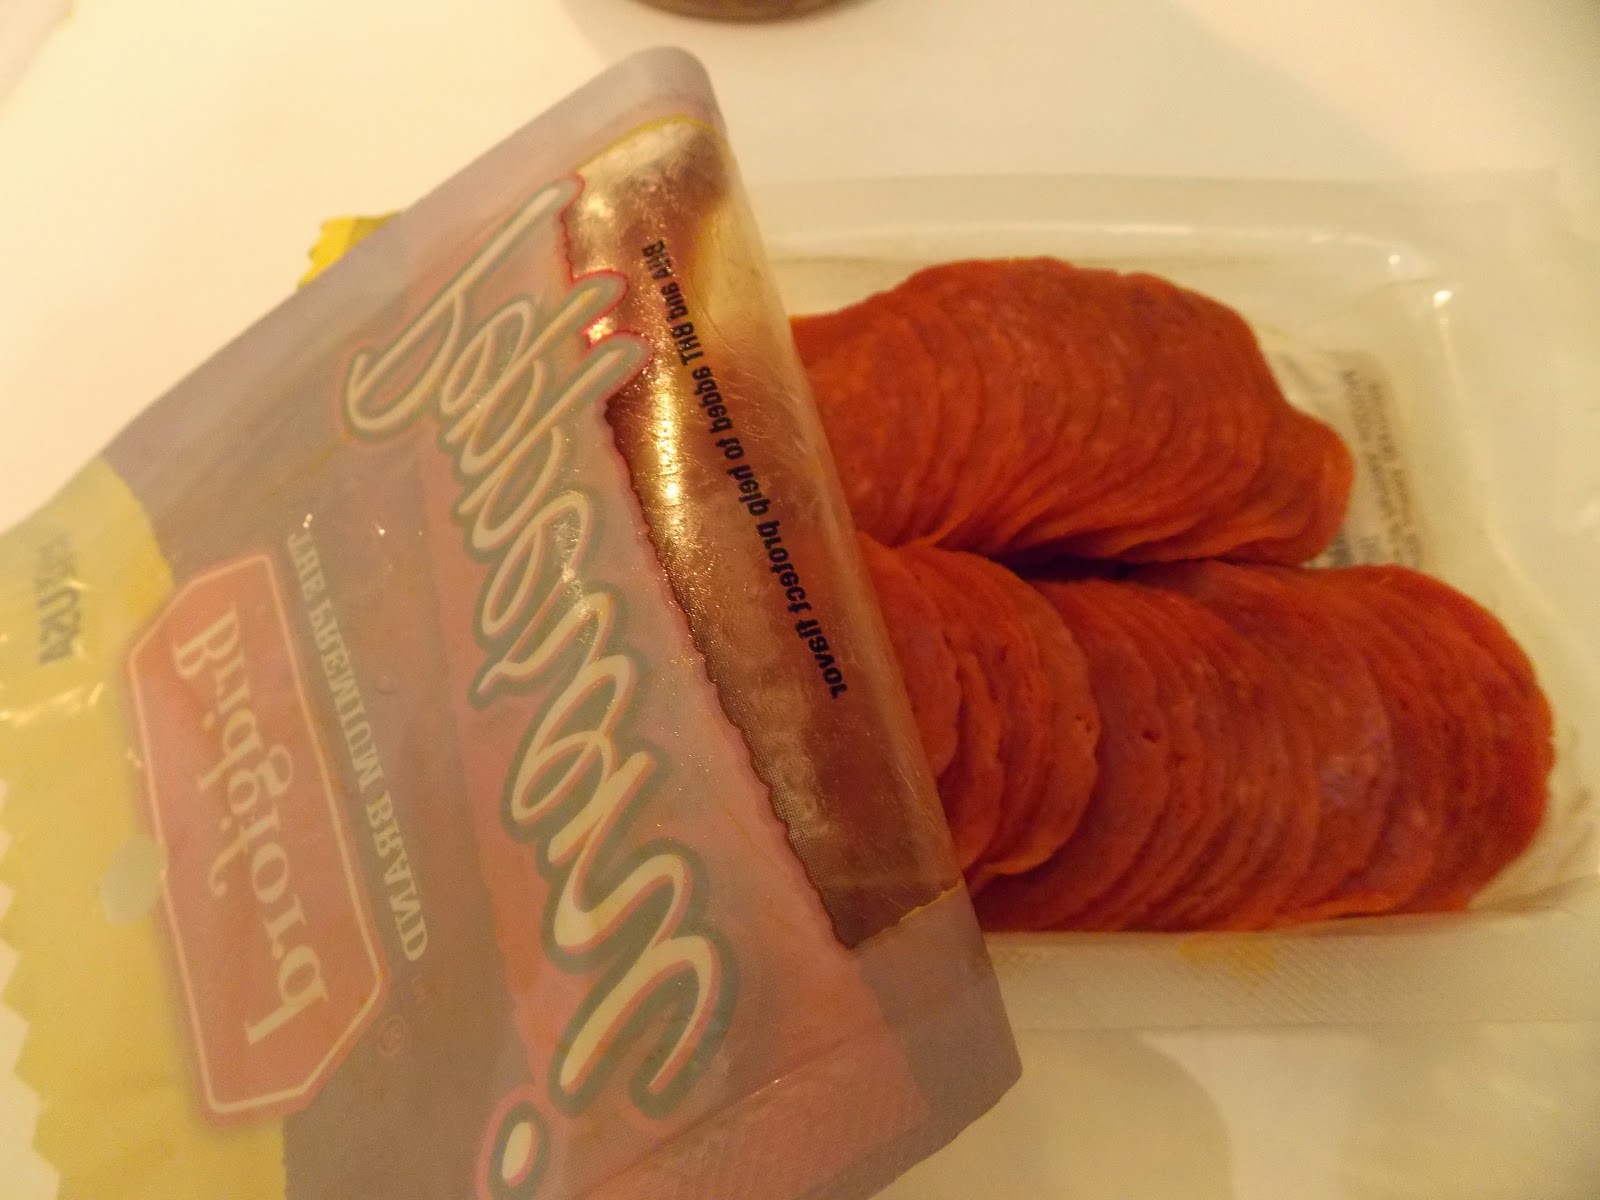
Pre-sliced pepperoni comes in a convenient plastic bag, sliced 'paper thin'...so you really just add them at the few remaining minutes of baking time, on top of the shredded mozzarella cheese.


Now, you are ready to finish baking with the pepperoni topping, for an additional 5 more minutes. Total baking time abt. 22-25 minutes, at 450 degrees F.


The finished product! Perfect pizza,
not overflowing with extra cheese, but you can add more for the last baking process if you like. Just the right amount of sauce and topping...enjoy!


...and some other photos to share!

My newest little friend, who lives with his family in our courtyard...in the coconut palm trees...comes to visit me every morning on my balcony, for his peanuts; I named him Alvin!
Caught a glimpse of the lunar eclipse on the following morning...at 7:15 AM...missed it at night, on Oct. 8 before; too many clouds at night~ photo taken on our private beach, in Palm Beach, FL.
Notice the white streak in the sky? An airplane flying through the sky...how awesome is that?!
Finally, at 7:40 AM...this is how the sky and the ocean appeared!
Wherever one is at any given moment...we are seeking connection with the Divine~

Thursday, June 21, 2012

Cucumber Tea Sandwiches...and a busy day!

I was so determined to make something light today for lunch, and suddenly, an idea just came to my mind...why not Cucumber Tea Sandwiches?!...after all, I had all the ingredients, including the 'soft spread' cream cheese and fresh dill, which I like to keep on hand but they go bad so quickly. I don't even like to freeze them because they taste terrible when you thaw them out!
These little open faced sandwiches are not enough to satisfy your hunger...but for an afternoon snack with 'tea'...in my case, iced tea, would have been just the right snack to 'hit the spot.'

Also, did the same thing to the cupboards to check for items, and I even made a banana bread, as well. It sure was nice to have a large piece with cold iced tea  after the little sandwiches.

In the meantime...the lawn care guys came, and of course the little doggies went crazy, barking their little heads off!
When you have ripe bananas, I mean ripe...as in little brown spots ripe; that's when its the best time to make banana bread and if you have some chocolate chips...even better...yumm

(Remind me to post the recipe on my next post)...although I do have at least two recipes on my blog for banana bread!

...and by-the-way, the loaf pan that I gave to my daughter, is a heavy-duty calphalon, so nice to bake in it, and it was actually brand new...such a treasure from Goodwill...a fabulous thrift find for $1.99.

We do get hot temperatures, but also rain, every day since last month. Doesn't rain all day long...just on-and-off, but trying to take pictures in-between the rain, and the sun...seriously; that's how it is here in S. Florida.


Getting back to my tea sandwiches!

First off: you must have one of these gadgets, the plastic mandolin...another thing, if you can't find this in a 'thrift store'...which is almost, but I should say...always new, because most people do not, or cannot use them because they don't know how! The cost:  99cents...and I have at least 3 of these, the other two have extra gadgets, for cutting different things.

For the method:
Take one, or two cucumbers, and peel partially, like in the photo, cut the ends off, and with a steady hand slice the cucumbers. (just watch the tip of your fingers, because the blade is extremely sharp.)
Set sliced cucumbers aside on a plate, and start cutting your bread.


You can cut your bread into any shape you would like to, if you want round shapes, just use a biscuit cutter, or different cookies shape cutters. Just make sure you cut the crusts of. I used a triangle cut, (they're not so even) but that's OK...it's just for myself!


The best cream cheese to use, is the Philadelphia spreadable cheese; leave outside for about 20 before spreading on your favorite bread slices. I used a really good oat bread. If you can't find the soft spread cheese, you can use the regular cream cheese, just let it come to room temperature!


Spread each slices lightly...


Line the thin slices of cucumber in a decorative style on the slices of bread, and with kitchen shears, snip a small piece off...I got a little carried away, on a couple slice of bread, with the dill; but I love dill so much, the fragrance is incredible, and so is the flavor! Such an Eastern European 'thing'...the famous DILL!

I sprinkled some freshly ground sea salt, and freshly ground multi-colored peppers on them...such light and delicious little sandwiches!


...and that's all there is to it; Enjoy!


Enhanced by Zemanta

Thursday, April 19, 2012

Feta Cheese LOVE...and taking a short break!

Tomato, feta cheese, fresh mint, and red onion salad with lemon, and white wine vinaigrette
Tri-color tortellini salad with feta cheese, and Greek olives and white wine vinaigrette
Since I have a blog about "food" which naturally is a food blog, also I do have it listed as "thrift"...previously "finds" as well. I still find fabulous thrift finds...just when I happen to walk into Goodwill and something will just "pop" out to greet me, but my main focus still is FOOD and being THRIFTY!

As you have seen my Spanakopita in my previous post, I used the same feta cheese in two of these dishes, as well!
At Costco, or another food club, you can purchase the same amazing Greek feta cheese...not the pre-crumbled kind, but in one solid block, which stays moist, and you can dice it, or crumble it yourself. For a 2.65lb. of Greek Feta Cheese, I paid a little over $10. ...prepared 3 different kinds of dishes with it, and I still have enough to use for a beautiful Greek salad. So actually, you have enough for 4 different kinds of things to use it in...which is about $2.50 pr each dish, that serves up to 6 to 8 servings. What a fabulous DEAL!

So now, I would like to let you in on a "little secret" that I wasn't going to mention...but then again, I'm back in the same situation as in my last mention on my blog, about the "posting".
Although, I do have a GUEST POST ready for my dear friend, Ping @ Ping'sPickings, which I successfully have made just about a day or two before I had this accident on both hands that will be preventing me from blogging....(sure, sure, excuses, excuses! LOL)


Some of you, who doesn't know about my beautiful kitty named Prince, is nearly 20 years old now...we're just calculating the age from the time my daughter Lora found him at her doorstep crying, about 17, or 18 yrs ago at her apartment door (close to her college she was attending) He was left behind by the previous owner still with the tag on his neck...owner moved, and I think Prince just did not want to leave his premises. Apparently he was well known in the area by the people, and the neighborhood cats that were all his buddies, hanging around the plush Key West style area at the N. area of the Palm Beaches.

The photo on the right...Prince from 1998, when I adopted him from Lora, since she was living in Italy at the time. He is a pure breed Main Coon...tall, about 11 lbs, with gorgeous shimmering soft white-and-black hair, and bushy long tails. The most handsome male cat you've ever seen. So sweet, and gentle, as well.

Well, I announced a few month ago that I may have to have Prince put down because he is wasting away...he is now, about 4 lbs...has thyroid problems, has glaucoma, almost deaf, but still as sweet as he always has been...still remembering the 7:00 wake up call for me, to jump on my bed to remind me...still jumping up on the sofa by the living room window...I don't know how he recognizes my footsteps but he knows I'm coming upstairs...still eating...and a LOT! every 2, 3 hrs wanting to eat again, so now I just give him the same leftovers in a clean dish, and he finishes it!

I cannot make this awful decision to put him down YET, when he is still alert, sweet, and caring...but two days ago, something terribly went wrong. Since he does not groom himself, I clean his hair with "handy wipes" wet disposable towels, and brush his hair but not as often because he get snarls, and his skin is sensitive.

I will not prolong...although, I'm still hesitating to tell you that my sweet Prince bit both of my hands which at the time I didn't make much of it, just cleaned it up, and put a band aid on it. That was TWO days ago.

I do understand no-one likes to have their hair pulled, "you'd be mad too," is what my attending nurse said! Poor Prince freaked out...while in my lap, he snapped at my left hand, leaving two puncture marks over, and under my left thumb (can't bend my thumb;ouch)....I did get the snag out of his hair, and when I put him down, he freaked out even more, and bit my upper right hand, quite deep, and tore the skin to almost two inches...looks like a #7  nasty infected scar now!...the worst part is, that both my hands been inflamed, and swollen...getting better now with strong antibiotic, and antibiotic heavy cream!
Wouldn't you know, when it happened, all I said..."Prince, that wasn't nice"...last year at this time, almost to the exact day is when I sprained my ankle, and now this!
Instead of worrying about my hand at the time, I asked Dr. Eric to look at Prince...and again, he suggested to put him down...I'm in such a dilemma...Prince is his sweet self again...as he has always been, calm, and nice...fighting to stay alive!

So, I will be resting, taking my antibiotic (which makes me drowsy)...will try to comment on your blogs, but will not be posting for now...no cooking, or baking, but will be enjoying all your mouthwatering and delicious foods, and amazing desserts you post!

My daughter Lora @ CakeDuchess offered to  do a Guest Post for me this weekend, and I may be "knocking" on your food blog door to ask if you could do a guest post for me!


Enhanced by Zemanta

Sunday, April 15, 2012

Spanakopita (Greek Spinach Pie)

It's Sunday, and I was going to wait till tomorrow to do another post but I feel like I'm just really prolonging it, and trying to "milk" my last post to get more comment?...or maybe I should have replied on my blog to all? I just don't know which would be the right thing to do. Also...I wish I could just whip-up some cakes, cupcakes, or throw in some various different things to brighten up my blog; but honestly, I don't have the time, or the energy to be so ambitious like that. I don't know how others can do a different post just about every day, and come of with the most amazing things!
When I made my Hungarian Sour Cherry Strudel, I mentioned making Spanakopita, and I finally did make it. You can easily double up on the pastry sheets...they are so, so, thin; will not make one bit of difference to use more. Some recipes call for 6 sheets (bottom and top) with filling in the middle, as for the strudel did, but for the Spanakopita, you can easily use 12 each, bottom and top, because it needs to hold the amazing filling, which I totally adapted from the basic recipe I used.
One important advise when making the Spanakopita. DO NOT use fresh...unless you're willing to break your "food budget!" You would need at least 5 bags of it, which would cost about $3.99 each, as opposed to the chopped frozen spinach; 2- 10oz. frozen chopped spinach, less than $2.00 each, and you get a lot, and I mean, a lot of filling when mixed up with the cheeses, and eggs. If you are making the spinach triangle appetizers, then you probably would need about 2 bags of the fresh spinach, which is more affordable.

This is a classic Greek favorite pie than can be served as an appetizer, or side dish, or even a main dish with a side of salad. The main ingredients of course are; Phyllo (fillo) pastry dough, spinach, and Feta cheese. You can variate the herbs such as mint, parsley, or dill. I used a mixture of fresh mint, and fresh parsley.Also, you can add a different cheese with the Feta... as for the onions, you can use scallions, or a sweet mild onion.

Spanakopita (Greek Spinach Pie)
adapted from All Recipes.com
Ingredients:
3 tablespoons olive oil
 I used 1 stick butter 4 ozs=113.4g (melted)
1 large sweet onion, chopped
1 bunch green onions, chopped (omitted that)
2 cloves garlic, minced
2 pounds spinach, rinsed and chopped
2- 10 oz. chopped frozen spinach, thawed
1/2 cup chopped fresh parsley
a handful of chopped fresh mint
No salt needed, just freshly ground pepper, and freshly grated nutmeg added in to the cheeses 
2 eggs, lightly beaten
 1- 8 oz, package Philadelphia Cream Cheese
1 cup crumbled feta cheese
2 cups crumbled feta cheese
8 sheets phyllo dough...(omit this)
 24 sheets total...12 for bottom & 12 for top
1/4 cup olive oil
Directions:
1. Preheat oven to 350 degrees F (175 degrees C). Lightly oil a 9x9 inch square baking pan.I used a 9x11 or 9x13inch is OK to use.
2. Heat 3 tablespoons olive oil in a large skillet over medium heat. Saute onion, green onions and garlic, until soft and lightly browned. Stir in spinach and parsley, and continue to saute until spinach is limp, about 2 minutes. Remove from heat and set aside to cool.
3. In a medium bowl, mix together eggs, ricotta, and feta. Stir in spinach mixture. Lay 1 sheet of phyllo dough in prepared baking pan, and brush lightly with olive oil. Lay another sheet of phyllo dough on top, brush with olive oil, and repeat process with two more sheets of phyllo. The sheets will overlap the pan. Spread spinach and cheese mixture into pan and fold overhanging dough over filling. Brush with oil, then layer remaining 4 sheets of phyllo dough, brushing each with oil. Tuck overhanging dough into pan to seal filling.
4. Bake in preheated oven for 30 to 40 minutes, until golden brown. Cut into squares and serve while hot.Bake for at least 45 minutes with the extra sheets. Before you bake the Spanakopita, with a sharp knife, score the pieces but do not cut through (only the top few layers) This makes it easier to cut, when finished baking!
Note: I can't begin to tell you how incredible flaky, and super delicious the Spanakopita was.This is an example how I adapt my recipes. Cannot always remember the ingredients, even though I remember the basic method. It would be nice to see other food bloggers mentioning at least SOME type of source where they got their recipe, or the idea from. Sometimes, when I eat out and a certain type of dish really inspires me, I even ask the chef if he would please just give me an idea of what ingredients are used, and I will create my own. Googling is the best and less troublesome way to get creative with a certain recipe, and make it your own.

Unless you have some old "hand-me-down" recipe from family, I seriously doubt that they mention any source because it's usually handed down to them by a family member, or friend, and those are the best KIND!

Also, I have to be honest with you, I practically given up on my Weight Watchers now...even though I'm still paying for the online program...have gained back 5 lbs of my 15 lbs weight loss over the last month (especially the holidays) ...too ashamed to go for a "weigh-in"...just went back to the gym in one month of absence, not counting points right now...shame, shame. I didn't just fall off the "wagon"...the wagon kind of rolled over me! All-in-all, I feel really good, my cat Prince is still alive (eating me out of house and home)...(although skin and bones)...oh, yes! He even eats from my roasted chicken, as long as it's white meat and cut up in tiny pieces. Poor old little guy, almost 20 now. Just wanted to let you in on the latest!
Have a wonderful Sunday!
Enhanced by Zemanta

Friday, April 29, 2011

Teresa's Zucchini Quiche, and More!

Now that Teresa and Domenico (my daughter's in-laws) departed for Italy, it's been real quiet at my daughter's household...not that they were noisy, but a lot of cooking and baking going on, a lot of "hustle and bustle"...only Italian language heard.

I went there yesterday, to help organize all the many frozen and canned items she made to last for several months. We all miss them, and our Italian language has improved a lot...LOL

Since I attempted to make my last dish, which was the Cayman Fish, I must say I have not cooked anything, because every day my son comes over to the beach to go surfing at lunch time, before he goes to his classes at the local University, working for his Masters degree.

He brings me so much food, all ready to be re-heated, that's all I have to do...literally.
My ankle is improving tremendously, I don't even have to use the walker any more...it's folded up, and will be donated to Goodwill. My diagnosis is all good...no blood clots, no vascular problems...just had to see my chiropractor, because my back, my shoulders, my neck was all "out of line"...a few cracks of the ribs, and everything is back to normal...but I'm still just "tippy toeing" on that foot, yet...in time, all will heal!

Getting back to the Quiche, which is part of the Easter tradition, whether it's in a pie form, filled with meats, or just vegetarian, and most of the time, filled with generous amount of grated cheese of your choice. Different regions of Italy, have different traditions, but they all agree that the use of the eggs are the real purpose, for the use of the Easter Pie...Pastiera...or Quiche, even pizza is considered as part of the tradition, especially, in Naples. Teresa made this beautiful Zucchini Quiche, also 2 kinds of pastas, one vegetarian, and a mostaccioli with little meat balls, mozzarella cheese, chopped hard boiled eggs, and with her homemade tomato sauce...amazing.
I want to share my recipe to the quiche which was quite similar to this quiche...the only difference is that this quiche was made with puff pastry dough, but my recipe which I use...and "tried and true" every time, is a Mark Bittman's recipe, for both the Quiche, and the crust!


Here's the recipe that I use for the Quiche: You can add sauteed vegetables, and/or diced ham, crumbled bacon, or, crumbled cooked sausage if you like...the choice is yours.

Basic Cheese Quiche
How to Cook Everything, by Mark Bittman

1 Recipe Generous Pie Shell, or Rich Tart Crust, without sugar,
in a 10-inch tart pan, or 9 inch tart pan, or a 9 inch deep pie pan-chilled

6 eggs, at room temperature
2 cups grated Emmenthal, Gruyere, Cantal, Cheddar,
or other flavorful cheese
2 cups cream half-and-half, or milk, gently heated, just until warm
1/2 teaspoon salt
1/4 teaspoon cayenne

Preheat the oven to 425 degrees F. Prick the crust all over with a fork. Line it with tin foil
and weight the bottom with a pile of dried beans. Bake 12 minutes. Remove from the oven
and carefully remove the weights, and foil, and turn the oven to 325 degrees F.

Combine eggs, cheese, liquid, and seasonings and beat until well blended.
Place the baked crust on a baking sheet. Pour the egg mixture into the crust, right to the top.
Carefully transfer the baking sheet to the oven and bake 30 to 40 minutes, until the mixture
is set, but is still moist; it should still jiggle just a little in the middle. Cool on a rack and serve
warm, or at room temperature. Serves 6-8.

Not too "shabby"...this gorgeous Lamb Shank, made by son-in-lawExecutive Chef  Fabrizio... over a bed of basic Risotto...(Melt in your mouth)...Sinfully delicious, and beautiful!  He made 8 of these, and this is supposed to be a portion for 1, no way!...(enough for 4 servings)
Pasta al Forno, made by Teresa, Fabrizio (son-in-law's mom)...Baked Rigatoni, with homemade tomato sauce (from real tomatoes-not canned)...with tiny meatballs, chopped hard boiled eggs, and the most amazing combination of cheeses. Yumm!!!
Teresa's Italian Fig Cookies...proudly holding the tray... by my sweet granddaughter Sophia (requested not to take her photo)...OK, LOL, just the platter, Sop

Lora sitting on left, m-in-law Teresa, f-in-law Domenico, hubby, Fabrizio...enjoying a nice Easter Sunday "early bird" dinner...at my daughter, and son-in law's house!
Enhanced by Zemanta

Thursday, March 3, 2011

Arancini di Riso-Sicilian Rice Balls


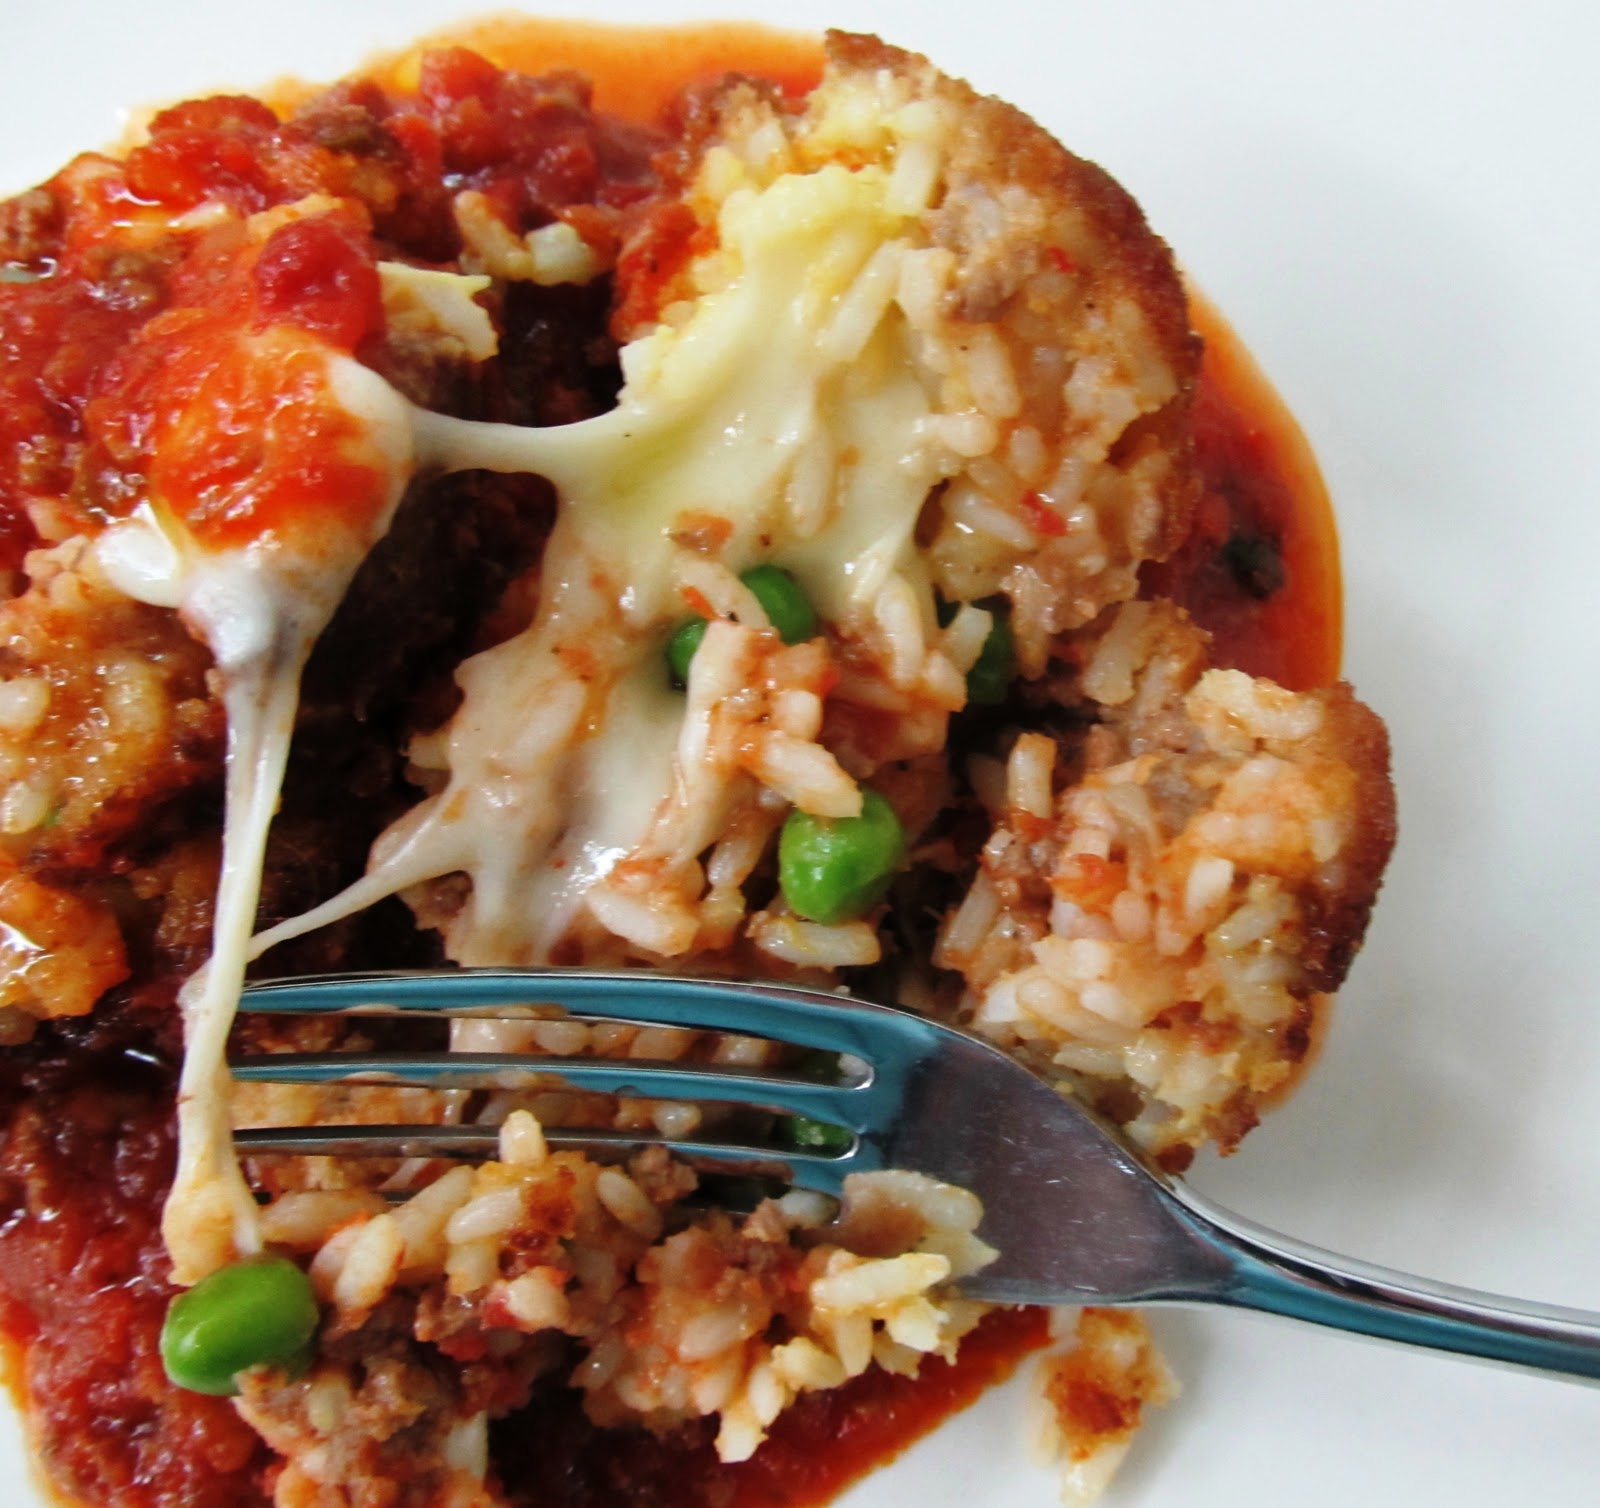
If you are familiar with the Arancini, which literally means, "little oranges" then you would know what this authentic, Sicilian, or Calabrian delicacy is. It is called Rice Balls. You can make it two ways, the first one which we all are familiar with are with a scoop of ground meat, w/sauce, and a cube of mozzarella cheese, and let's not forget the green peas. You can also make it vegetarian style, with just the mozzarella cheese in the middle, served over plain Marinara sauce. Either way, you've never tasted any Italian comfort food, which is usually served as a snack in the middle of the afternoon, or an appetizer, for a few, or a crowd that will disappear faster than pizza. I had the opportunity to learn about this yummy dish, firsthand when I lived in Sicily, and also visiting family in the recent years. Nowadays, as in the past, it is still a very popular tasty treat, made in every pizza place, or in cafes, and mostly it's a tradition to make on a Sunday afternoon.


There really isn't much difficulty in making the Arancini if you have all your ingredients organized, your meat, or plain sauce ready, and all you have to do is to just assemble them together, and ready to fry...yes, fry! and not bake. You will not be required to deep fry them, as long as you have a couple inches of fresh vegetable oil sizzling in a large heavy duty deep skillet, you will have the most crunchy, and delicious tasting Arancini, dipped into extra sauce, or just eat them just like the way I am holding a yummy piece!

Arancini-Sicilian Rice Balls
 my own recipe

2 cups of raw long grain rice
2 Tablespoons butter
4 eggs separated
1/2 cup grated Romano cheese
salt and pepper to taste
1 cup fined bread crumbs
Vegetable oil for frying

Cook rice until firm (not tender). Drain. Place rice in a large bowl. Add butter, cheese, salt, and pepper.Let it cool down for about 20 minutes. Add the egg yolks, and mix well. Spread out on a large platter and let it cool down in the fridge for about 30 minutes, up to an hour. Next, make your meatsauce, or Marinara sauce, according to your favorite recipe. For the meatsauce, use at least 1 lb. of ground lean beef. You will have plenty of extra meatsauce or plain sauce leftover, from a good batch of sauce.

This is basically how you form the rice balls.
The only problem was, that I didn't let the rice cool down enough, and probably added too much meatsauce.
The frozen peas do not have to bee boiled, just let them thaw out. I placed another portion of rice on top of this, and rolled it into a ball, then I dipped it in the remaining 4 egg whites, which has been mixed with about 1/4 cup water, and dipped it into the bread crumbs, rolling it into a ball, and frying it till it was nice, and golden brown.


Filling for the Arancini

Scoop out a good amount of the ground beef with a slotted spoon, into a separate bowl, and get your set up ready. You need about 1 cup frozen peas, thawed out at room temperature, and about 1 cup small cubed, or even shredded mozzarella will work. Put 1 heaping tablespoonful of rice in the palm of your hand. Flatten slightly, then place about 1 or 2 teaspoon of the meat filling, about 1 teaspoon of the peas, and a cube of the cheese. For the meatless version, do the same with the plain sauce, the cheese, and the peas, or you can just use the cheese, and omit the peas. Add another heaping tablespoon over the top, and enclose it packing the ingredients well to stay inside. Beat the remaining egg whites with 1/4 cup water till frothy, then roll the rice balls into the egg whites, and dip into the breadcrumbs, that has also been seasoned with salt, pepper, and Romano cheese. Fry in about half filled skillet, with vegetable oil, or in a deep fryer. until golden brown, Drain on absorbent paper towel, and serve over a bed of extra sauce, or by itself. Serve hot, or at room temperature. Makes about 12 to 16, depending the size you make. Oh, so delizioso...Mangia!
If you love Italian food, I promise you that you will want to have this ridiculously, and totally amazing Arancini to make. It really is worth the precious time, and effort!
Enhanced by Zemanta

Wednesday, December 29, 2010

A Comforting Frittata

With Christmas behind us, and leftovers just about gone, too much sweets eaten...a nice comforting vegetarian frittata will not only satisfies your hunger, but you can have your "breakfast, for dinner" as well. How can you go wrong with a perfect blend of sauteed sliced potatoes, fresh chopped tomatoes, and fresh spinach, topping it off with shredded cheese of your choice ( I used, cheddar)...scramble up at least 6-8 eggs, and added all together cooking it on the stove top, making sure you are not scrambling it, just lift a little from the edges to let it cook evenly, and finishing it off in the broiler. Yumm! Something your family will enjoy on a lazy and not much to do, evening.
There's no set recipe for this fritatta, just start out sauteing some chopped onions in about 2 Tbsp. extra virgin olive oil, along with about 4 small potatoes peeled and sliced thin, saute until potatoes are almost tender, adding about 1 large or a couple small fresh tomatoes, salt and pepper and a good handful of fresh spinach right into the mixture. Let it all cook together until spinach gets wilted. I even added about 1/4 cup of plain crushed tomatoes, (tomato sauce, marinara sauce will also work) but not tomato paste. To serve 6 servings with this, I scrambled 8 eggs, and poured it right over the vegetable mixture...see photo below!
In this process, all you do is lift a little bit around the edges, not disturbing the rest of the egg mixture, letting the uncooked eggs flow to the edge. 
At this point, you can see the edges setting, but the middle is still kind of wet, so with a wooden spoon, or spatula, carefully make a small incision in the center, tilting the pan from left to right to get to an even flow for setting more.
This may sound like a small "surgery process" or some kind of experiment, but it's just to make sure you have an even, nice, and fluffy frittata. Here's the last process, below!
Last process, I added a 16 ounce bag of shredded cheddar cheese, and a small amount of Mexican style cheese...you can add in place of this, shredded mozzarella, Swiss, or just grated Parmesan cheese. Also, you can variate the vegetables, and the spices, but in this case my grandchildren were eating this, and I had to be careful not making it too spicy for them. You can top this off with a nice salsa, and serve it with crusty bread. This dish served 4 adults, and 4 young children. Satisfaction guaranteed!
Actually, there was more food, which my daughter prepared...always thinking, there's not enough. We prepared all this at my son's house, just to have an easy casual dinner...yeahh, right!
We always have a bag or two of frozen shrimp, around. You can also use cooked frozen too, just add it to the sauce when it's completely done, and heat it up. In the case of the peeled deveined frozen shrimp, just saute in a small amount of olive oil, till they turn pink, and added to the sauce. I have a link back from June of this year, before I decided to join Foodbuzz-as you can see, I didn't even get a comment on it, not even looking for anyone to follow, except only family, and a handful of friend following my blog-out of guilt, or pity!...and never commenting. OK, just check the link out, even the photos were...so, so...bad!
Shrimp Marinara
The sauted shrimp is being added to the sauce, just fold it into the sauce, and it's ready to serve over pasta of your choice. The fritatta, is being prepared on the right...Buon Appetito!...ready to serve the "Strarving Artists"...seriously, they are all taking special art classes, my son Joey, is not only a writer, but an artist too, and it kind of runs in the family, on both sides.
I guess they are all working on "Alice in Wonderland...my son doing artwork on surfboards, with special waterproof markers.

"Would you tell me, please, which way I ought to go from here?"
"That depends a good deal on where you want to get to," said the Cat.
"I don’t much care where--" said Alice.
"Then it doesn’t matter which way you go," said the Cat.


"--so long as I get SOMEWHERE," Alice added as an explanation.
"Oh, you’re sure to do that," said the Cat, "if you only walk long enough."
(Alice's Adventures in Wonderland, Chapter 6)

 
(The above quote is often mistakenly referred to as: "If you don't know where you're going, any road will get you there." But this line is not in the Alice in Wonderland books.)
Enhanced by Zemanta