Tuesday, December 20, 2011

Linzer Cookies...and White Christmas Recipe Challenge


I am such a procrastinator...always the last one to join an event, unless someone is pushing me to do so! I did join the Very Good Recipes, as you can see the badge on my sidebar, and I do love this group, and to think that I didn't have to do a thing, just to sign up and they do all the work for you, to feature your blog with your latest posts automatically linked into your own page...now how hard awesome is that!? I'm also entering in this fun event with the Very Good Recipes White Christmas Challenge

Just click on, to see what the challenge is about, and check out the fabulous judges, including my dear friend Veronica, from Quay Po Cooks!

 linking to: Full Plate Thursday, 12-22-2011 @ Miz Helen's Country Cottage
                  Thursday Favorite Things Blog Hop 15 @ Katherines Corner

There's so many different versions of these lovely Viennese cookies that each country calls it their own, but it was actually originated during the 19th century
what was then, the famous well know Austria-Hungary empire! So, there you have the short history on these delicate buttery sandwich cookies...filled with apricot and various other fruit jams.
As a child, I have fond memories of these Linzer cookies, and I don't have my mom's or my aunt's recipes...only just remembering how it was made, so I adapted my version, from a trusted source!


Linzer Cookies

adapted from, Joy of Baking

1 cup (110 grams) blanched sliced almonds
1/4 cup (50 grams)

1 cup (227 grams)  (2 sticks) unsalted butter, room temp.
2/3 cup (135 grams) granulated white sugar, divided
2 large egg yolks
2 cups (220grams) all purpose flour
14 teaspoon salt
1/2 teaspoon cinnamon (optional)
1 teaspoon pure vanilla extract
1/2 teaspoon baking powder
Zest of 1 lemon

Confectioners' icing sugar, for dusting
choice of jams; raspberry (seedless preferred) blackberry
I used organic apricot, and organic blueberry, but you can use
choice of your own, even Nutella, which is great for chocolate lovers,
recipe, continued...


For the almonds:
Preheat oven to 350 degrees F. (177 degrees C) and rack in the center of the oven. Place almond on a baking sheet and bake for about 8-10 min. until light brown and fragrant. In a food processor, process with sugar, until finely ground.


For the dough:
In a separate bowl, stir your dry ingredients.


In a bowl of your electric mixer, or large bowl, with a hand mixer, beat the butter, and the 2/3 cup sugar, until creamy, and fluffy, beat in the vanilla extract, the egg yolks, and lemon zest. Add the flour mixture beating, just until incorporated. Divide the dough into two rectangular shapes, and wrap in plastic. Refrigerate until firm, at least one hour, or overnight. Remove dough from the refrigerator, and on a lightly floured board, or surface, roll the dough, until it's about 1/4 inch (1cm) thick.


Cut our shapes with a cookie cutter; circle, heart, star, square, or any other shapes you like, making sure to cut a hole in the center (cutter not shown), to let the jam show through!


Cut the shapes, making sure that every-other is cut with a smaller cutter in the center, to make it ready to sandwich the cookies.


Slide the cookies with a spatula (very important, so they stay in shape) on a parchment lined baking sheet, and bake in a 350 degrees, (177C) oven for 8-10 min. until lightly browned. Remove from the oven, to cool.


Re-roll scraps of dough to cut out more cookies, and bake to make more. When they are finished, and cooled on a rack, on the bottom half, spread a small amount of jam, and place cookie with hole, which you already have sprinkled with confectioners' sugar, lightly place on top.
(do not put too much jam on the bottom of the cookies, or it will ooze out when you sandwich it)


Now, I have to run to make Latkes, with my daughter Lora, (Cake Duchess) for Hanukkah...which begins at sundown tonight!
Happy, Hanukkah, to all my Jewish friends, non Jewish friends, as well... and those who celebrate this festive event with extended families, and friends!
Big hugs!

Enhanced by Zemanta

Sunday, December 18, 2011

Chocolate Drop Cookies...Cookbook Sundays!

Please don't be too judgemental with these yummy Chocolate Drop Cookies, made by me...but totally designed,and decorated by my "loves of my life"...2 of my 4 grandchildren! Luca (boy w/long hair) and Gabby (not shown in photo)...and I assure you, it was made with love, and lots of fun, which will be remembered for fond memories, for years to come!
I am so happy to join once again...Cookbook Sundays... now hosted by Sue!

Linking to: Cookbook Sundays #2 @Couscous and Consciousness


Since I'm a "thrifter"...and has mentioned about a 100th time, that I got this GEM of a cookbook for only 79cents...which was the cost of paperback books, about 3 years ago!...someone obviously donated this GEM of a fabulous book...which you will never find again, at this price...anywhere!!! My lucky day! I have mentioned a few times that this is my "bible cookbook"...and it is!
Oops... first cookie got too much sprinkles

Chocolate Drop Cookies 
How to Cook Everything...by Mark Bittman

adapted from the...Butter Drop Cookies

2 cups all-purpose four
1/2 teaspoon baking powder
pinch of salt
8 Tbsp. unsalted butter softened
1 cup sugar
1 teaspoon vanilla extract
1 egg
1/4 cup milk, plus more, if needed

For Chocolate Drop Cookies
melt 1 ounce unsweetened chocolate, and add to the mixture, after combining wet, and dry ingredients.

Luca, standing on a stool to decorate cookies
Preheat oven to 375 degrees F.
To combine the ingredients by hand, mix the flour, baking powder, and salt together in a small bowl. Cream the butter with a fork, then, mash in the sugar until well blended. Stir in the vanilla and the egg, then about half the flour mixture.

Add the milk, then the remaining flour, then a little more milk if necessary, to make a soft batter that can be dropped from a spoon.

For the Drop Chocolate Cookies:
Melt 1 ounce of unsweetened chocolate, and add to the mixture, after combining wet, and dry ingredients.

Drop rounded teaspoons of the batter onto parchment lined baking sheet and bake for about 10 minutes, or until edges are browned. Let each sheet sit on a rack for 2 minutes before removing the cookies with a spatula, and cooling them on a rack. Store in a covered container at room temperature, for  no more than a day or two. Be sure to refrigerate them, afterwards!
 

Gabby...sprinkles the colored sugars on the yummy cookies, but the best part of the frosting was...the Pillsbury Creamy Supreme Peppermint Frosting


Drop rounded teaspoons of the batter unto greased baking sheets an bake for about 10 minutes, or until the edges are browned. Let each sheet sit on a rack for 2 minutes before removing the cookies with a spatula and cooling them on a rack
Store in a covered container at room temperature for no
more than a day or two.
If you still have some leftover, be sure to refrigerate it!


Just a reminder...there's only 8 days before Christmas! What are you waiting for?...get busy! do a GOOD DEED!
We went around the local neighborhood,  and to our delight, and this local neighborhood  has teamed up with the decoration, and the lights...


Enhanced by Zemanta

Thursday, December 15, 2011

We Wish You a Merry Christmas... a Restaurant Review!

Wednesday, December 14, at  Cafe Sapori  West Palm Beach, Florida
Undoubtedly, you know the song...but seriously, in case I forget to wish all of my dear blogger friends, a peaceful and Blessed Holiday Season! As far as baking, I'm so not ready, as for Christmas shopping...same issues, but I did make an awesome Chocolate Chip Date Nut Spice Loaf...for recipe, click on to Claudia's blog...my Florida friend, @ What's Cookin' Italian Style Cuisine! She has all the old fashioned Italian style recipes, from her dear mom. and grandmother!

Linking my Chocolate Chip Date Nut Spice Loaf to:
  Full Plate Thursday, 12-15-2011 @ Miz Helen's Country Cottage


I was so impressed with this old fashioned Date Nut...(minus the nuts) bread, with chocolate chips, and the dates steeped in Kahlua liquor! ...but as in my case, I had to substitute the Kahlua, for my homemade coffee made instantly, with 3/4 cup cold espresso coffee, 1/4 cup vodka, sweetened with 1 Tbsp. Organic Blue Agave nectar. I added all this to 1cup of halved seedless dates and stored in a Mason jar for overnight!

I remember, Christmas pasts, my Hungarian aunt would make coffee liquor, with vodka, and strong espresso coffee, but it was too sweet, just like any other sweet liquors are. The only time I would have sweet liquors around, if a recipe requires it, but then again...they are way too expensive, and as for vodka, I had to use my son-in-law's, since I don't keep that around, either. I just keep nice bottles of wines...both red, and white! So, now you know what I keep in my liquor cabinet!


Allow me to take you on a fabulous tour and check out the most beautiful Christmas tree...just wait to sample the desserts, as well!

For the past six years, Cafe Sapori has been quite the "spotlight" of Northern Italian cuisine, at affordable prices. It's not often I dine there; even though my son-in-law, Executive Chef Fabrizio, and Francesco, his long time friend own it Can't go there, just unexpectedly, but invitation only...with my daughter Lora, and grandchildren. They are quite busy at this time of the year, and of course during the Florida busy season.


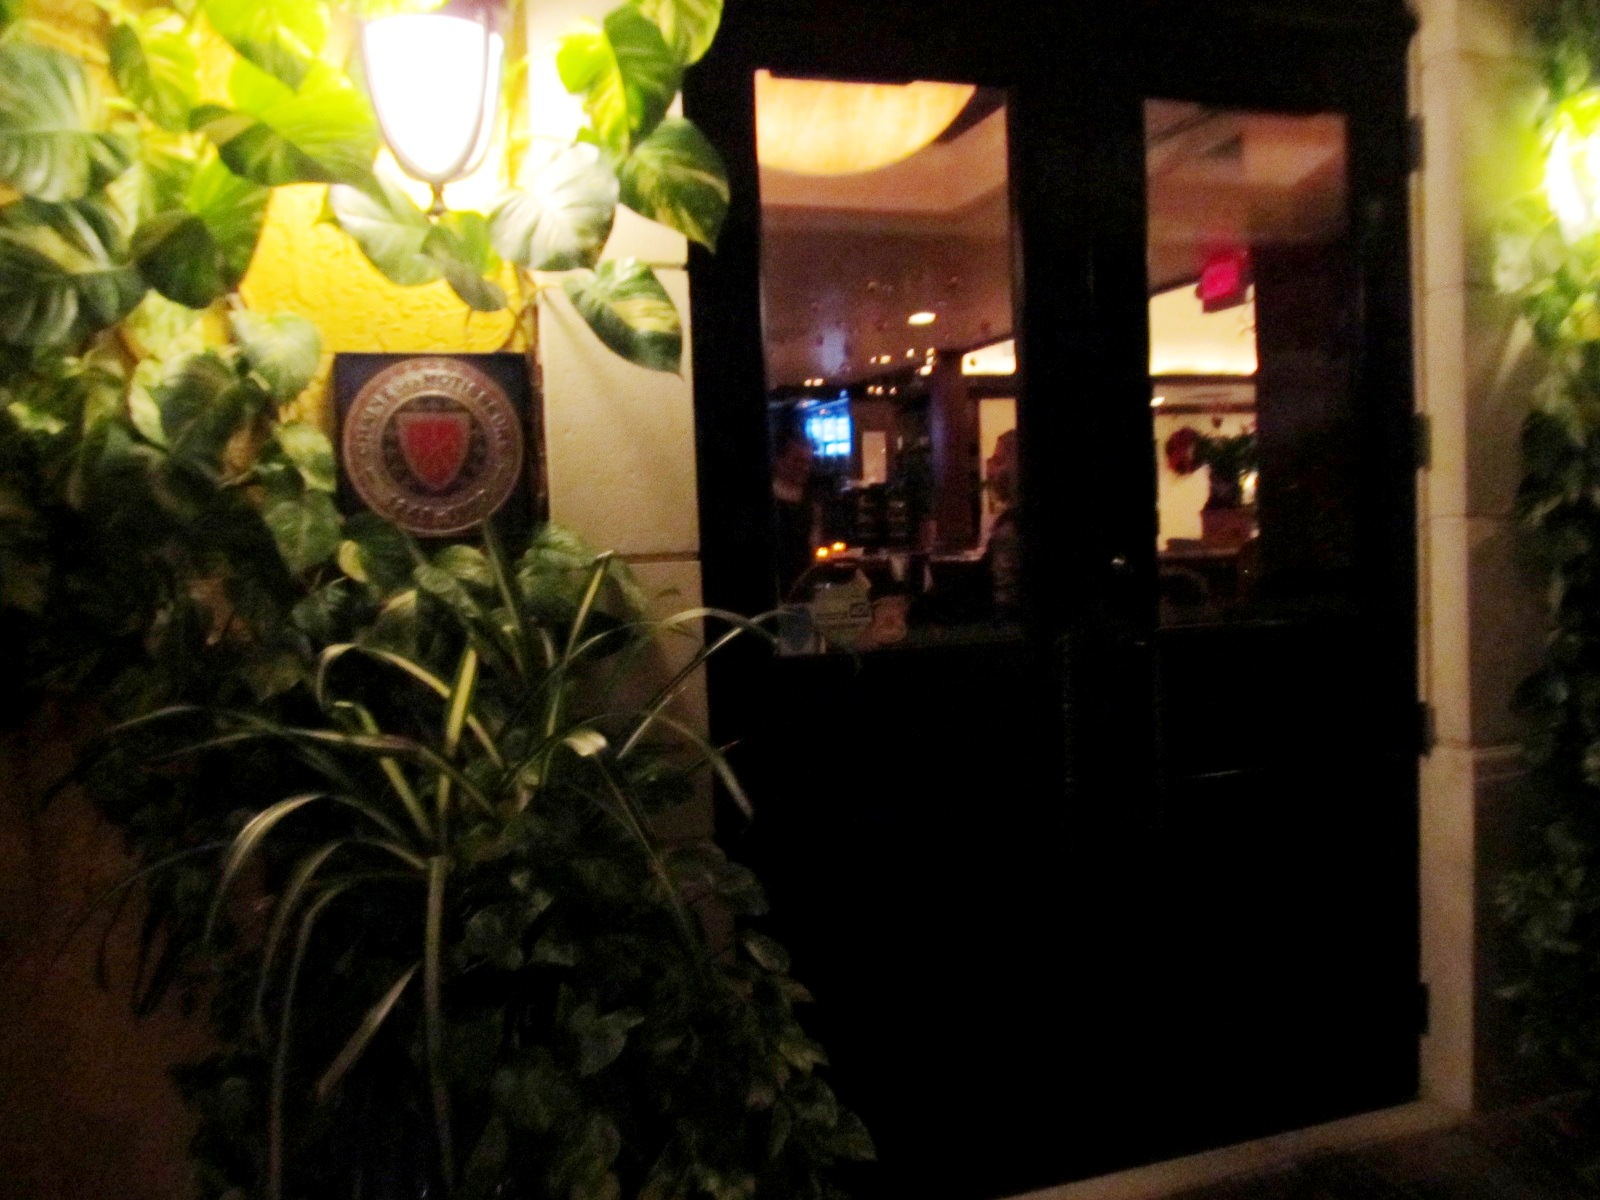
Simple, elegant sign, no flashy neon sign.Tuscan gold color building is easily recognized with beautiful tall neatly manicured shrubs, all around the building, located close to the Intracoastal waterway, which divides West Palm Beach from the island of Palm Beach...an easy access from the Palm Beacher clientele to find the restaurant, as well as the locals.


The entrance to the restaurant is from the side, since it's located on a busy main road...Southern Blvd. It gives you such an incredible feeling with the beautiful green plants, the happy gold color of the building, the Christmas lights festively and tastefully decorated all around!


So here we are...just look at the healthy and vibrant plants literally growing on the wall. (somebody has a green thumb, around here...which is Fabrizio) He has the same method with gorgeous plants at their home.

note: these photos are all taken with my little Canon camera...no flash!


We arrived about 6:15, still early before it gets real busy.
Huge beautiful Christmas tree is the first thing we notice, of course!


I would have loved to dine on the beautiful and charming patio, but my grandchildren wanted to be close to their daddy, popping out from the kitchen to keep checking on use with each portion (I was banned from taking photos of the several courses, so I just sneaked in a few of the most important ones....desserts...yeayyy!)


We were seated at this little corner table...the closest to the kitchen, so my son-in-law could pop in and out to check on us, and the kids couldn't be happier!
(you guessed it, that empty corner seat was mine...no patio for me!)...but all was good. Got a good spot of the entire dining room!


Didn't even have to get up from the table...taking photo of the gorgeous tree from the corner where I was sitting!
I noticed an elderly gentleman wearing a Christmas light garland around his neck, with the lights flashing...again, I was cautioned not only by Lora, but Gabby as well!
"Don't take a picture!)...OK, no picture! It was quite a sight, couldn't take my eyes off the flashing lights around his collar. Wonder how his seating companions put up with the distraction?...eventually he shut the flashing lights off!


Now, if you think I'm kidding...I am not...see the finger of my 10yr old granddaughter Gabby? ...what does that mean, Nonna?..."Stop! or was it wait?)...OK, now you've witnessed it for yourself. Three generations of "bossy" females...seriously. All three of us are so alike...


Took a photo of them anyway...while they were smiling for their mommy, but not for me!


I sneaked a photo of one of the appetizers...what seemed to be sliced salame, sauteed with roasted chestnuts, and the most enticing delicious sweet and savory sauce!


...after this, my camera had to be turned off for the main courses...ordered by my daughter, Lora; but in the meantime, I kept telling her "eat"...why are you eating so slow?...courses just kept coming out, and my grandchildren ate everything that was on their plate!


Desserts are up...no stopping me! Grabbed my camera, and took quick photos! We shared all these amazing desserts...most with various gelatos, and semi freddo, also with a coffee creme brulee which was my favorite!


Gabby's favorite and mine too!


Coffee Creme Brulee...with puff pastry and vanilla cream!


This was a traditional cheesecake, with cranberry sauce, and fresh cranberries, sauteed! Lora's favorite!


 Lemon cake with lemon curd...lemon gelato...yumm!!

Enhanced by Zemanta

Monday, December 12, 2011

It's The Season...for Dill Pickles?

It's The Season To Be Jolly...for Dill Pickles?...yes, and what a great gift for someone special who loves dill pickles, and better yet, homemade! You really can make your own fresh dill pickles, you don't need a whole case of canning jars, just two large 32 ounces (guess you would have to buy the whole case)...just need two large jars, 3 days to let it marinade in the homemade brine, and you can open it, and enjoy a crispy dill pickle with your favorite sandwich or burgers...yumm!
I must confess, I love pickles...any kind, dill, sweet, hot, half sour, but dill pickles, are my all-time favorite. I could munch on it, just by itself. Why would you want to pay $2.00 for a large dill pickle from the deli, or buy a jar of the refrigerated Kosher Dill's for up to $5.00 for a large jar, or even more! Those pickles are very good, and crispy crunchy, but sometimes they are too sour, too garlicky, or not sour enough. When you make your own brine for your pickles, you know that they are pure...no preservatives, no funny "off" taste, just pure fresh, crunchy dill pickles.

I checked so many different recipes, googled quite a few, but nothing seemed to be what I really wanted. The most important thing is the BRINE, and to make sure the pickles are the freshest, Kirby pickles you can find. The have to be really a nice healthy green color, no blemishes, and be sure they are firm! We find these at this time of the year in South Florida, the best to find is at a local produce market, or of course Whole Foods store.

Fresh Dill Pickles Home Made
my own recipe

2 cups white distilled vinegar
6 cups water
2 Tbsp. Kosher salt
4 cloves peeled fresh garlic
1 Tbsp. whole black pepper corns

2 small bunches of fresh dill (cut off bottoms)


6 to 8 Kirby pickles


In a large stainless steel pot, add the vinegar, the water,
salt, pepper corns, and bay leaves. Do not add the garlic or dill at this time, or the dill will get too wilted, and the garlic will get blue spots from the brine. Bring water to a boil, and boil on med. low for about 15 minutes. Shut the heat off, and let it steep for another 15 minutes OFF  the heat. Wash pickles real well in the sink, or in a bowl, and take off the end stem, if any. Make sure your jars and lids are sterilized already. You can just run it through the rinse sickle of your dishwasher, or boil them in a large pot of water for about 10 minutes, and let it cool down.

Cut the pickles in half, or in spears, and carefully pack  them in the jar, with the clean dill sprigs, and place the 2 garlic clove each, for the two jars, on the bottom. You can now pour the pickling brine almost to the top, making sure you spoon out the pepper corns, and the bay leaves to divide among the two jars. Close the lid tightly, and when it gets cool enough, place them in your refrigerator, for at least 2 days...3 or more days, is even better, up to 1 week to marinade. (I only kept it for 3 days before I opened the jars)

Make sure you check the jars at least twice a day to turn it upside-down, to let the marinade flow through all over!
Keeps up to 4 weeks in the fridge...if it should lasts that long! Very, very good, not too sour, not to garlicky, just right, crispy, crunchy and totally the best pickles, if you love Dill pickles!


Since I'm a "thrifter" I used last year's Christmas wrap to cut about two 4x6 inches of wrapping paper, overlapped the two, placed it on the jar top, placed a rubber band around it, and with plain scissors, cut around it in a zig-zag design. I also purchased a roll of gorgeous bow from Michael's, which is such an amazing store for crafts, and things, for $2.99 on sale, at a 50% discount. Tied a nice bow around it, and my special gift is ready for a special pickle lover recipient! The other jar, I already opened, to keep for myself, and to share with family! (also for my photo shots)

You can use smaller jars, for the pickles, (probably about 4) Recalling one recipe, on the Internet, I really cringed at the thought of up to 10 lbs of Kirby cucumbers, putting them in the bathtub...yuk! Doesn't matter how clean is your bath tub, to me, just is not something I would do. In a clean kitchen sink, with less...let's say about half the amount, maybe up to 5lbs, is more like it! ...but then, you need a lot of empty sterilized jars, and a "cold basement"...which we do not have here, in South Florida, so small amount is the best, and to refrigerate it!

So that's it for now...just a little suggestion for 1 of many, many homemade gifts you can give with "love" and from the "heart"
Thank you for all you kind and loving comments, I appreciate all of you, and just don't go overboard trying to please someone with "unrealistic" spending. You can make a person so happy, just by making something by hand, like crafting, baking a special treat, give a nice picture frame with a favorite photo of yourself or them; any of these gifts cost so little, yet means so much to the recipient you are giving it to!
Hugs, to all!
Enhanced by Zemanta

Saturday, December 10, 2011

Everything But the "kitchen sink" Soup

Last week, when I mentioned I just didn't feel up to photographing my food...well, actually, in reality...just didn't feel like photographing my step-by-step directions, while making this amazing hearty, and so good for you, all fresh vegetable, and organic beef meatball soup! See, there it is... on the bottom, a little meatball, and on the right, next to the parsley, but it's sort of camouflaged by all the yummy grated Parmesan cheese! Even the Great Northern beans were from a bag of dry beans, and not canned!
The only thing that was canned, was the 28 ounce can of organic diced tomatoes, from Whole Foods. As a matter of fact, every piece of fresh vegetable was from whole Foods. 

I started out sauteing my chopped onions, chopped garlic, sliced celery, sliced carrots, in Canola oil, about 3 Tbsp. added some chopped fresh parsley, salt, and pepper, a couple bay leaves, ... added the canned diced tomatoes, and a 32 ounce container of organic beef broth, a dash of Worcestershire sauce, and bring it to a boil. Depending on how much vegetables you are using, if you use a lot, then you have to add more broth!
Now, where were we?...let's continue!

After the soup comes to a boil, turned the heat down to medium, and added, 1 large diced golden sweet potato, 2 peeled and diced golden beets, 1/2 lb. fresh, cut green beans. I made about 1 dozen small meatballs the day before, which was precooked, added that, and I cooked up a pot of dry Great Northern beans as well. Added that, as well. Pasta which was the tiny shell pasta was cooked up separately to add to the soup.

You don't need any thickening agents, such as flour, or cornstarch, the soup thickens on its own, just from the well cooked dry beans, and especially when you add the pasta to it, will thicken.

At the end, sprinkle some Parmesan cheese right into the soup, and ladle a nice portion out, drizzling extra virgin olive oil on it, for color, texture and flavor, and some more extra cheese.

I promise you, it will chase away any holiday "blues"...makes you feel full and satisfied, all you need is some crunchy bread to go with it, a glass or two of full bodied red wine....and have a nice dessert ...always room for dessert, just with a bowl of soup. If you would like to make this vegetarian, or vegan, just omit the cheese, and the meatballs, and use vegetable broth, instead of beef broth. You can add your choice of vegetables fresh or frozen, and you can actually use any kind of canned beans; they are just as good, and add that at the end of cooking time!

So this is my offering to you, for a chilly weekend, so stay warm, or come down to sunny Florida and enjoy our mild weather here!
Enhanced by Zemanta

Wednesday, December 7, 2011

Orange Almond Mandelbrot...a.k.a Jewish Biscotti!

To think that I was going to skip making cookies for the holidays...when this morning, I called my daughter Lora, and said..."I want to make some biscotti...but you know, that  my kitchen is way too small, so I will come over to
your house and will make it there! Of course, she agreed, as she always does, because she likes to see me out of my "rut"...even though I live on the beach, but I get into those "holiday blues" just before the holidays, and I tell you...You got to snap out of it!!!...seriously! Life is too short...life is GOOD! It's what you make of it!
You want to feel sorry for this person...for that person...their sad situation, but when you seriously think about it, you really have to think about "yourself!"...You have "issues" just as the next person does...except, you deal with it much better than they do! They make you feel, that you have to help them, it's your responsibility!...enough said, just check out my amazing Orange Almond Mandelbrot (Jewish Biscotti) for the holidays!

Linking my Orange Almond Manderbrot to: Full Plate Thursday 12-8-11 @ Miz Helen's Country Cottage

Forgive me, for not "staging" my biscotti, with photo props, holiday decors, or anything "fancy, schmancy"...what you see, is what you get! ...but I promise you it's GOOD STUFF!...no fancy "frills"

Grandson Luca, checking his little "car programs" on Mommy's I-Pad, while Luigi is  checking out the new lawn chair!

 Stella watching me...while I'm studying the recipe for the Mandelbrot ...literally meaning: Almond Bread!


Orange Almond Mandelbrot
(originally adapted by, Orange Walnut Mandelbrot)
from: Rosie's Bakery, by Judy Rosenberg

2 cups all purpose flour
1 teaspoon baking powder
1/4 teaspoon baking soda
1 teaspoon salt
4 Tablespoons, (1/2 stick unsalted butter. at room temperature)
1/4 cup vegetable oil
3/4 cup sugar
1 Tablespoon pure vanilla extract
Grated orange zest, of 1 orange
2 large eggs
1 cup of sliced toasted almonds

Preheat oven to 350 degrees F. Line baking sheet with parchment paper. In a medium size bowl, mix baking powder, baking soda, and salt.

Using an electric mixer, on medium-high speed, cream the butter, oil, sugar, vanilla, and orange zest together in a medium size mixing bowl, until light and fluffy. Stop the machine twice, during the process to scrape the bowl with a rubber spatula.

Ad the eggs, one at a time on medium speed, mixing until each egg is partially incorporated, about 5 seconds. Scrape the bowl, after each addition.

Using the rubber spatula, mix in half the flour mixture by hand. Then blend with the electric mixer on low speed for several seconds. Add the remaining flour mixture and mix on low speed until the dough is smooth, about 5 seconds. Add the nuts with a few more turns. of the mixer.


Turn the dough out unto a work surface, and divide it in half. Dough will be somewhat sticky...that's why you need extra flour added unto the work surface, just as in the upper photo!

Form a strip about 3 inches wide, and 11 inches long, with both of the portions, and set it on to the baking sheet.


 Bake the dough strips at 350 degrees F. for 20 to 25 minutes, until golden, and firm to the touch!


Turn the oven down to 275 degrees F. Cut the biscotti, using a serrated knife, about half to 3/4 inch slices, slightly diagonal. Arrange the slices standing up, about 1/2 inch apart, and bake until crisp, golden... about, 20 minutes.


Turn the oven off, and leave the biscotti in for an additional 15 minutes longer. Then, remove from the oven, and let them cool on the baking sheets.


Now, you can drizzle the glaze on it, if you like!
Mix 1 cup powdered sugar, with about 2 Tbsp. of mil,, until smooth. If it's too dry, add a drop or two of more milk, if it's too thin, add more powdered sugar, until yo get the right consistency. Drizzle with fork...and  not spoon, unto the biscotti...just like Gabby does it, longways, and across, if you like.


Gabby (granddaughter) loves to do the decorating part.


After the drizzle part is done...comes the fun, decorating part, where you shake the multicolor sprinkle candy!


Store cookies in an airtight container, at room temperature, or freeze, for up to 2 weeks. Bring them to room temperature, before eating!

Makes up to, about 44 cookies!


Enhanced by Zemanta