Thursday, November 27, 2014

GIVE...THANKS...

Ahh...the famous American Green Bean Casserole! Who can forget this classic side dish for Thanksgiving and Christmas from the famous Campbell's Soup company...originated way back in 1955, when it was made with canned green beans; yikes! Graduating to frozen green beans in the seventies...and now, made with fresh green beans, but still the same recipe! Can't leave out the 'cream of mushroom' soup, or the French's fried onions, otherwise you will lose the original concept!
I have such fond memories of past Thanksgiving, growing up in midwest, Ohio...remembering the super cold weather; most years on Thanksgiving without snow...unlike what they are having at this time of the year with so much snow all over the country. Also, at this time of year we must remember our 'homeless' and 'hungry' people that live right here in the 'country of plenty'; we are all responsible to give...and 'Give Thanks' if we have our health, family, a 'roof' over our heads...and enough food to eat!

This year...as of the last few years, we've been sharing Thanksgiving with 3 other families...the 'more, the merrier'! Do you see the little 'red' magic button on the breast of the turkey?...well, that's what makes it perfect...no under cooking...no over cooking the turkey! The stuffing is just the plain and simple herb stuffing!

Campbell's Classic Green Bean Casserole
from the Campbell's Soup Kitchen

1 can (10 3/4 ounces) Campbell’s® Condensed Cream of Mushroom Soup or Campbell’s® Condensed 98% Fat Free Cream of Mushroom Soup or Campbell’s® Healthy Request® Condensed Cream of Mushroom Soup
1/2 cup milk
1 teaspoon soy sauce
1 dash black pepper
4 cups cooked cut green beans
1 1/3 cups French's® French Fried Onions  
                                                                                                                                                       
Stir the soup, milk, soy sauce, black pepper, beans and 2/3 cup onions in a 1 1/2-quart casserole.                                                    
Bake at 350°F. for 25 minutes or until the bean mixture is hot and bubbling.  Stir the bean mixture.  Sprinkle with the remaining onions.                                           
Bake for 5 minutes or until the onions are golden brown.


Thursday, November 20, 2014

Lottie Greer's Country Biscuits


Have you ever came across a recipe to learn that you don't really agree with the ingredients are off, and you either fix it, or just ignore it and move on to something else. Homemade Southern buttermilk biscuits are always so comforting to have served with chicken, breakfast, or just have it for a snack with fresh sweet butter slathered on it...yumm!

I have so many great cookbooks, but I always end up googleing for recipes on the Internet to get quick results. I purchased this lovely cookbook called Jan Karon's Mitford Cookbook and Kitchen Reader at World Thrift store for a mere $2.95...2004 edition, which is still popular and has the author's Southern family recipes which were no doubt 'hand-me-downs'...probably verbal and not all of them tried and tested before being published!

I was so thrilled that the biscuits turned out so nice, crunchy and perfectly baked out the outside, and super flaky, and delicious on the inside. Also, I want to share a little tip with you regarding the buttermilk and the self-rising flour. I must be the only one that does not particularly favor self-rising flour...only because, it tends to be too salty, and has a distinctive flavor on its own. (just my opinion)
Buttermilk is being wasted if only used in just a certain recipe; so, it's wise to use an easy substitute!
These awesome biscuits freeze well, just pop them into a plastic baggie, and when ready to use one or all, they heat up in the oven so nice, just as fresh as you made them.

You can actually see the flakiness of the biscuit, as I split it in half. Seriously, I will continue to make my own buttermilk, and save money, but not spare the flavor. As for self-rising flour, (maybe the American brand)...just not a fan of it and will stick with the all-purpose flour!
You can purchase Jan Karon's Mitford Cookbook and Kitchen Reader on Amazon


Lottie Greer's Country Biscuits

Chef.Foodie's picture


Ingredients
Shortening8 Tablespoon, chilled (More For Greasing The Baking Sheets)
I used 4 Tbsp. shortening and 4 Tbsp. unsalted butter...also use parchment paper to cover baking sheet (no greasing baking sheet; removed parchment paper when done, for photo shots)
Self rising flour3 1⁄4 Cup (52 tbs) (White Lily, More For Rolling Out The Dough)
made my own 'self-rising' flour from all-purpose flour, using the 'alternating method'
1 cup all-purpose flour
1 1/2 teaspoon baking powder
1/4 teaspoon salt
For 1 cup of all-purpose flour=1 cup of self rising flour
Salt1⁄2 Teaspoon...no additional salt needed
Granulated sugar2 Tablespoon...way too much sugar...I did use 2 teaspoons organic sugar
Baking soda1⁄2 Teaspoon...1 teaspoon
Buttermilk2 Cup (32 tbs), chilled...I used the 'alternating method' ...ONLY 1 CUP OF BUTTERMILK IS NEEDED1
For 1 cup milk...whole milk, 2 % or heavy cream
1 scant cup of milk
1 Tbsp. white vinegar
Combine milk w/ vinegar, let stand 10 min. it will slightly thicken and bubble; use in place of buttermilk
Directions
Preheat the oven to 475°F...450 degrees F. is needed
Grease a couple of baking sheets and set aside....no greasing needed when parchment paper is used.
Combine the flour, salt, sugar, and baking soda in a large bowl.
Cut in the shortening with a pastry blender until the shortening is the size of small peas.
Add the buttermilk and stir until just mixed.
The dough should be very wet....THE DOUGH WILL BE JUST RIGHT IF ONLY 1 CUP OF MILK IS USED! DO NOT USE 2 CUPS...
Place some flour in a shallow bowl.
Spoon a heaping tablespoon of wet dough into the flour.
Flour your fingers and sprinkle flour on the top of the wet dough.
Roll the dough gently in flour just to coat the outside.
 Try not to mix too much extra flour into the dough.

Add a handful of flour on the board or counter, and gently gather your dough patting it lightly into a disk...no rolling is needed at all!
 Shape into biscuits, using floured hands, working the dough as little as possible.Shape into biscuits using 3 inch biscuit cutter, or smaller....3 in. cutter will make 9 biscuits, and smaller will make 12. Use scraps up, gently shaping and cutting it.
Arrange the biscuits, touching each other, on the baking sheets.
Arrange biscuits...DO NOT touch together!
You can brush extra milk on the biscuits (optional) before baking.
 Bake for 15 to 20 minutes, or until just brown on top.


Saturday, November 15, 2014

Silent Sunday

Like a bird on a wire, like a drunk in a midnight choir, I have tried in my way ... to be free.~
Leonard Cohen

Saturday, November 8, 2014

Tomato, Avocado, and Cucumber Salad

When you have 4 beautiful Haas avocados, that are still fairly hard...you let it sit outside in a basket, or fruit bowl and wait for two or three days and they will be perfectly at their best, firm, yet soft to make some nice salad with it...if you let it ripen another day or longer; best to make Guacamole out of it. In my case I chose to make a beautiful and healthy salad. Same goes with the plum tomatoes. When you purchase them, and they are firm, but just getting ripe...let them sit outside for a couple days, and they will ripen to perfection.

Also, I decided to add hard boiled eggs to the salad...only because hard boiled eggs are a nice addition to any healthy salad...and because, I felt extremely guilty for having to toss out half a dozen eggs that I neglected to use up, and they were nearly one month old. I always check the dates on the egg carton and are careful not to use them more than 1 week pass the expired date. The expiration date is really just a caution to warn you but they will still be OK to use after the expiration date for a week, I'm quite sure of that! I always use organic eggs which cost a little more, but so well worth it. Same with my vegetables!

At our Latino produce market, everything is 'dirt' cheap. Just have to make an effort to stop there, and stock up on all the things I need; but it's more convenient to buy everything at the local supermarket when I do my weekly grocery shopping. Who can pass up Haas avocados...2 for $1.00 when at the supermarket they are $1.50 each! Same with the limes, at the produce market, they are always 10 for $1.00 compared to 3 for $1.00 at the supermarket. You really have a choice, but not always convenient to go out of your way when you can find all the things you need in one stop! Whole Foods Market is more expensive, but that still happens to be my very favorite market for the best quality!
Even though I live alone, but I have lovely neighbors/friends in my condo complex, and my family is just a few minutes over the 'bridge' on the other side of the Intracoastal waterway. I live on the island, which is quite a large size, and only 1 supermarket; which I recently realized, but it takes only 10 minutes to drive over the bridge and have the 'world at your feet'! I only cook about once or twice a week, and almost always have all my amazing meals at my daughter's Lora! ...and once a week at my son Joe...how fortunate can one mom be?...having loving family around me...feeling truly Blessed!
When you prepare something healthy and delicious, you really need to have the freshest ingredients, especially when you make a beautiful salad. You don't always need lettuce for your salad...just use your imagination, and create something that inspires you...no recipe needed for that. I happen to love sweet Vidalia or another brand of sweet onions. Naturally sweet; you can almost bite into it like an apple...but really, you don't want to do that; just peel, an slice, or dice it to saute it in cooking...never, ever any tears...which is the best part, as well!
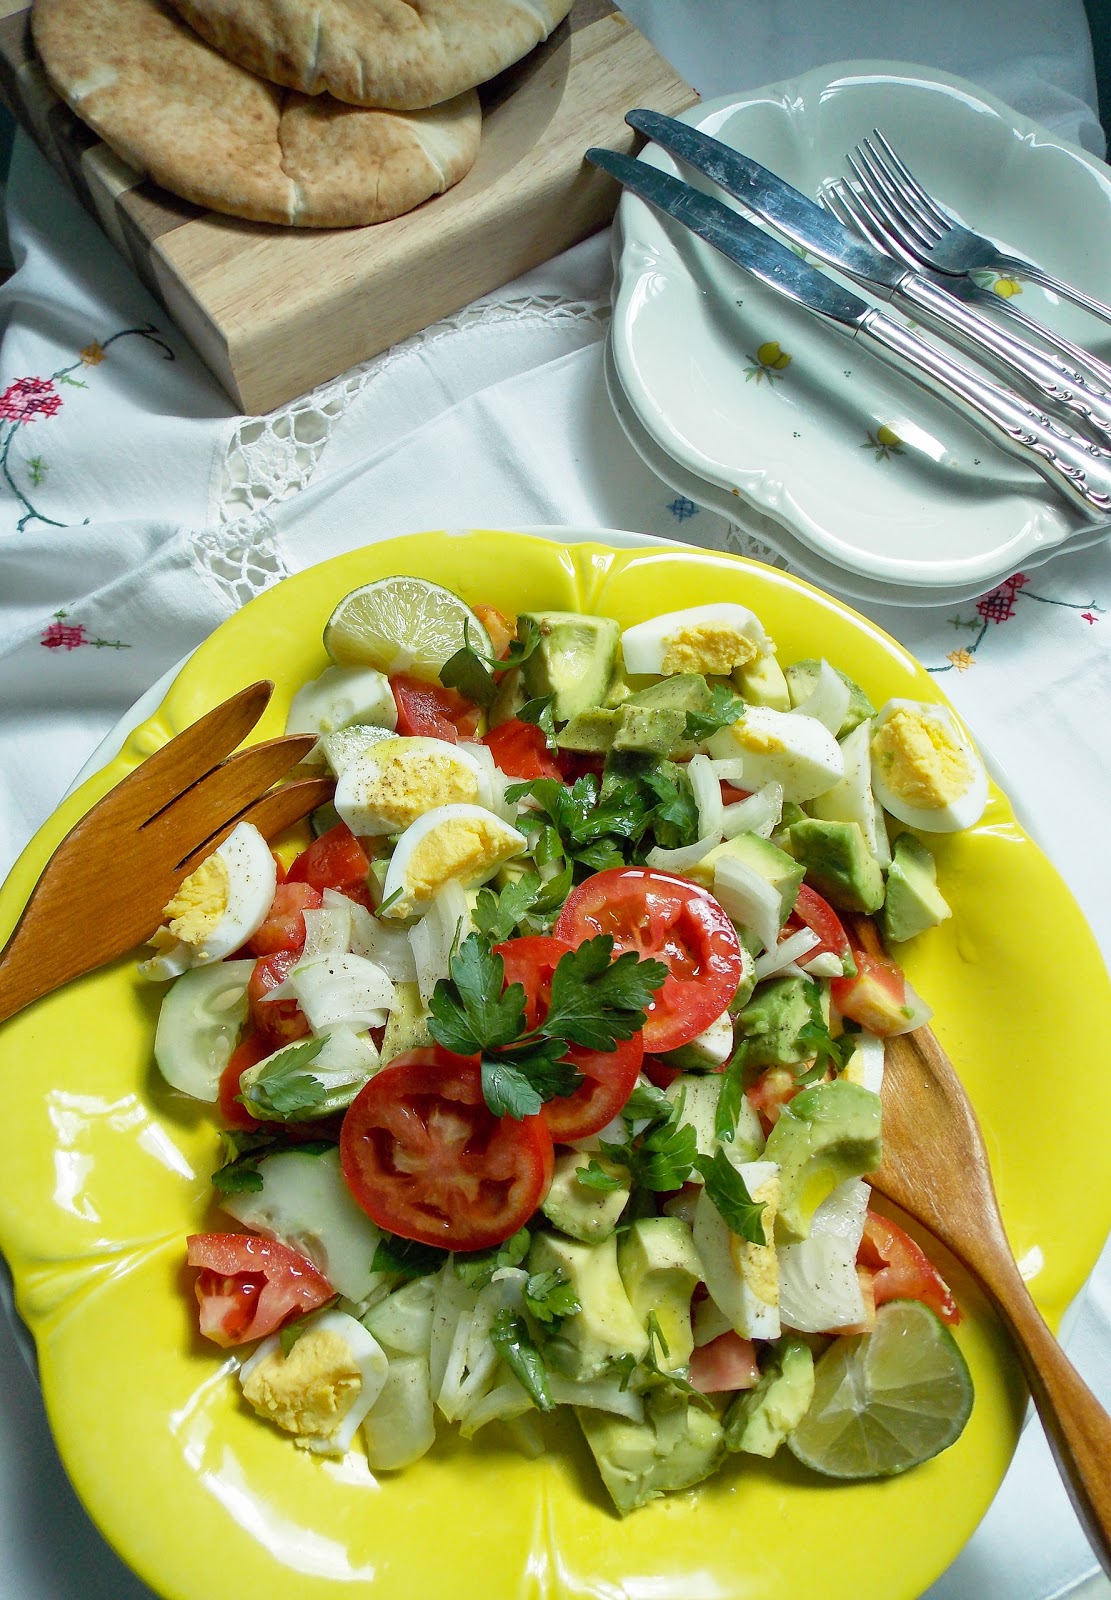


Tomato, Avocado, and Cucumber Salad
created by; Elisabeth


4 Haas avocados
4 Plum (Roma) tomatoes
1 firm cucumber
2 hard boiled eggs
1/2 of a medium sweet onion
1 or 2 limes
1 bunch of Italian parsley
Extra Virgin olive oil
Sea Salt
freshly ground pepper


Cut avocados, tomatoes, in half...carefully remove the pits from the avocados, then cut them into half again, lengthwise...same with the tomatoes, and dice them into bite size pieces.

Peel cucumber partially, or all the way, cut it in half lengthwise, and dice it into bite-size pieces as well. For the hard boiled eggs, also cut in half lengthwise and dice into bite-size pieces.


For the onion, cut in half, and slice thin lengthwise, as well. For the parsley, chop a small handful, and save a few whole pieces for decoration. Combine everything in the proper order, starting with the tomatoes, and ending with the avocado, and hard boiled eggs...since they are delicate. they need to be on top.

Drizzle with about 1 Tbsp. of olive oil, and juice of half of a lime...or a whole if not enough juices. Salt, and pepper to taste, and additional oil, and juice of lime
if preferred.

Serve with pita bread, flat bread, or bread of your choice. Serves 2, generously!


Thank you everyone for your kind comments, and support; and I do appreciate your friendship, even though I don't comment regularly, and often...not even checking my own blog. I must confess that I'm  Pinterest...aholic, and not even bothering with my e-mails every day! (when you receive about 200 e-mails daily, you really have to add another e-mail address...can't see the 'trees' from the forest...as they say!
Have a wonderful weekend, dear friends! xo