Showing posts with label Vanilla extract. Show all posts

Sunday, October 28, 2012

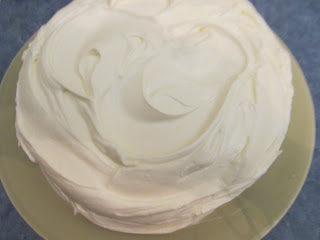
Red Velvet {Birthday} Cake with Cream Cheese Icing

As you may know we've had a very stormy week, starting last Wednesday, and expecting the worst by Thursday, and Friday...kids having half a day of school on Thursday, and off on Friday, due to Hurricane 'Sandy' lurking around our area in S. Florida...leaving a mess behind in Cuba, and Haiti. Now, heading up to the east coast...already causing havoc in North Carolina! Luckily, we escaped a lot of what could have been really bad damage, just heavy winds, to deal with and a lot of downpour of heavy rains.
The only time you will see a frosted cake posted on my blog, when I make one for a special occasion...and this certainly was! My granddaughter Sophia just turned 11...the second oldest of the 4 grandchildren that I have. Gabriella had her 11th birthday in August. This was a special request from Sophia, she's such a 'sweetheart' and knows exactly what she wants. Red Velvet Cake is an 'all American' Southern cake...and don't let anyone convince you...otherwise:) Some like it 'ruby red'...but since there's cocoa powder used, I like to have a dark reddish/brown
version of this famous cake!
Most recipes call for cake flour, but the recipe that I adapted this from called for all-purpose flour. When using cake flour, you do not add baking powder, just baking soda, but I figured baking powder addition to the all-purpose flour would lighten it up...and it did; so moist, perfect, and yummy. Also, I cut down on the sugar, as well!
My two 'angels' Sophia on the left...and Gabby (cousins)...but more like sisters!


I don't like my Red Velvet Cake to be a
bright red color...so I added the special dark Hershey's cocoa, instead of the regular one. When you chill the cake, you can cut a perfect slice, just like this! I will share this 'failproof' and perfect recipe with you, step-by-step, so READ on!
Red Velvet Cake with Cream Cheese Icing
 slightly adapted from Wilton
  • 2 cups all-purpose flour
  • 2 tablespoons cocoa
  • 1 teaspoon salt
  • 1/2 cup (1 stick) butter or margarine , softened
  • 1-1/2 cups granulated sugar
  • 2 eggs
  • 1 cup buttermilk 
    1 teaspoon baking powder
  • 1-1/2 teaspoons baking soda
  • 1 tablespoons white vinegar

    Preheat oven to 350ºF. Spray 2- 9 in. pans with vegetable pan spray.

    In a medium bowl, stir together flour, baking powder, cocoa and salt; set aside. In large bowl, beat butter, sugar and vanilla until light and fluffy.


    Add eggs and red icing color; mix well. Add flour mixture alternately with buttermilk to butter mixture, beating until well blended. Stir baking soda into vinegar and fold carefully into batter. Pour batter into prepared pans.

    Bake 25-30 minutes or until toothpick inserted in center comes out clean. Cool 10 minutes; remove from pans to wire racks. Cool completely.

    To Ice: Spread a thin layer of cream cheese icing on bottom cake layer. Top with remaining layer and spatula ice cake fluffy


Enhanced by Zemanta

Sunday, March 18, 2012

Almond Cookies

I've been down-and-out with the flu for at least one month now, which seemed to have gone after finally 3 weeks, and I was so glad that I finally got a little relief from the sneezing and coughing...then one week ago, I woke up with my throat on fire, sneezing and coughing once more again, this time even worse. I finally gave in and went to see my doctor, and he prescribed antibiotic this time. Finally, I'm getting better now...well enough, that I just had to make something sweet, but not too sweet, so my perfect stand-by Almond Cookies always come to my rescue!
I practically have this simple recipe memorized, but could not find my handwritten recipe from over 20yrs ago, so I had to consult online, only to find the exact recipe that I used to have. Funny...even if I would have found my recipe, there wouldn't be a source on it, which we did not include in the past when we copied recipes by hand.
These lovely light as a "feather" cookies, do not even need baking powder, or baking soda, a light crispiness on the outside, and soft as a "pillow" on the inside. You really do not need to buy a large bag of whole almonds, just get the sliced ones which you can grind in a small processor, and use some sliced ones...I generously sprinkled the top of my cookies just before I baked them.

Almond Cookies
adapted from all recipes.com

1/2 cup unsalted butter softened
1/2 cup granulated sugar
1 egg
1 1/4 cups all-purpose flour
1 cup ground almonds
1 teaspoon pure vanilla extract
1 teaspoon pure almond extract
(you can use 2 teaspoons Amaretto liqueur
 instead of the vanilla, and the almond extract)

Preheat oven to 400 degrees F (200 degrees C)

In a large bowl, cream together the butter and sugar. Beat in the extracts, or if you're using Amaretto beat that into the mixture. Beat in half the amount of the ground almond. Gradually mix in the flour and the rest of the ground almonds.

Drop by teaspoonfuls 2 inches apart, on parchment lined baking pan. Bake 5-8 minutes in the preheated oven, or until cookies are lightly colored. Do not bake longer than 8 minutes...they brown very quickly.
Point value: 2 pr. cookie


Serves about 24 cookies. An extremely easy recipe...if you love almonds, you will love these perfect little cookies!
Enhanced by Zemanta

Tuesday, December 20, 2011

Linzer Cookies...and White Christmas Recipe Challenge


I am such a procrastinator...always the last one to join an event, unless someone is pushing me to do so! I did join the Very Good Recipes, as you can see the badge on my sidebar, and I do love this group, and to think that I didn't have to do a thing, just to sign up and they do all the work for you, to feature your blog with your latest posts automatically linked into your own page...now how hard awesome is that!? I'm also entering in this fun event with the Very Good Recipes White Christmas Challenge

Just click on, to see what the challenge is about, and check out the fabulous judges, including my dear friend Veronica, from Quay Po Cooks!

 linking to: Full Plate Thursday, 12-22-2011 @ Miz Helen's Country Cottage
                  Thursday Favorite Things Blog Hop 15 @ Katherines Corner

There's so many different versions of these lovely Viennese cookies that each country calls it their own, but it was actually originated during the 19th century
what was then, the famous well know Austria-Hungary empire! So, there you have the short history on these delicate buttery sandwich cookies...filled with apricot and various other fruit jams.
As a child, I have fond memories of these Linzer cookies, and I don't have my mom's or my aunt's recipes...only just remembering how it was made, so I adapted my version, from a trusted source!


Linzer Cookies

adapted from, Joy of Baking

1 cup (110 grams) blanched sliced almonds
1/4 cup (50 grams)

1 cup (227 grams)  (2 sticks) unsalted butter, room temp.
2/3 cup (135 grams) granulated white sugar, divided
2 large egg yolks
2 cups (220grams) all purpose flour
14 teaspoon salt
1/2 teaspoon cinnamon (optional)
1 teaspoon pure vanilla extract
1/2 teaspoon baking powder
Zest of 1 lemon

Confectioners' icing sugar, for dusting
choice of jams; raspberry (seedless preferred) blackberry
I used organic apricot, and organic blueberry, but you can use
choice of your own, even Nutella, which is great for chocolate lovers,
recipe, continued...


For the almonds:
Preheat oven to 350 degrees F. (177 degrees C) and rack in the center of the oven. Place almond on a baking sheet and bake for about 8-10 min. until light brown and fragrant. In a food processor, process with sugar, until finely ground.


For the dough:
In a separate bowl, stir your dry ingredients.


In a bowl of your electric mixer, or large bowl, with a hand mixer, beat the butter, and the 2/3 cup sugar, until creamy, and fluffy, beat in the vanilla extract, the egg yolks, and lemon zest. Add the flour mixture beating, just until incorporated. Divide the dough into two rectangular shapes, and wrap in plastic. Refrigerate until firm, at least one hour, or overnight. Remove dough from the refrigerator, and on a lightly floured board, or surface, roll the dough, until it's about 1/4 inch (1cm) thick.


Cut our shapes with a cookie cutter; circle, heart, star, square, or any other shapes you like, making sure to cut a hole in the center (cutter not shown), to let the jam show through!


Cut the shapes, making sure that every-other is cut with a smaller cutter in the center, to make it ready to sandwich the cookies.


Slide the cookies with a spatula (very important, so they stay in shape) on a parchment lined baking sheet, and bake in a 350 degrees, (177C) oven for 8-10 min. until lightly browned. Remove from the oven, to cool.


Re-roll scraps of dough to cut out more cookies, and bake to make more. When they are finished, and cooled on a rack, on the bottom half, spread a small amount of jam, and place cookie with hole, which you already have sprinkled with confectioners' sugar, lightly place on top.
(do not put too much jam on the bottom of the cookies, or it will ooze out when you sandwich it)


Now, I have to run to make Latkes, with my daughter Lora, (Cake Duchess) for Hanukkah...which begins at sundown tonight!
Happy, Hanukkah, to all my Jewish friends, non Jewish friends, as well... and those who celebrate this festive event with extended families, and friends!
Big hugs!

Enhanced by Zemanta

Wednesday, December 7, 2011

Orange Almond Mandelbrot...a.k.a Jewish Biscotti!

To think that I was going to skip making cookies for the holidays...when this morning, I called my daughter Lora, and said..."I want to make some biscotti...but you know, that  my kitchen is way too small, so I will come over to
your house and will make it there! Of course, she agreed, as she always does, because she likes to see me out of my "rut"...even though I live on the beach, but I get into those "holiday blues" just before the holidays, and I tell you...You got to snap out of it!!!...seriously! Life is too short...life is GOOD! It's what you make of it!
You want to feel sorry for this person...for that person...their sad situation, but when you seriously think about it, you really have to think about "yourself!"...You have "issues" just as the next person does...except, you deal with it much better than they do! They make you feel, that you have to help them, it's your responsibility!...enough said, just check out my amazing Orange Almond Mandelbrot (Jewish Biscotti) for the holidays!

Linking my Orange Almond Manderbrot to: Full Plate Thursday 12-8-11 @ Miz Helen's Country Cottage

Forgive me, for not "staging" my biscotti, with photo props, holiday decors, or anything "fancy, schmancy"...what you see, is what you get! ...but I promise you it's GOOD STUFF!...no fancy "frills"

Grandson Luca, checking his little "car programs" on Mommy's I-Pad, while Luigi is  checking out the new lawn chair!

 Stella watching me...while I'm studying the recipe for the Mandelbrot ...literally meaning: Almond Bread!


Orange Almond Mandelbrot
(originally adapted by, Orange Walnut Mandelbrot)
from: Rosie's Bakery, by Judy Rosenberg

2 cups all purpose flour
1 teaspoon baking powder
1/4 teaspoon baking soda
1 teaspoon salt
4 Tablespoons, (1/2 stick unsalted butter. at room temperature)
1/4 cup vegetable oil
3/4 cup sugar
1 Tablespoon pure vanilla extract
Grated orange zest, of 1 orange
2 large eggs
1 cup of sliced toasted almonds

Preheat oven to 350 degrees F. Line baking sheet with parchment paper. In a medium size bowl, mix baking powder, baking soda, and salt.

Using an electric mixer, on medium-high speed, cream the butter, oil, sugar, vanilla, and orange zest together in a medium size mixing bowl, until light and fluffy. Stop the machine twice, during the process to scrape the bowl with a rubber spatula.

Ad the eggs, one at a time on medium speed, mixing until each egg is partially incorporated, about 5 seconds. Scrape the bowl, after each addition.

Using the rubber spatula, mix in half the flour mixture by hand. Then blend with the electric mixer on low speed for several seconds. Add the remaining flour mixture and mix on low speed until the dough is smooth, about 5 seconds. Add the nuts with a few more turns. of the mixer.


Turn the dough out unto a work surface, and divide it in half. Dough will be somewhat sticky...that's why you need extra flour added unto the work surface, just as in the upper photo!

Form a strip about 3 inches wide, and 11 inches long, with both of the portions, and set it on to the baking sheet.


 Bake the dough strips at 350 degrees F. for 20 to 25 minutes, until golden, and firm to the touch!


Turn the oven down to 275 degrees F. Cut the biscotti, using a serrated knife, about half to 3/4 inch slices, slightly diagonal. Arrange the slices standing up, about 1/2 inch apart, and bake until crisp, golden... about, 20 minutes.


Turn the oven off, and leave the biscotti in for an additional 15 minutes longer. Then, remove from the oven, and let them cool on the baking sheets.


Now, you can drizzle the glaze on it, if you like!
Mix 1 cup powdered sugar, with about 2 Tbsp. of mil,, until smooth. If it's too dry, add a drop or two of more milk, if it's too thin, add more powdered sugar, until yo get the right consistency. Drizzle with fork...and  not spoon, unto the biscotti...just like Gabby does it, longways, and across, if you like.


Gabby (granddaughter) loves to do the decorating part.


After the drizzle part is done...comes the fun, decorating part, where you shake the multicolor sprinkle candy!


Store cookies in an airtight container, at room temperature, or freeze, for up to 2 weeks. Bring them to room temperature, before eating!

Makes up to, about 44 cookies!


Enhanced by Zemanta

Sunday, October 9, 2011

Chocolate Chip Fudge Brownies...and Breast Cancer Awareness!

I have featured my brownies quite a few times since a little over a year ago that I have been blogging...but trust me, this one is so different...so perfect...so chocolaty goodness...fudgy, and oh, so yummy! Really! I kid you not!
Exactly one year ago..give or take a week earlier, or later, I posted my Breast Cancer Awareness Month post, and  linked it back to my sweet food blogger friend, Joanna, from ChicGorgeous  since she had the most gorgeous pink cupcakes posted.

Linking this with Hearth and Soul Blog Hop #69


Chocolate Chip Fudge Brownies
adapted from: Bon Appetit magazine 1999

3/4 cup (1 1/2 sticks unsalted butter
4 ounces bittersweet Girardelli chocolate chopped
4 large eggs
1 1/2 cups sugar
2 teaspoons vanilla extract
3/4 cups all purpose flour
1 cup bittersweet Girardelli chocolate chips

Preheat oven to 350 degrees F. Butter a 13x9x2 inch metal baking pan. Stir butter and bittersweet chocolate in heavy medium saucepan over medium-low heat until melted and smooth. Remove from heat. Whisk eggs and 1 1/2 cups sugar in large bowl until pale yellow and light, about 3 minutes. Gradually, whisk in warm chocolate mixture. Whisk in vanilla, then flour. Mix in chocolate chips. Pour batter into prepared pan.

Bake brownies until tester inserted into center comes out with moist crumbs attached, about 25 minutes. Cool brownies completely in pan on rack. Cut into squares. (Can be prepared 1 day ahead.) Store in airtight container at room temperature. You can sift powdered sugar over the top!


“When you do nothing, you feel overwhelmed and powerless. But when you get involved, you feel the sense of hope and accomplishment that comes from knowing you are working to make things better."

~ Maya Angelou


Me and Cara, at Peter's house at  Rosh Hashanah celebration...Oct. 2011
At any rate, I did receive the most beautiful pretty little bracelet from my amazing daughter in-law Cara, whose mother also lost the battle...as did my own mother!

 so beautiful, and absolutely affordable to give as gifts for a tribute to family and friends who lost their battle  with breast Cancer. Check out the beautiful  Chan Luu  Breast Cancer Awareness Bracelet!
Enhanced by Zemanta