Showing posts with label Oven. Show all posts

Thursday, July 3, 2014

Unfried Chicken

Tomorrow is Independence Day...on 4th of July, and as far as I'm concerned fried, or grilled chicken cannot be left out. In my case, as much as I would love to get the gas grill going of my family's grill...it's 'not happening'...since I'll be elsewhere, enjoying my celebration with friends, while my daughter and family are still vacationing in Italy.
Chicken is a huge favorite of mine, and the entire family's...can't get tired of it since there are so many ways of preparing it. Frying the chicken is not an option these days for health reasons, so unfried, is the best way for 'fried' chicken lovers. Instead of breadcrumbs, or Panko, I used crushed corn flakes to pat on the chicken.  I got the inspiration from Bobby Deen, Paula Deen's son. Check out his recipe for the...
 Unfried Chicken
Instead of buttermilk, I used Ranch dressing from a bottle, to dip the chicken into, NO Egg whites needed, and I crushed the cornflakes to a finer grade, using a large zip-lock baggie, and just used the heel of my hand to crush it. Also added 1 cup of flour right in the bag, and added the chicken pieces right into the bag. Make sure you tap the crust so it adheres well.

Most importantly, I replaced the boneless chicken thighs like the recipe mentions, and got with the skin, and bone in. A lot cheaper with bone and skin on. I removed the skin, of course. Baked it for additional 10 minutes in the Le Creuset cast iron glazed skillet. I only baked 4 pieces, and will make an additional for the next day, or freeze it!
We have been getting rain, every day...for the month of June...I mean, heavy, heavy downpour! Also there's a Hurricane watch, which may come our way. Watching through the window on the front of the house...there's a cute papaya tree in the middle which is only less than a year old, and it has lots of papaya's...still green, but I saved a large papaya to ripen. We get sunshine every morning until about 2:00PM, then it gets cloudy and the rain starts for over one hour, sometime longer! Cools things down a little, but everything stays so green!

Friday, August 10, 2012

Jamaican Jerk Chicken Legs

TGIF-where has the week gone by?...pretty soon, the kids will be going back to school at the end of this month, and the end of summer vacation for most people, as well! Living in South Florida most of my life, and my children, 'native Floridians'...grandchildren not even knowing what cold winter, and snow is all about...glad that we are here in the 'land of sunshine'...not so much of it for the last couple months. Although we get a 'sneak preview' of it just about every single day, even if its for an hour, S. Florida is still the SUNSHINE STATE!
Often, I have a dilemma about what to make for 1 person (myself) for dinner, when I'm not at my daughter's which is just about every day. We cook together, or I cook (she does most of the baking)...but when I eat alone, about twice a week, I just don't want to heat up my little kitchen and waste electricity, so I use my George Foreman grill, or my toaster over to make a small portion, for (2) ...yes, 2...either for one, and have another portion fore leftover lunch, or invite a friend!
Have you ever tried cooking a gourmet meal in the toaster oven?...well, you can, you know, it's as easy, if not easier than in your big conventional oven! I've been doing this for a long time now, and my best friend suggested that I write a 'toaster oven cookbook'...which of course, I haven't but then, they already have them and she gave me a cute little toaster oven cookbook!

You have to have at least a large enough tray for the toaster oven to be able to fit at least 6 pieces of chicken comfortably, or for roasting a few pieces of vegetable, fish, or even baking cookies...seriously!

I'm gonna share 3 different recipes...one for the Jerk seasoning, 1 for the Basmati rice which is a cilantro-lime scented, and a fabulous Cuban , authentic Havana based black beans, which you can mix with the rice, or serve it separately! So, are you ready?...because I will guide step-by-step for this semi-spicy delicious Caribbean dish, that will take you away to the island of Jamaica...or the Havana black beans to the 'forbidden island'...which I will not go into a long explanation but just that; it was referred to as the 'jewel of the Caribbean'...the largest of the Caribbean islands...frozen in time, from the 1950's!... see link-Caribbean, Havana!
We have a huge population of Cubans here, in S. Florida, as we also have a large population of Jamaicans, and Haitians. We have so much 'island influences' that you do not have to venture far to authentic cuisines of these colorful, tasty, spicy, Caribbean influences of their culture!


Remember my trusty little Better Homes and Gardens recipe box?...I featured this last year, with all my old scribbled...copied recipes, and some on little index cards from the eighties...some torn out pages with pictures; but let me tell you...these are truly 'treasures' that I can make, and have made in the past. Recipes that are really a 'labor of love' ...and hand-me-downs, although I have some scribbled pages tucked away in some old treasured cookbooks!

The Jamaican Jerk Seasoning...and Marinade, which I have adapted from the scribbled page, is another one that I have saved (no photo of it) ...although I have not made this spicy delicious chicken in a long time, I decided to make it on a smaller scale...using my Cuisinart Toaster oven, that is just as strong if not stronger, than my conventional big oven! Save time...save energy...save money on your electric bill by using a smaller oven that you can bake, broil, toast, just about anything, and everything that will put a 'smile' on your face, because you have minimal clean-up!

Jamaican Jerk Chicken Legs
adapted from 2 various sources

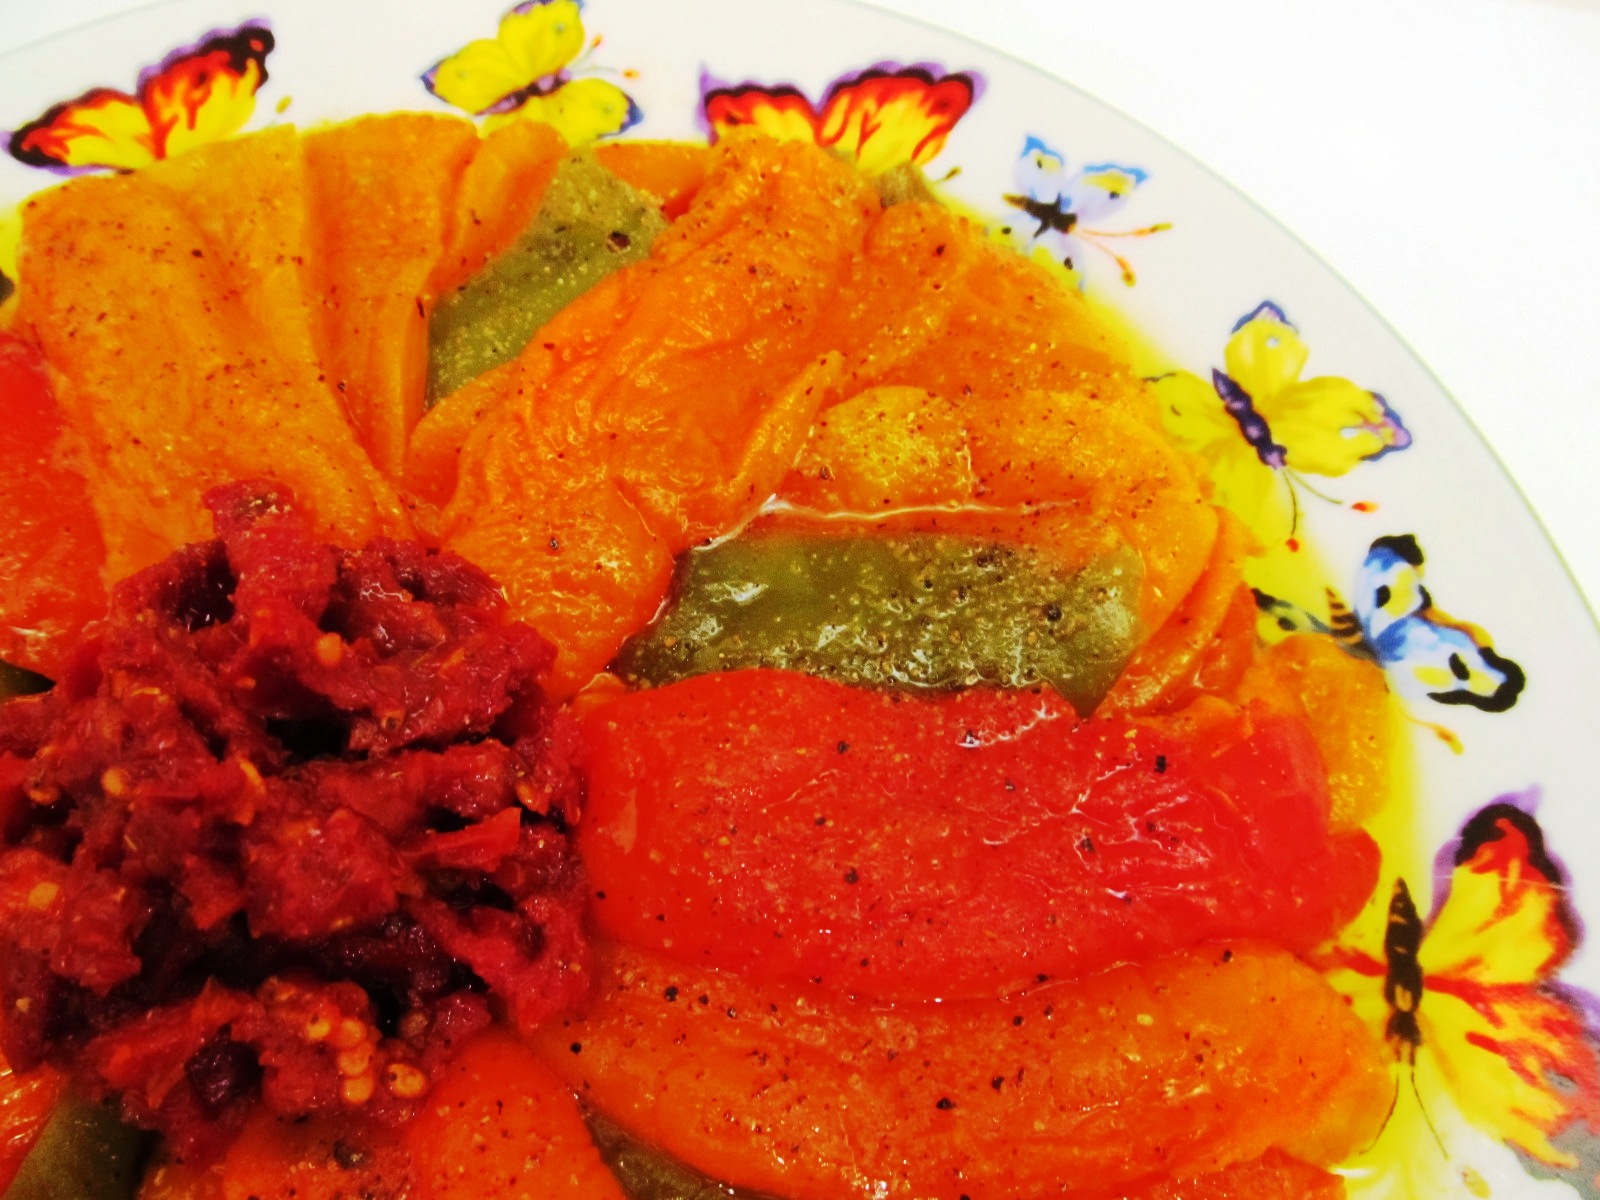
1 Scotch bonnet, or Jalapeno, or Habanero pepper,
seeded and chopped
(you can use one of each...if you dare)
4 scallions sliced into 2-in. length
3 cloves of garlic, peeled, and chopped
3 Tbsp. fresh ginger, grated
(about a 2 inch piece)
4 sprigs of fresh thyme chopped
(or, 1 1/2 teaspoons dried)
2 bay leaves, crumbled
1 Tbsp. all-spice, ground
1 teaspoon cinnamon powder
(or 3 teaspoons, dried)
2 teaspoons English style dry mustard
salt and pepper to taste

For the sauce:
created by; Elisabeth

1 cup crushed pineapple
1/2 cup tomato juice
1/4 cup vegetable, or canola oil

Mix all the ingredients together in a blender,
and brush on the chicken as a glaze
note: brush on only, at the last 20 minutes. You can
double this recipe, and also use it for dipping, and adding
on extra sauce at serving time.

For the seasoning (spice rub) ingredients: Put all the ingredients in a food processor, and mix together till everything is pureed into a powdery form. This spice rub is plenty enough for a 3 1/2 lb. chicken, so you will not need all of it for 6 pieces. Just use half the amount, and save the other half in a jar, or plastic container in the fridge to use later.

In a large zip-lock baggie, place the chicken pieces, and pour half the amount of the spices...or use the entire amount if you are making a lot of chicken parts to marinade. Close the bag, give it a good shake, and refrigerate up to 24 hrs. no less than 2hrs. (the longer, the more tender your chicken will be, and more flavorful)
Grill, or bake @ 350 F.for l till about 45- 50 minutes, just remember to brush with the sauce the last 20 minutes.


Havana Black Beans

2 15-oz. canned black beans
(you can make your own, from dried
if you prefer)
1 teaspoon dried thyme
dash of cayenne pepper
half of a green pepper, chopped (opt.)
2 cloves garlic, chopped
2 bay leaves
1 Tbsp. canned chipotle sauce,
8 oz. can of tomato sauce
juice of 2 limes
1/2 cup of water
1 Tbsp extra virgin olive oil
2 scallions finely chopped
1/2 cup finely chopped cilantro

In a medium saucepan, add saute the garlic, the pepper and the scallion in the olive oil, add the bay leaves, slice one of the limes, and add into the saucepan, and use the juice of the other, or (you can just use the juice of both limes)
Add the chipotle sauce, the tomato sauce, and the 1/2 cup of water, bring to a boil, and cook for about 10 minutes.
(you can remove the lime slices and the bay leaves at this time)...drain the liquid from the black beans, and add it to the sauce ingredients, add the thyme, and cayenne pepper, and adjust seasoning with salt and pepper. You can serve the beans separately, or make a batch of Basmati Rice, adding cilantro, and lime juice while cooking the rice!

This is so incredibly delicious with the Jerk Chicken, that your family or friend will think you slaved away all day making this amazing dish!...and don't forget the frozen Margarita cocktail...(which I will have to borrow from one of my fabulous foodie friends)

Have a blessed and peaceful, wonderful weekend!
xo

Enhanced by Zemanta

Thursday, May 24, 2012

Popovers...and Good Bye!

No...I'm not saying Good Bye...although, I wanted to take a break, which I did for a week, and then again, just recently, with all the stress and making my final decision to have my precious, and loyal companion, Prince, my beautiful Maine Coon kitty. On Monday, May 21st, we had to part and say our last "Good Byes." I will tell you more about it at the end of my post. After all, this is a blog about food, and thrift, and I should concentrate on these, but it's very, very, difficult to do so while my heart is weighing so heavy with grief!

Since this Monday, I don't know how I functioned...well, not so good! I'm glad I had my guest post ready for Ping by last Sunday evening, and another 2 guest posts for the month of June for Lizzy, and Veronica. You know how it is with some people? When they are stressed and under pressure, they shop, and shop!

I also do that...did that in the past, spending money needlessly for some things that I didn't need. The only difference for the last 10 years, I have learned how to budget, save money, and shop wisely.

Thrift shopping is such a fun thing to do, especially when you find useful, expensive, sometimes practically all new items, for fraction of the cost that you would pay full cost. Just take a look at this cool popover separated cups...very heavy duty, and non-stick...it really was brand new, but I only paid $2.99 for it at my local Goodwill. I think you can even make mini cakes, or muffins in them...very, practical, and useful! I also found a great Bread Book, a soft covered 1983 HPBooks that has amazing yeasted breads and rolls, just don't know how the Popover recipe ended up in this book. It certainly does not have any yeast, and it oh, so easy to make.I love the breads, rolls, and biscuit recipes in this book. The cost?...$1.49 for a beautiful book with photos, instructions and great bread recipes! I also order amazing books from Amazon.com...just love, love all the things they have on Amazon!


Popovers
adapted; from HPBooks Breads

1 cup all-purpose flour
1/4 teaspoon salt
2 teaspoons sugar
1 cup milk, room temperature
2 eggs, room temperature
1 Tbsp. vegetable oil

Generously butter (I used cooking spray) 8 (5-to 6-ounces) custard cups, or 10 muffin cups, or 6 popover cups. Place custard cups on a heavy baking sheet. Place muffin cups, popover cups or baking sheet on center rack of oven.

Preheat oven to 450 degrees F. (230C) Combine all ingredients in a BLENDER. (seriously, a blender.) You can use a food processor or small bowl of electric mixer. Blend until batter is smooth, scraping sides of container, if necessary. Remove hot baking cups from oven; spoon in batter until 2/3 full. Immediately return filled cups to oven. Bake 20 minutes. Reduce heat to 350 degrees F. (175 C) Bake 20-25 minutes longer or until browned.

Run a knife around edge of baking cups to loosen popovers.

Note: After batter is prepared, it can be stored at room temp.. for 2 to 3 hrs. before baking. Keep oven door closed during the first 30 minutes of baking.  A draft will collapse popovers. Popovers have a moist interior. It's important that you have the milk and eggs at room temperature, and the popover, or muffin pans preheated.

My beloved kitty, Prince has ended his life on Monday afternoon, on May 21, 2012...after a long illness that he has endured for the last 2 years. He was my constant companion for the last 15 of his almost 20 years. My daughter is the one who originally had him for the first 5 years, after finding him at her apartment, during her early college days.
Prince has been  a loyal companion to all of us...a very sweet, intelligent kitty. He has literally wasted away at the end, and I insisted that I will not have him put down as long as he is able to eat, and be able to walk. A sudden change came over the last weekend...on Monday, he refused to eat, and his poor legs gave out after a few steps. I knew right there that I have to quickly make the choice. I was able to comfort him, and say my last Good Bye...as did my daughter, and grandchildren, when I brought Prince over to Dr. Eric, as instructed. He will surely be missed by all of us. I did all I could to keep him comfortable, and prolong his days...but there's a higher power, who decides the end is here!

IS THERE A PET HEAVEN?
While there is no decisive answer to the question, “Is there a pet heaven?” a few things are clear indeed. First, pets bring tremendous joy to their owners, and can teach them a great deal about compassion, kindness, and mercy. Second, many pets live their whole lives in the service of their owners, trying to please them, make them happy, and cheer them up when they need it. Third, if there is a heaven, then there is a God, and they are His creatures. All of these things give tremendous plausibility to the idea that.... yes, there is a pet heaven, waiting for all of the good animals, after they die!

Photo of my beloved Prince...at the young age of 5, when he came to live with me...nearly 15 years ago! May you rest in peace...you will always be in our hearts!


Enhanced by Zemanta

Tuesday, May 24, 2011

Roasted Peppers, the Easy Way!

If I show you step-by-step how easy is to make the best roasted peppers in your own oven, I guarantee that you won't buy the jarred kind, which does not come remotely close to the homemade kind. I'm not going to convince you that it's cheap to buy red, yellow, or orange bell peppers, but if you can find a local produce market, chances are they always have bulk buys of whatever kind of vegetables that they have an abundance of, or they are getting a little too ripe, so they will put it on sale. Our local Cuban produce market has the freshest and such a variety of every kind of produce you can find.

I'm linking this to Full Plate 5-26-11 @ Miz Helen's Country Cottage

 also...HURRY,
You don't want to miss out on this giveaway on Lora's blog @ Cake Duchess Honey Girl Organic Skincare products, from Hawaii. Be sure to check it out!

You can visit their website to learn more about their amazing products! There is even a video here on this page that shows how they get the honey from their own bees in Hawaii.

honey%20girl%20organics_2007_ed


I was so thrilled when my daughter gave me 2 large bags of peppers, and zucchini, that she bought for $1.00 each bag from the produce market. That's what I call a real thrift buy and I am truly grateful for it.
If you love peppers as much as I do, follow me through all the steps and I will show you how easy it is to make roasted peppers.

This is where the easy part comes in. Cut the peppers in half, and clean the seeds out. Also, discard the core.
Depending how many peppers you have, Line one or two bake pans with aluminum foil.

Place the peppers facing down, and spray with cooking spray. You can also scatter some garlic cloves around them. Do not drizzle with oil, or it will get too wet. Peppers will release a lot of liquid during roasting time. You don't have to season peppers at this stage.


I would have preferred also some red and yellow, although there was one red pepper in the bunch. What can I say? This bunch cost $1.00. I am happy with this "loot." Set your oven at 425 degree F. Roast peppers for about 45 minutes, do not turn them...it's not necessary.
When they appear wilted, and wrinkled like in the photo, you can remove from the oven.


Have a large plastic baggie ready. With a tong, remove peppers to place into the bag and snap it closed.


Put all the peppers in the bag, and let it sit in the bag for about 20 minutes...by that time they will also cool down and it will be easier to peel the skin off.


Empty the peppers into a colander and place into a clean and empty sink.


Just look, how easy the skin comes off. Pile the peppers on a platter, and ready to prepare them.


These are the peeled peppers, ready to be sliced.


On a cutting board, with a small sharp knife, slice all the peppers, and line a platter decoratively.


Line a platter with the peppers, and in between the layers, drizzle a very nice extra virgin olive oil, and white balsamic vinegar.


This is the amazing White Balsamic Vinegar I used to drizzle on the peppers. Notice that it's fig infused which gave a slight sweetness. Just sprinkle with sea salt, a small amount of garlic powder, and freshly ground pepper, and you can also add a nice touch of sliced sun dried tomatoes in olive oil.

note: you can also add the roasted garlic pieces to the layered peppers. The reason I added garlic powder, because fresh garlic overpowers the sweet natural flavor of the peppers.


I like to make my own sun dried tomatoes, which I do quite often and keep in a jar, but I did find this beautiful California Sun Dried Julienne Cut tomatoes which I truly love to add to my recipes.


Just look at the beautiful vibrant colors...the sun dried tomatoes, and the roasted peppers. You can add them to sandwich, use as appetizer with crunchy pieces of bread, add them to pasta, or salad, and you can also add them to cooked vegetables...Enjoy!
Enhanced by Zemanta