Showing posts with label Vinegar. Show all posts

Monday, March 4, 2013

Eggplant Caviar

Continuing with my usual blogging has not been the easiest and smoothest thing on my list of things to do...just like my daily tasks these days, but I'm trying my best to catch up. I know I owe you, my dear friends comments, and replies on your blogs. It's not enough to be replying back on  my comment section, it should be done directly by visiting your blogs.

So, I will try harder...you've been all so sweet and kind with all your comments. I thank you for that!
I seldom make eggplant dishes, although I do love eggplant...as do all my family. So many ways of preparing it, for appetizers, side dishes, and main dishes. It is so versatile and can be prepared so deliciously, just like I made it for a wonderful appetizer.
 Eggplant Caviar is another favorite Sicilian dish which I have been making for a long time. It is quite similar to the famous Caponata, but with less ingredients, and is simplified, using only a few additions. Also, traditionally it is peeled and mashed up into a paste-like concoction which is not so attractive...so I prefer to leave the skins on which as you can see is soft and edible, and also leave most of it in chunks. All you need is some crusty bread, and enjoy!

Eggplant Caviar
recipe by; Elisabeth

1 large eggplant
1/4 cup plus 2 Tbsp. extra virgin olive oil
1 teaspoon red wine vinegar
2 cloves garlic minced fine
1/4 cup small capers
juice of 1 lemon
a handful of fresh chopped Italian parsley
sea salt, or Kosher salt to taste
fresh ground black pepper to taste
crushed red pepper flakes, about 1 teaspoon

Preheat oven to 400 degrees F. Line a baking sheet with dull side of the aluminum foil side up; spray with cooking spray. Cut eggplant in half, lengthwise then cut into thirds, and into segments as shown on photo. You can spray some more spray on the eggplant slices, or drizzle oil. (I sprayed mine with cooking spray)

Bake for about 20 minutes, and check to see if it needs liquid; just don't add any more oil...add about 1/4 to 1/2 cup of plain water to the pan...it will soak into the eggplant. Continue baking for another 25 minutes.(45 minutes total)

When eggplant has a brownish color and soft, carefully take the hot baking pan out and remove the eggplant pieces with a flat spatula onto a cutting board to cool for a few minutes then, cut into bite size pieces.

Have a medium size bowl ready to add the 1/2 cup oil, the chopped garlic, pepper flakes, capers, parsley, the vinegar, and the lemon juice. Add the salt and pepper. Carefully add the eggplant, you can mash some of them up. Stir carefully, and serve it on small plates for first course, or just appetizer. Drizzle extra oil on top, and garnish with extra parsley.  Serves 4
Enhanced by Zemanta

Monday, November 19, 2012

Fennel, Orange, and Onion Salad

With Thanksgiving around the corner, you'll want to eat lighter the few days before, to save some calories for the big Feast! One of my all-time favorite fall, and winter salad is the fennel and orange, paired with red onions, capers, on a bed of your favorite salad, or salad leaves; such as Romaine, or for that matter a simple Iceburg which I had leftover from using shredded lettuce to accompany last weeks tacos (sorry, no photo)
Fennel is so refreshing, so crispy and if you like licorice, you will love the flavor of this delightful fennel bulb, trimmed, and sliced into 1/2 inch pieces...and don't throw out the fronds; they make an excellent decoration...kind of reminds you of dill fronds, but not as strong...they are perfectly eatable, as well!
Back in 2000, when I first started my WeightWatchers diet (lost 37 lbs.) is, when I discovered this wonderful salad...with -0- points if you don't use a dressing with extra virgin olive oil...actually even with just 1 teaspoon of the oil, and a white wine vinegar dressing, I still think it's -0- points a serving...so go ahead, and enjoy this beautiful salad...and by the way, if you're wondering how to cut beautiful segments of oranges; watch this video that will show you how easy to segment an orange.

Fennel, Orange, and Onion Salad
recipe ; by Elisabeth... Weight Watchers inspired

1 small fennel bulb, trimmed, and cut into 1/2 inch pieces
1 naval orange, peeled, and sliced into segments
1 red onion, halved, and sliced thin
1 Tbsp small capers, drained and rinsed
sea salt, and freshly ground pepper to taste
1 teaspoon extra virgin olive oil
2 teaspoon white wine, or rice vinegar
small amount of leftover orange juice from the segments
Your favorite salad leaves, or bed of salad
Chopped fennel fronds

In a medium bowl, mix together the fennel, the red onion, the capers, and carefully mix in the cleaned orange segments. Toss with the oil, and vinegar. and serve on a bed of lettuce leaves, or your favorite salad mix...salt and pepper to taste, and top with fennel fronds. Serves 2-4... very tasty, mild, and refreshing.


Linking to: Cast Party Wednesday Link Party, @ Lady Behind the Curtain


Enhanced by Zemanta

Sunday, October 28, 2012

Red Velvet {Birthday} Cake with Cream Cheese Icing

As you may know we've had a very stormy week, starting last Wednesday, and expecting the worst by Thursday, and Friday...kids having half a day of school on Thursday, and off on Friday, due to Hurricane 'Sandy' lurking around our area in S. Florida...leaving a mess behind in Cuba, and Haiti. Now, heading up to the east coast...already causing havoc in North Carolina! Luckily, we escaped a lot of what could have been really bad damage, just heavy winds, to deal with and a lot of downpour of heavy rains.
The only time you will see a frosted cake posted on my blog, when I make one for a special occasion...and this certainly was! My granddaughter Sophia just turned 11...the second oldest of the 4 grandchildren that I have. Gabriella had her 11th birthday in August. This was a special request from Sophia, she's such a 'sweetheart' and knows exactly what she wants. Red Velvet Cake is an 'all American' Southern cake...and don't let anyone convince you...otherwise:) Some like it 'ruby red'...but since there's cocoa powder used, I like to have a dark reddish/brown
version of this famous cake!
Most recipes call for cake flour, but the recipe that I adapted this from called for all-purpose flour. When using cake flour, you do not add baking powder, just baking soda, but I figured baking powder addition to the all-purpose flour would lighten it up...and it did; so moist, perfect, and yummy. Also, I cut down on the sugar, as well!
My two 'angels' Sophia on the left...and Gabby (cousins)...but more like sisters!


I don't like my Red Velvet Cake to be a
bright red color...so I added the special dark Hershey's cocoa, instead of the regular one. When you chill the cake, you can cut a perfect slice, just like this! I will share this 'failproof' and perfect recipe with you, step-by-step, so READ on!
Red Velvet Cake with Cream Cheese Icing
 slightly adapted from Wilton
  • 2 cups all-purpose flour
  • 2 tablespoons cocoa
  • 1 teaspoon salt
  • 1/2 cup (1 stick) butter or margarine , softened
  • 1-1/2 cups granulated sugar
  • 2 eggs
  • 1 cup buttermilk 
    1 teaspoon baking powder
  • 1-1/2 teaspoons baking soda
  • 1 tablespoons white vinegar

    Preheat oven to 350ºF. Spray 2- 9 in. pans with vegetable pan spray.

    In a medium bowl, stir together flour, baking powder, cocoa and salt; set aside. In large bowl, beat butter, sugar and vanilla until light and fluffy.


    Add eggs and red icing color; mix well. Add flour mixture alternately with buttermilk to butter mixture, beating until well blended. Stir baking soda into vinegar and fold carefully into batter. Pour batter into prepared pans.

    Bake 25-30 minutes or until toothpick inserted in center comes out clean. Cool 10 minutes; remove from pans to wire racks. Cool completely.

    To Ice: Spread a thin layer of cream cheese icing on bottom cake layer. Top with remaining layer and spatula ice cake fluffy


Enhanced by Zemanta

Monday, December 12, 2011

It's The Season...for Dill Pickles?

It's The Season To Be Jolly...for Dill Pickles?...yes, and what a great gift for someone special who loves dill pickles, and better yet, homemade! You really can make your own fresh dill pickles, you don't need a whole case of canning jars, just two large 32 ounces (guess you would have to buy the whole case)...just need two large jars, 3 days to let it marinade in the homemade brine, and you can open it, and enjoy a crispy dill pickle with your favorite sandwich or burgers...yumm!
I must confess, I love pickles...any kind, dill, sweet, hot, half sour, but dill pickles, are my all-time favorite. I could munch on it, just by itself. Why would you want to pay $2.00 for a large dill pickle from the deli, or buy a jar of the refrigerated Kosher Dill's for up to $5.00 for a large jar, or even more! Those pickles are very good, and crispy crunchy, but sometimes they are too sour, too garlicky, or not sour enough. When you make your own brine for your pickles, you know that they are pure...no preservatives, no funny "off" taste, just pure fresh, crunchy dill pickles.

I checked so many different recipes, googled quite a few, but nothing seemed to be what I really wanted. The most important thing is the BRINE, and to make sure the pickles are the freshest, Kirby pickles you can find. The have to be really a nice healthy green color, no blemishes, and be sure they are firm! We find these at this time of the year in South Florida, the best to find is at a local produce market, or of course Whole Foods store.

Fresh Dill Pickles Home Made
my own recipe

2 cups white distilled vinegar
6 cups water
2 Tbsp. Kosher salt
4 cloves peeled fresh garlic
1 Tbsp. whole black pepper corns

2 small bunches of fresh dill (cut off bottoms)


6 to 8 Kirby pickles


In a large stainless steel pot, add the vinegar, the water,
salt, pepper corns, and bay leaves. Do not add the garlic or dill at this time, or the dill will get too wilted, and the garlic will get blue spots from the brine. Bring water to a boil, and boil on med. low for about 15 minutes. Shut the heat off, and let it steep for another 15 minutes OFF  the heat. Wash pickles real well in the sink, or in a bowl, and take off the end stem, if any. Make sure your jars and lids are sterilized already. You can just run it through the rinse sickle of your dishwasher, or boil them in a large pot of water for about 10 minutes, and let it cool down.

Cut the pickles in half, or in spears, and carefully pack  them in the jar, with the clean dill sprigs, and place the 2 garlic clove each, for the two jars, on the bottom. You can now pour the pickling brine almost to the top, making sure you spoon out the pepper corns, and the bay leaves to divide among the two jars. Close the lid tightly, and when it gets cool enough, place them in your refrigerator, for at least 2 days...3 or more days, is even better, up to 1 week to marinade. (I only kept it for 3 days before I opened the jars)

Make sure you check the jars at least twice a day to turn it upside-down, to let the marinade flow through all over!
Keeps up to 4 weeks in the fridge...if it should lasts that long! Very, very good, not too sour, not to garlicky, just right, crispy, crunchy and totally the best pickles, if you love Dill pickles!


Since I'm a "thrifter" I used last year's Christmas wrap to cut about two 4x6 inches of wrapping paper, overlapped the two, placed it on the jar top, placed a rubber band around it, and with plain scissors, cut around it in a zig-zag design. I also purchased a roll of gorgeous bow from Michael's, which is such an amazing store for crafts, and things, for $2.99 on sale, at a 50% discount. Tied a nice bow around it, and my special gift is ready for a special pickle lover recipient! The other jar, I already opened, to keep for myself, and to share with family! (also for my photo shots)

You can use smaller jars, for the pickles, (probably about 4) Recalling one recipe, on the Internet, I really cringed at the thought of up to 10 lbs of Kirby cucumbers, putting them in the bathtub...yuk! Doesn't matter how clean is your bath tub, to me, just is not something I would do. In a clean kitchen sink, with less...let's say about half the amount, maybe up to 5lbs, is more like it! ...but then, you need a lot of empty sterilized jars, and a "cold basement"...which we do not have here, in South Florida, so small amount is the best, and to refrigerate it!

So that's it for now...just a little suggestion for 1 of many, many homemade gifts you can give with "love" and from the "heart"
Thank you for all you kind and loving comments, I appreciate all of you, and just don't go overboard trying to please someone with "unrealistic" spending. You can make a person so happy, just by making something by hand, like crafting, baking a special treat, give a nice picture frame with a favorite photo of yourself or them; any of these gifts cost so little, yet means so much to the recipient you are giving it to!
Hugs, to all!
Enhanced by Zemanta

Thursday, March 10, 2011

Baked Barbecue Country Pork Ribs... and a giveaway!

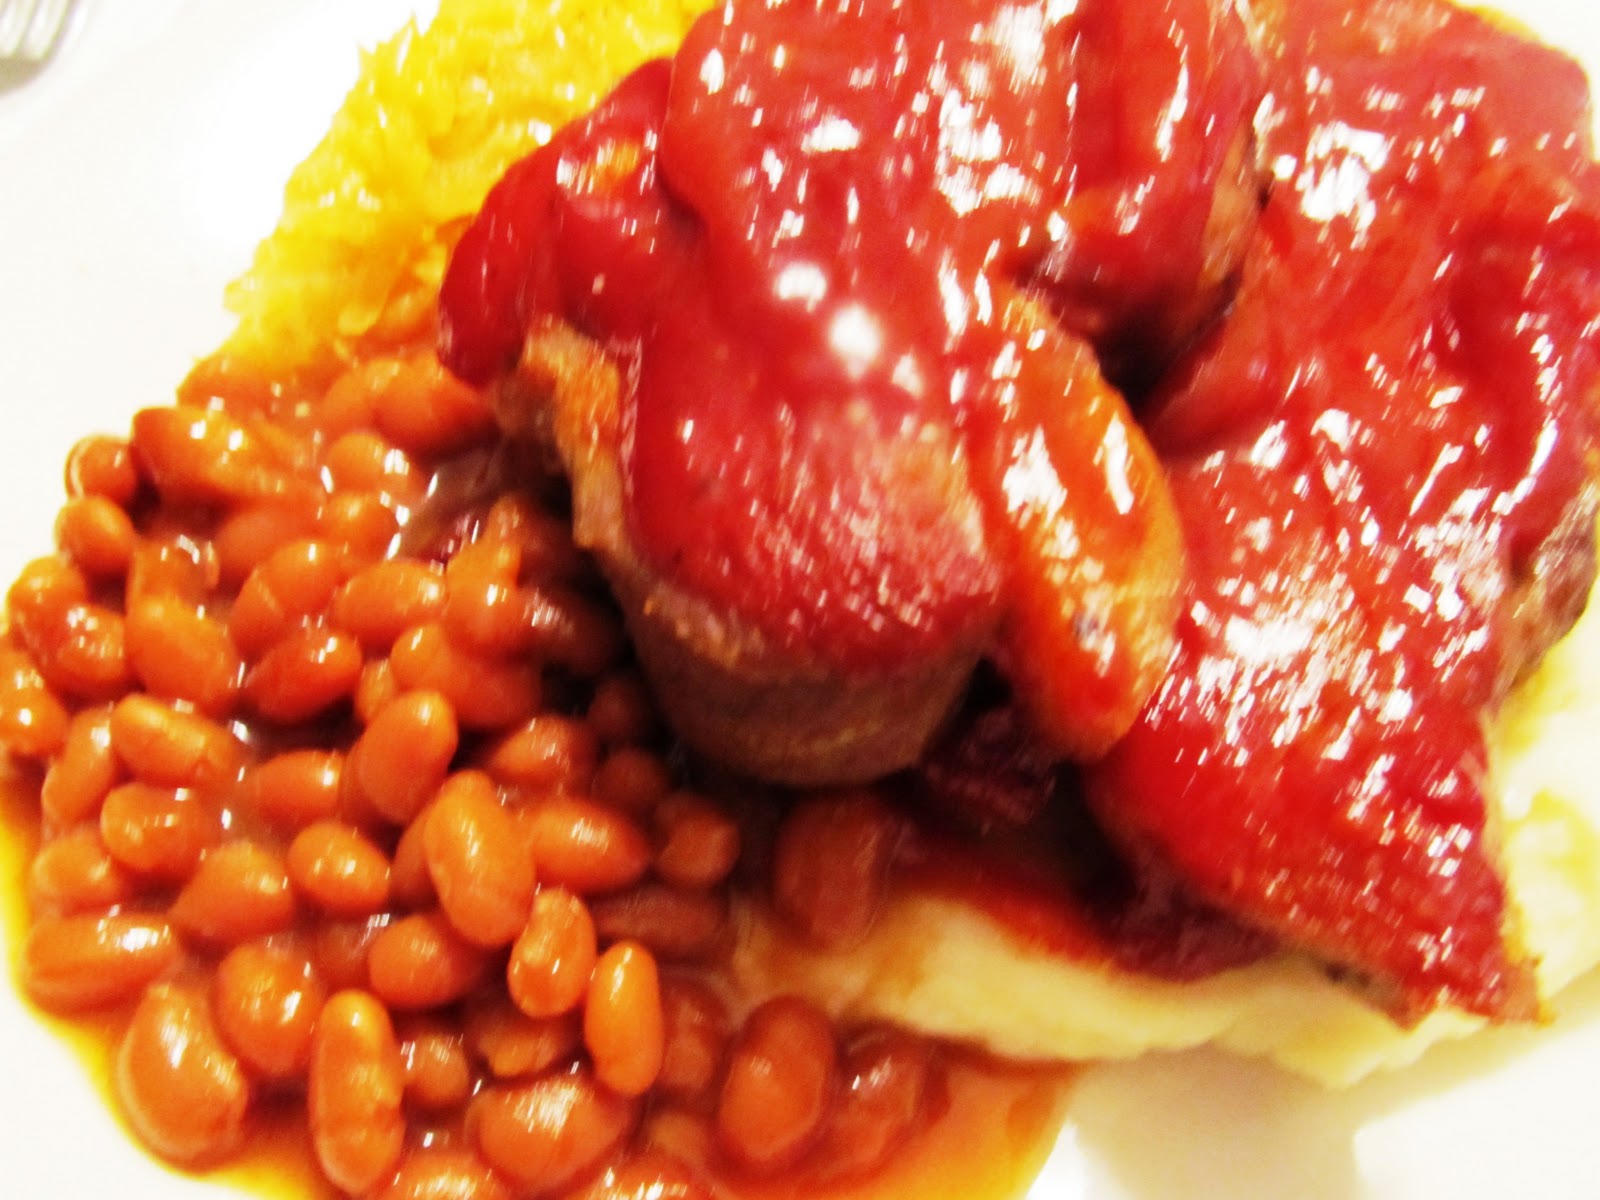
This may not be a "baking blog" but I assure you, for sure it's a "food blog", which actually, in the beginning, less than a year ago, started out to be a blog about mostly thrifting, and some food. We all have to eat, but where, and how we eat, and mostly what we eat...who we eat with, seemed more of a challenge than finding a bargain at our favorite thrift shops. I like to make my rounds every week, to cook at my friends' once a week, or at my daughter's or my son's, so basically, I only cook for myself about twice a week, realistically. It still is a late winter for some of you, but for us right now, is our spring. A barbecue "indoors" is so much easier, when it's for 2 people, than barbecuing outside and dealing with all the cleanup mess. I found these lovely country ribs at my local market, and I knew what I would want to make as a side dish with it to share with my friend. A side of "doctored up" baked beans, mashed potato, and sauteed sauer kraut. Yumm! As a matter of fact, everything was doctored up...even homemade barbecue sauce for the ribs...and let me tell you. You can have "finger licking good" barbecue sauce that you made, instead of the ones in a bottle, which is ready made. Slather it on for the last 25 minutes, and you have the best barbecue ribs, "this side of south Florida"...not Texas!

Before I get to the recipe, I want to share an amazing thriller book with you, with a giveaway, hosted by my friend Patty, @Books, thoughts, and a few adventures...
She mentioned to me about this amazing book, and the author, and it immediately caught my attention, because he is another cat lover, as I, and Patty...besides writing this amazing thriller. I do read other books, besides cookbooks. Incidentally, I will introduce to you another thriller book next time, that my son Joe wrote, self published through Amazon, recently, but first, I would like to introduce to you, James Le Pore, and his first and most thrilling novel called, A World I Never Made


About James LePore

James LePore
James LePore is an attorney who has practiced law for more than two decades. He is also an accomplished photographer (his work can be seen at www.nakedeyeimages.com). He lives in South Salem, New York with his wife, artist, Karen Chandler.
A World I Never Made, his first novel, was written after extensive research into the history of Islam on the Iberian Peninsula, and travel in Europe and North Africa. Mr. LePore writes novels of suspense, driven as much by gripping stories as by strong, complex characters. His second novel Blood Of My Brother, will be released on December 25, 2010; his third, Sons and Princes, in May, 2011.
Mr. LePore is a writer of short fiction as well. His stories stand alone as dramatic works, but are also meant to illuminate the central characters in his novels. Anyone Can Die, a collection of short stories written to accompany A World I Never Made, will be released in February, 2011.
Mr. LePore is currently at work on his fourth novel, the story of a Manhattan district attorney whose son is wrongly accused of murder, which The Story Plant will publish in fall, 2011.
To find out more about James visit James LePore Fiction

About A World I Never Made

A World I Never Made
Pat Nolan, an American man, is summoned to Paris to claim the body of his estranged daughter Megan, who has committed suicide. The body, however, is not Megan’s and it becomes instantly clear to Pat that Megan staged this, that she is in serious trouble, and that she is calling to him for help. This sends Pat on an odyssey with Catherine Laurence, a beautiful but tormented Paris detective, that stretches across France and into the Czech Republic and that makes him the target of both the French police and a band of international terrorists.
Juxtaposed against this story is Megan’s story. A freelance journalist, Megan is in Morocco to do research when she meets Abdel Lahani, a Saudi businessman. They begin a torrid affair, a game Megan has played often and well in her adult life. But what she discovers about Lahani puts her in the center of a different kind of game, one with rules she can barely comprehend, and one that puts the lives of many—maybe even millions—at risk
 
A World I Never Made is an atmospheric novel of suspense with brilliantly drawn characters and back-stories as compelling as the plot itself—a novel that resonates deeply and leaves its traces long after you turn the final page
Before I tell you anything more about the giveaway, you will have to stop by Patty's blog
@Books, throughts, and a few adventures... leave a comment for the exciting giveaway gift... and I know you will want to follow her fabulous blog!

Now on to my recipe for the Oven baked Barbecue Country Pork Ribs.

Baked Barbecue Country Pork Ribs
my own recipe

8 pieces of Country Pork Ribs, with or without bones
(I have some with, and some without bones)
Salt and pepper to taste
Garlic powder
1/2 cup plain white vinegar
4 Tablespoon vegetable oil
1 sliced onion
Dash of Worcestershire Sauce

In a large casserole lay out the ribs, they could be overlapping, and pour 1/4 cup of the vinegar, and fill with water. Soak for about 30 minutes and pour off all the liquid. In a large rimmed baking pan, line with aluminum foil, and place the ribs, drizzling with the oil, the additional 1/4 cup vinegar, salt, pepper, garlic powder, and add about 1/4 cup water. Slice the onions, and scatter them throughout. Cover loosely with foil, and bake in a preheated oven for 45 minutes on 375 degrees. Remove foil, and turn ribs over to bake for an additional 30 minutes, uncovered. Spoon, or brush your favorite barbecue sauce on top, and bake for another 25  minutes, or till tender. It should not take more than 1 1/2 hrs, total. You can pour out excess liquid to save, or discard, before spooning on the barbecue sauce. I made my own homemade sauce, that is quite easy, and yummy, as well. 4-6 servings. I served mashed potatoes, sauteed Hungarian style Sauer Kraut, and "doctored up" baked beans. Totally comforting dish.

Homemade Quick Barbecue Sauce

1 cup ketchup (I used Heinz)
1/4 cup yellow mustard
1 Tablespoon brown sugar
Dash of Worcestershire Sauce
Dash of hot sauce

In a small saucepan, mix all the ingredients together and heat to a boil. Spread sauce on the ribs the last 25 minutes. Do not turn ribs over. You can make additional sauce if you like...double the recipe, but this should be enough for eight pieces of ribs.

 I just had a request from a lovely lady, Mari @Mari's Cakes to post my sauer kraut recipe. Mari is a professional cake baker and decorator, (if I' wrong about this, sorry) She makes the most gorgeous cakes that you can imagine, with decorations that blow you away. She resides in the Dominican Republic, and her blog is in Spanish, and English. Do visit her blog...you will be glad you did, and follow!

Sauteed Sauer Kraut

32 oz. bag, canned, or jar sauer kraut
1 small onion chopped
1 Tablespoon vegetable oil
1 teaspoon Hungarian hot, or sweet Paprika
1/2 cup water
1 teaspoon whit vinegar
salt and pepper to taste

Empty sauer kraut in a colander, and rinse off the brine, under running water in the sink. Squeeze the liquid, and set aside until ready to saute. First, in a medium saucepan saute onion in the oil, over medium heat until transparent. Pull
aside from the heat and add the paprika, and the 1/2 cup of water, and the teaspoon of vinegar.Add the sauer kraut, the salt and pepper, and set the heat to low. Cover, and steam for about 20-30 minutes until soft and thickened. You can add a little more water, if it starts to evaporate. Serve as a side dish with the barbecue ribs, or other meats. Goes well with pork, or ribs. Serves 4.


So, this was a fabulous decadent chocolate fudge cake that I did "not" make, which I purchased at the bakery section of my supermarket, and I have to be real honest, this cake was the most sinfully ooey, gooey thick chocolate fudge cake that I could not have made better, myself. I shared this with my BFF friend Barbara, actually, I only had a small piece, and left the rest to her, because I cannot trust myself when it comes to "chocolate"...especially chocolate cake, or ice cream!

  •  
  •  
  •  
  •  
  •  
  •  
  •  
  •  
  •  
  •  
  •  
  •  
  •  

  •  
  •  
  •  
  •  
  •  
  •  
  •  
  •  
  •  

  •  
  •