Showing posts with label Pizza. Show all posts

Monday, October 13, 2014

Pepperoni and Mushroom Pizza

Hi everyone! Not much to post since nearly 2 weeks of absence. Although, I did post my Pepperoni and Mushroom Pizza photo on facebook...which I have also been absent from for 3 months now. Wasn't a smart thing to post the pizza photos, since I didn't have it on my blog and it made it look like I just posted a 'random' store bought pizza.
I don't know about you, and how you feel about the 'follow' part on facebook...seems like I follow a lot of people, especially family relatives...ie. cousins, and close friends, but what I have discovered lately...duhh! (dummy me)...pondering over the fact that I have not gotten any feedback of my postings from any, or most of these close friends and relatives...I mean...what gives? I never stopped getting their latest 'tid-bits', photos of their kids mostly...their latest trips, etc. and I have always commented and 'liked'...so when I finally found out that they are NOT following me...I stopped following them...but not un-friending them, and at that point I gave up my interest in viewing what's going on out there. I discovered a totally new 'meaning' to my facebook page; just view what is being sent to my 'timeline' and keep 'liking' and commenting back to friends' that took the time to see my posts as well! So, that's that...getting back to my pizza!
It is really so easy to make your own fresh pizza dough by mixing the dough in a sturdy Kitchen-Aid mixer with a dough hook, or place the ingredients in a Bread Machine, and let it do its work. Just let the dough rise in a large oiled bowl, and the rest is so easy! I seem to be boring, but my favorite pizza topping is pepperoni, mushroom, and onions...although you can't see it all in the photo...it's in there!

MARTHA STEWART
Quick Basic Pizza Dough


  • 2 packets (1/4 ounce each) active dry yeast
  • 2 tablespoons sugar
  • 1/4 cup olive oil, plus more for bowl and brushing
  • 2 teaspoons coarse salt
  • 4 cups all-purpose flour (spooned and leveled), plus more for work surface

COOK'S NOTE

To freeze, you can wrap the dough in plastic and freeze it in a resealable freezer bag for up to 3 months. If you plan to use it in a recipe that calls for half a batch, divide it before freezing.

Note: This pizza is from half a batch...divide the dough in half, and wrap the other half in plastic wrap...freeze for another use, or make 2 pizzas with the recipe!

DIRECTIONS

  1. STEP 1

    Pour 1 1/2 cups warm water into a large bowl; sprinkle with yeast and let stand until foamy, about 5 minutes.
  2. STEP 2

    Whisk sugar, oil, and salt into yeast mixture. Add flour and stir until a sticky dough forms. Transfer dough to an oiled bowl and brush top with oil. Cover bowl with plastic wrap and set aside in a warm, draft-free place until dough has doubled in bulk, about 1 hour. Turn out onto a lightly floured work surface and gently knead 1 or 2 times before using.

After kneading the dough once or twice, let the dough rest on the floured board...and if you're not a practice 'pizza thrower'...just get a rolling pin and roll into a circle from each direction as dough gets more elastic and your can fit it onto the pizza pan.


As you carefully fit it into the pizza pan, you can brush olive oil, and sprinkle it with salt, pepper, and garlic powder (I also used hot chili pepper flakes). Let the dough rise a little longer, and you can form nice shapely rims around the edges.


Next, I saute my sliced mushroom, and onions just slightly. (nothing worse than topping pizza with raw sliced mushroom, and raw sliced onions)...and paying $18.99 for a large pizza...horrific idea!


Here's a little secret...I pre-bake my dough at 450 degrees F. for 7 minutes, (this assures you not getting a soggy finish) ...next, I spoon my tomato sauce, and topping on it.


I make my own sauce...no pre-cooking needed, just add the entire 28 oz can of your favorite sauce into a medium bowl, add some extra virgin olive oil, abt. 1/4 cup, salt, and pepper, a few fresh torn basil leaves. Now, you are ready to top the pre-baked dough...(seen in the above photo)


Bake for about 10 more minutes, and at the last process, add more cheese and top with pepperoni slices.


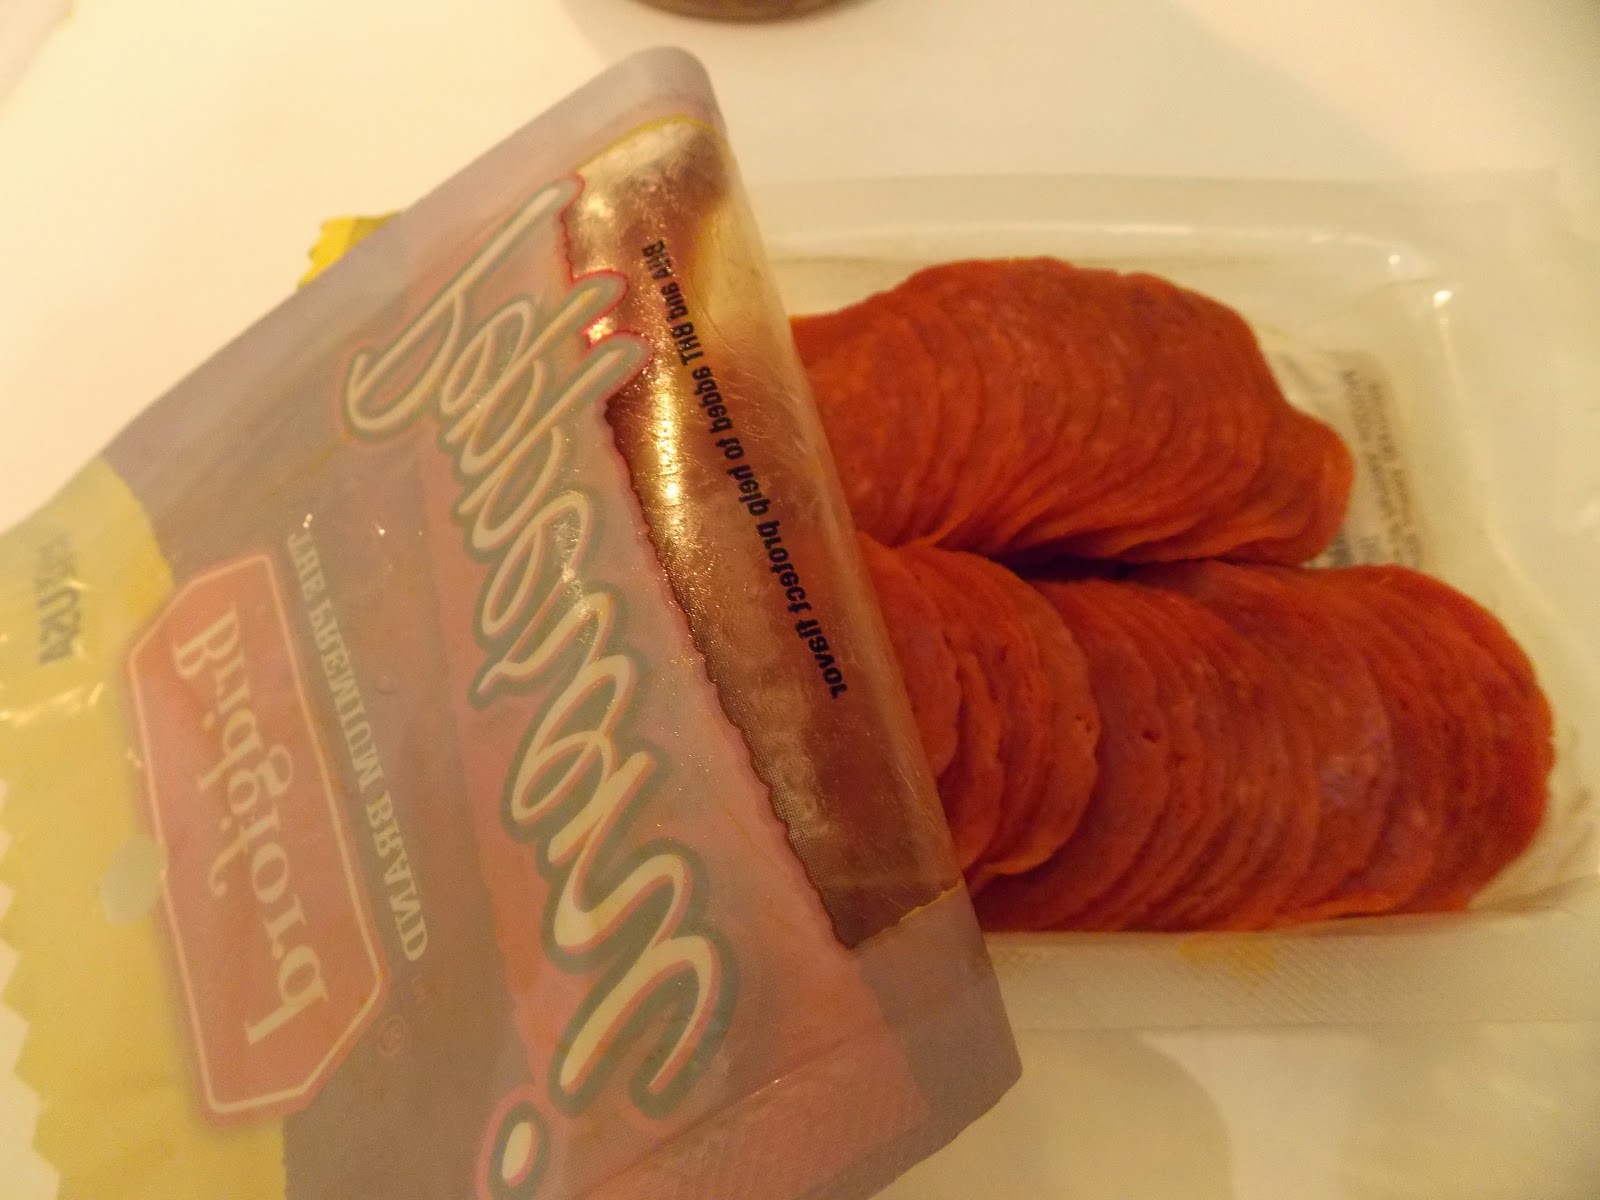
Pre-sliced pepperoni comes in a convenient plastic bag, sliced 'paper thin'...so you really just add them at the few remaining minutes of baking time, on top of the shredded mozzarella cheese.


Now, you are ready to finish baking with the pepperoni topping, for an additional 5 more minutes. Total baking time abt. 22-25 minutes, at 450 degrees F.


The finished product! Perfect pizza,
not overflowing with extra cheese, but you can add more for the last baking process if you like. Just the right amount of sauce and topping...enjoy!


...and some other photos to share!

My newest little friend, who lives with his family in our courtyard...in the coconut palm trees...comes to visit me every morning on my balcony, for his peanuts; I named him Alvin!
Caught a glimpse of the lunar eclipse on the following morning...at 7:15 AM...missed it at night, on Oct. 8 before; too many clouds at night~ photo taken on our private beach, in Palm Beach, FL.
Notice the white streak in the sky? An airplane flying through the sky...how awesome is that?!
Finally, at 7:40 AM...this is how the sky and the ocean appeared!
Wherever one is at any given moment...we are seeking connection with the Divine~

Friday, January 31, 2014

Chocolate Fudge Brownies... with Chocolate Ganache Frosting


Just when everyone in the U.S. is getting ready for Super Bowl Sunday...just who thinks about desserts?...well, I do know it's mostly chicken wings, sliders, pizza, chips, and dips that are the most popular party snacks for the big game, but who thinks about yummy, and easy to grab desserts?
We all love brownies...especially Fudge Brownies; and why not top it off with the most delicious
ooey-gooey Chocolate Ganache Frosting?...who says you can't have your cake...and 'eat it too?'...well, you sure can, with the cutest cupcake liners from William Sonoma! The recipe is super easy; got it from the Internet, and even if I didn't, I have it somewhere in one of my cookbooks, or recipe files. So much easier just one click to Google, and get what you need without searching in your own files!
So easy to serve these yummy fudge brownies... once they are done, and frosted, all you have to do is to cut the usual square portions in half, and set them in cute cupcake liners. Just be sure to refrigerate them until serving time, and take them out about 30 minutes before serving, and you will see how the fudge frosting will 'glisten' and achieve the ooey-gooey look! Every 'chocolate lovers' dream!


Chocolate Fudge Brownies
source: King Arthur Flour
1) Preheat the oven to 350°F. Lightly grease a 9" x 13" pan
2) Crack the 4 eggs into a bowl, and beat them with the cocoa, salt, baking powder, espresso powder, and vanilla till smooth.
3) In a medium-sized microwave-safe bowl, or in a saucepan set over low heat, melt the butter, then add the sugar and stir to combine. Or simply combine the butter and sugar, and heat, stirring, until the butter is melted. Continue to heat (or microwave) briefly, just until the mixture is hot (about 110°F to 120°F), but not bubbling; it'll become shiny looking as you stir it. Heating the mixture to this point will dissolve more of the sugar, which will yield a shiny top crust on your brownies.
4) Add the hot butter/sugar mixture to the egg/cocoa mixture, stirring until smooth.
5) Add the flour and chips, again stirring until smooth. Note: If you want the chips to remain intact in the baked brownies, rather than melting in, let the batter cool in the bowl for about 20 minutes before stirring in the chips.
6) Spoon the batter into a lightly greased 9" x 13" pan.
7) Bake the brownies for about 30 minutes, until a cake tester inserted into the center comes out clean, or with just a few moist crumbs clinging to it. The brownies should feel set on the edges, and the center should look very moist, but not uncooked. Remove them from the oven and cool on a rack before cutting and serving.

Nutrition information

Serving Size: 1 brownie (63g) Servings Per Batch: 24 Amount Per Serving: Calories: 260 Calories

    For the Ganach Frosting:Basic Chocolate Ganache
    • 8 ounces semisweet chocolate, coarsely chopped
    • 1 cup heavy cream
    • 1 tablespoon unsalted butter, at room temperature
    INSTRUCTIONS
    1. Place chocolate in a medium heatproof bowl; set aside.
    2. Place cream in a small saucepan over medium heat and bring to a simmer. Pour over chocolate and let stand until chocolate has softened, about 5 minutes.
    3. Add butter and stir until smooth. Let cool slightly before using.
     
      Have a wonderful SUPER BOWL SUNDAY!
      eat plenty...drink responsibly! xo
 

Tuesday, September 24, 2013

Zucchini and Caramelized Onion Focaccia

When it comes to baking breads, rolls, and other baked goods with yeast...I don't do much of that. I've been spoiled, growing up as a child with all the amazing homemade breads and and sweet pastries made by my mother, grandmother, and aunts. When my children were little, we still had my sweet Hungarian (aunt) Mariska néni who made all the wonderful treats for us, not just for the holidays, but every week something different. She is no longer with us but we still have the fond memories of all the yeasted treats she baked with so much 'pride and joy'...but seriously, we are the ones that was given so much joy and happiness. That's what home baking does; honest!
 
This is my favorite topping; paper thin sliced zucchini, and sweet-crunchy caramelized sliced onions. Focaccia and pizza dough is so easy to make, just pop the ingredients in the standing mixer with the dough hook and the machine does all the work for you. The only dry yeast I trust is RED STAR. It is fail-proof rapid-rising dry yeast...never have to worry about the dough not rising.
 
 
To make a single focaccia, you need at least 3 1/2 to 4 cups of flour. I highly recommend bread flour. Some recipes do not use olive oil in the dough, but I prefer to add olive oil in the dough, and brush some on the top...as well!
 
Zucchini and Caramelized Onion Focaccia
recipe by; Elisabeth
 
3 1/2 to 4 cups bread flour
1/4 cup olive oil
1 cup of warm water
2 teaspoon RED STAR or your favorite rapid
rising yeast
1 tablespoon sugar
1 1/2 teaspoons coarse salt
corn meal for dusting
 
Topping:
 
2 medium zucchini, sliced thin with mandolin slicer
1 medium onion, sliced into thin circles
2 cloves of garlic, minced
1 tablespoon brown sugar
1 teaspoon coarse salt
freshly ground pepper
3 tablespoons olive oil
 
In a bowl of a standing mixer fitted with a dough hook, proof the yeast by combining it with the warm water and sugar. Stir gently to dissolve. Let stand for 3 minutes until foam appears. Turn the mixer on low, and slowly add the flour to the bowl. Dissolve the salt in 2 tablespoons of water and add it to the mixture. Pour in the 1/4 cup olive oil. When the dough starts to come together, increase the speed to medium. Stop the machine from time-to-time to scrape dough off the hook. Mix the dough until smooth and elastic, about 10 minutes, adding flour as necessary. (I added another 1/2 cup more.)
 
Turn the dough onto a work surface and form into a round. Place in a large oiled bowl. Turn to coat the entire ball with oil. Cover with plastic wrap and a towel. Let rise on a draft-free place, until doubled in size, for about 45 minutes.
 
You could coat a baking sheet pan with olive oil, or just use a large parchment paper, and directly coat the parchment paper with corn meal. When dough is doubled in size, punch down the dough and turn directly onto the cornmeal lined parchment paper. Pat the dough into an oblong shape but do not force dough to make it thin. Cover with a tea towel and let the dough rest for about 20 minutes so you can stretch it and shape it again. (In the meantime you could make the topping)
 
With your thumb, make indentations in the dough and brush with 1 tablespoon of olive oil. Preheat oven to 425 degrees F. and pre-bake for about 10 minutes without the topping. Spoon topping over the pre-baked focaccia; don't worry about having neat slices if zucchini is paper thin. Finish baking for an additional 10 more minutes, until focaccia is light brown, and vegetables are caramelized.
 
For the topping: Use remaining 2 tablespoons olive oil and in a large skillet sauté onion and garlic first... adding salt, pepper, and brown sugar. When onion mixture gets nice and caramelized add the thin zucchini slices and just mix all together...no need to cook zucchini; it will finish cooking in the last baking process. 


Tuesday, September 18, 2012

My 'Award' Winning Pizza for #Twelve Loaves September

Does it seem like I'm the only 'oddball?'...seriously! I do everything differently than the other fellow food bloggers. I'm so 'lame' when it comes to joining a group, or even linking up something. Not consistent, and certainly always falling behind schedule. I did try to link up last week with my Cheddar Cheese bread for Lora's #Twelve Loaves September, which required a cheesy bread, but did not know that pizza applies...and I did make my own dough this time with the most amazing yeast from RED STAR, called PLATINUM!

linking to:#Twelve Loaves September @ Cake Duchess
              Hearth and Soul Blog Hop @ Zesty South Indian Kitchen
              Full Plate Thursday @ Miz Helen's Country Cottage
              Thursday Favorite Things Blog Hop @ Katherines Corner


...again, I chose to be alone...needed some quiet time to 'reflect'. Not exactly a holiday dinner; since it was Rosh Hashana Eve! My daughter had a beautiful celebration at her house with their best friends and family, and I was just not in the mood for more work in the kitchen, so I did not join!


I'm so unlucky with yeast, even though it has the proper dates for the expiration...somehow I tend to mess it up. The last time I know it was too hot water, that I added the yeast to dissolve. This time I made sure that the water was slightly warm, and it worked! (sorry, no photos of my step-by-step direction, was not going to use this post)

I am so overly critical of getting a good crust for my pizza, that I'm so picky when it's home made. For me, it has to have a good rim, and it has to be baked just right...actually, pre-baked which I strongly prefer, in order to get a good crunchy crust, not to have it soggy, or greasy, and WORST, underdone!

I have a few really good pizza dough recipes, including a whole wheat dough which is softer, than the regular unbleached white flour pizza dough. We prefer the traditional dough, and this recipes is so easy...so basic, saved from 1998 Gourmet magazine, which I am happy to share with you!

Basic Pizza Dough

For a 12-inch pizza

1 packet of Red Star Platinum dry yeast,
or your favorite (abt. 1-1/2 teaspoon)
2/3 cup warm water
2 cups unbleached all-purpose flour
(I used King Arthur)
1 teaspoon salt
olive oil for the bowl

Sprinkle the yeast over the water. Let stand 1 minute, or until yeast is creamy. Stir until the yeas dissolves.

In a large bowl, combine the 2 cups of flour, and the salt.
Add the yeast mixture and stir until a soft dough forms. Turn the dough out onto a lightly floured surface and knead, adding more flour if necessary, until smooth and elastic, about 10 minutes.

(you can skip all this process, by adding all the ingredients in a bread machine, on DOUGH setting, and let the machine do the work for you)

Lightly coat a large bowl with oil. Place the dough in the bowl, turning it to oil the top. Cover with plastic wrap. Place in a warm, draft-free place and let rise until doubled in bulk, about 1-1/2 hours.

Punch down on dough, and flatten with your fist. Spray your pizza pan with a non-stick cooking spray. If dough is sticky, you can add a little more flour, just do not knead any longer. Cover the dough with a dish towel and let it soften, to expand for an additional 30 to 45 minutes. At this time, you can stretch the dough all the way to the rim of the pizza pan. Lightly spread olive oil on the dough, and pre- bake for about 10 minutes, in a 425 degree F. oven on a pizza stone (preferably) to assure a good crusty dough.

At this time, you can leave the dough to cool down, and use for later, or proceed with your favorite topping for the pizza, to bake for an additional 10-15 minutes for the sauce, to set and the mozzarella cheese melt and slightly brown.
I strongly recommend a good quality pizza sauce, such as Dei Fratelli which is a superb quality. Just be sure to add to a small bowl, and stir about 1 to 2 Tbsp. olive oil and your favorite spices. (I used an Italian brand, a gift from Italy by Lora)

For a fresh mushroom, sliced red onion, and pepperoni topping:

Saute about a handful of fresh sliced mushrooms along with sliced red, or regular onions, just slightly...set aside.
In the meantime, spread the pizza sauce, thin, or thick on the pizza, not quite to the outer rim. Sprinkle with shredded mozzarella, divide the mushroom mixture, and bake for 10 minutes. For the addition of the pepperoni slices...make sure to add the pepperoni slices at the last 5 minutes, (otherwise they will shrivel up and dry out!)
Leftover pieces of pizza can be reheated, or eaten cold (which I love)...the next day...Enjoy!

So there, you have a perfect 'Award' winning pizza, made with love, and Red Star PLATINUM yeast!
BTW- I still have to post my awesome Fresh Tomato Tart recipe, for the next post...just remind me, if I forget. xo

Join Lora, Barbara and Jamie with the #TwelveLoaves baking project!

 The month of September is about bread and CHEESE! Who doesn't love bread and cheese? You could make a quick bread or yeasted bread (muffins, scones-PIZZA)and link up to the girls. I attached Lora's link for you to see the pretty pull-apart bread she baked.
Enhanced by Zemanta

Friday, August 17, 2012

Chocolate Balsamic Strawberries

Another TGIF...and I feel I've been so neglectful in cooking, or baking something for a new post this week. Too busy eating lunches and dinners at my daughter Lora's.

 For instance, her amazing sourdough pizza that she made yesterday and just posted it...you gotta check out her Sourdough Pizza Margherita...as for me, all I could come up with for today, is a fabulous quick and light strawberry dessert that I made, and photographed at her house...playing 'tag' with the sun coming in and out!
It's been over a year now, that I have received an amazing giveaway gift set of fantastic walnut olive oil, chocolate balsamic vinegar, seasonings, and spice rubs. from ARTISANO'S  via my dear friend Lizzy! I have not opened the chocolate balsamic vinegar...until now, even though I know how amazing it is on strawberries. I did make balsamic soaked strawberries before, but nothing like this particular one!
I've been reading  quite a few recipes from my Hungarian food blogger friends...especially GIZI who happens to make a lot of desserts with mascarpone and whipped cream...'hmm'...I thought to myself; why is it that I have not seen a whipped cream incorporated with mascarpone?...what's so hard about it?...it's done the same way as if you are whipping cream, adding a little sugar and vanilla, to the mascarpone, and the cream...I'll tell you, it is pure HEAVEN! My 6yr. old grandson, took a soup spoon and was totally eating the cream...like 'no tomorrow'...I had to remind him that we need to save it for the dessert!

Here's the most amazing chocolate balsamic vinegar that I have ever had the pleasure of using it for my amazing simple strawberry dessert. Here's ARTISANO'S website, to check out there amazing products, and to order online to be shipped to you! In any case, I will post the recipe, including making your own chocolate balsamic vinegar...just from my own experience from the past!

Chocolate Balsamic Strawberries
created by; Elisabeth

1/3 cup chocolate balsamic vinegar
or regular balsamic vinegar and 1 Tbsp of
dark cocoa powder
2 teaspoons, plus 4 Tbsp. sugar

8 oz container of mascarpone cheese
8 oz. container of whipping (heavy) cream
1 teaspoon vanilla extract

1 large basket of fresh strawberries...about 24 ozs.
hulled, and halved


Combine vinegar, (cocoa powder) if you don't have the chocolate balsamic vinegar, 2 teaspoons sugar, in a heavy small saucepan. Stir over medium heat until sugar dissolves.

Boil, until syrup is reduced to scant 1/4 cup, about 3 minutes. Transfer to a small bowl; cool completely.

For the cream:
Combine mascarpone cream, vanilla, and 2 Tbsp. sugar in a large bowl. With a hand held electric mixer, beat until soft peaks form. Combine berries, and remaining 2 Tbsp. sugar in large bowl. Drizzle with balsamic syrup and toss to blend. Let stand for about 30 minutes, stirring occasionally. Divide berries and syrup among 4 dessert glasses. Top with mascarpone cream. Yumm! 

Just to let you know how the weather is in Palm Beach at the end of the afternoon...just about every day! Huge rain clouds, and a quick soft rain...or a short storm! Have a wonderful weekend! xo


Enhanced by Zemanta

Friday, July 20, 2012

Pizza Margherita...{semi- homemade}

No matter what I try to do to this photo, to make it look better, its just not working! Its one of those photos that you have no choice at night, under a light that is just not gonna do justice to the photo. I made this semi-homemade pizza for myself, just the day before my family arrived back from their vacation, in Italy.

It was the easiest pizza...ever, and I must admit; the TASTIEST!...you know why?...because all you have to do is buy a fresh pizza dough from your local favorite supermarket, that's already in a plastic bag, and it weight 1 lb. and the dough is already risen. Costs about $2.50...and you don't have to do anything else, just spread the dough out on a pizza pan, and I will show you how I made it...and devoured almost the entire pizza by myself.

For the last time...alone in my daughter's house, I decided to go out on the patio with my glass, or two of my favorite Chardonnay wine, and just enjoyed the beautiful night...not exactly standing in this spot...where I took the photo of my son-in-law's creative 'trellis' design, where the beautiful bougainvilleas grow, but no flower at this time!

I am not having much luck with my computer today...or is it with Blogger? Thanks to my dear friend Angie...she wrote me an e-mail, just about an hour ago, which showed that she could not open my blog..."by invitation only"...what's up with that? I corrected it right away...so now its working, again.

Also, I cannot open my new photos that I intended to post for today's post. Lora took the photos at her house yesterday; of the Zucchini Quiche that I made, since I didn't have my camera with me, and I cannot upload it!
Will post it next week! ...so here's my super easy pizza with the 'ready dough'...BTW, I learned this method of actually getting a 'hands on' tutoring from a friend from Naples who was an expert 'pizza guy'...at my workplace at the famous caffe Luna Rosa, on the beach in Delray Beach, Florida. Now, its a chic and trendy caffe, but back in the late mid to late nineties, it was more of a small pizza, and panini place!

Pizza Margherita  
 recipe by; Elisabeth

1 lb.fresh, (not frozen) bread/pizza dough
or your favorite homemade dough
3 or 4 ripe plum (Roma) tomatoes sliced fairly thin
Kosher, or sea salt, freshly ground pepper,
1/4 cup extra virgin olive oil
3 cloves of fresh garlic, chopped
crushed red pepper flakes
dried oregano, dried basil
fresh basil leaves for garnish

1/2 to 1 cup shredded mozzarella cheese

First step: get your pizza pan ready, spray with cooking spray, take dough out of the plastic bag, and place it on the pizza pan...punch the dough down, and spread as much as it allows, leaving a border at the edge of the dough. In a small bowl, add the oil, garlic, the salt, pepper, the dry spices, and brush the dough lightly, with a pastry brush! Let the dough rest for about 30 minutes, and stretch again, leaving a border.

Preheat the oven to 525 degrees F. Also, brush the top of the tomato slices with additional oil, mixed with herbs, or if you prefer, just drizzle plain extra virgin olive oil on top. Place the pizza with the baking rim on a 'pizza stone'...if you have it, if not; it will still work fine. Bake for about 5 minutes...just to get the rawness out of the dough. Take the pizza out carefully; just don't burn your hands. Sprinkle the cheese on top of the dough, carefully put the fresh tomatoes on top of the cheese topped pizza, put back in the oven...lower the temp. to 450 degrees F. and bake for an additional 15 minutes longer, until the tomato gets slightly wilted, and cheese bubbles. The rim will get nicely golden brown, and crunchy!
Slice with a pizza cutter, and enjoy!...perfect pizza...and it really is homemade, because you made the entire pizza by yourself, and just used a 'little shortcut' dough, which saves you time, and waiting for the dough to rise!

You can top your pizza with whatever you have on hand, just a suggestion: which will help you each and every time. Brush your dough with the herb-based olive oil, and pre-bake for about 5 to even 10 minutes, depending on the topping you will use. You will never get a slimey, soggy top, underneath the topping, and will be sure to get a nice crunchy bottom, as well!
Mangia, mangia...Buon Appetito! xo


Enhanced by Zemanta