Showing posts with label Mozzarella. Show all posts

Monday, October 13, 2014

Pepperoni and Mushroom Pizza

Hi everyone! Not much to post since nearly 2 weeks of absence. Although, I did post my Pepperoni and Mushroom Pizza photo on facebook...which I have also been absent from for 3 months now. Wasn't a smart thing to post the pizza photos, since I didn't have it on my blog and it made it look like I just posted a 'random' store bought pizza.
I don't know about you, and how you feel about the 'follow' part on facebook...seems like I follow a lot of people, especially family relatives...ie. cousins, and close friends, but what I have discovered lately...duhh! (dummy me)...pondering over the fact that I have not gotten any feedback of my postings from any, or most of these close friends and relatives...I mean...what gives? I never stopped getting their latest 'tid-bits', photos of their kids mostly...their latest trips, etc. and I have always commented and 'liked'...so when I finally found out that they are NOT following me...I stopped following them...but not un-friending them, and at that point I gave up my interest in viewing what's going on out there. I discovered a totally new 'meaning' to my facebook page; just view what is being sent to my 'timeline' and keep 'liking' and commenting back to friends' that took the time to see my posts as well! So, that's that...getting back to my pizza!
It is really so easy to make your own fresh pizza dough by mixing the dough in a sturdy Kitchen-Aid mixer with a dough hook, or place the ingredients in a Bread Machine, and let it do its work. Just let the dough rise in a large oiled bowl, and the rest is so easy! I seem to be boring, but my favorite pizza topping is pepperoni, mushroom, and onions...although you can't see it all in the photo...it's in there!

MARTHA STEWART
Quick Basic Pizza Dough


  • 2 packets (1/4 ounce each) active dry yeast
  • 2 tablespoons sugar
  • 1/4 cup olive oil, plus more for bowl and brushing
  • 2 teaspoons coarse salt
  • 4 cups all-purpose flour (spooned and leveled), plus more for work surface

COOK'S NOTE

To freeze, you can wrap the dough in plastic and freeze it in a resealable freezer bag for up to 3 months. If you plan to use it in a recipe that calls for half a batch, divide it before freezing.

Note: This pizza is from half a batch...divide the dough in half, and wrap the other half in plastic wrap...freeze for another use, or make 2 pizzas with the recipe!

DIRECTIONS

  1. STEP 1

    Pour 1 1/2 cups warm water into a large bowl; sprinkle with yeast and let stand until foamy, about 5 minutes.
  2. STEP 2

    Whisk sugar, oil, and salt into yeast mixture. Add flour and stir until a sticky dough forms. Transfer dough to an oiled bowl and brush top with oil. Cover bowl with plastic wrap and set aside in a warm, draft-free place until dough has doubled in bulk, about 1 hour. Turn out onto a lightly floured work surface and gently knead 1 or 2 times before using.

After kneading the dough once or twice, let the dough rest on the floured board...and if you're not a practice 'pizza thrower'...just get a rolling pin and roll into a circle from each direction as dough gets more elastic and your can fit it onto the pizza pan.


As you carefully fit it into the pizza pan, you can brush olive oil, and sprinkle it with salt, pepper, and garlic powder (I also used hot chili pepper flakes). Let the dough rise a little longer, and you can form nice shapely rims around the edges.


Next, I saute my sliced mushroom, and onions just slightly. (nothing worse than topping pizza with raw sliced mushroom, and raw sliced onions)...and paying $18.99 for a large pizza...horrific idea!


Here's a little secret...I pre-bake my dough at 450 degrees F. for 7 minutes, (this assures you not getting a soggy finish) ...next, I spoon my tomato sauce, and topping on it.


I make my own sauce...no pre-cooking needed, just add the entire 28 oz can of your favorite sauce into a medium bowl, add some extra virgin olive oil, abt. 1/4 cup, salt, and pepper, a few fresh torn basil leaves. Now, you are ready to top the pre-baked dough...(seen in the above photo)


Bake for about 10 more minutes, and at the last process, add more cheese and top with pepperoni slices.


Pre-sliced pepperoni comes in a convenient plastic bag, sliced 'paper thin'...so you really just add them at the few remaining minutes of baking time, on top of the shredded mozzarella cheese.


Now, you are ready to finish baking with the pepperoni topping, for an additional 5 more minutes. Total baking time abt. 22-25 minutes, at 450 degrees F.


The finished product! Perfect pizza,
not overflowing with extra cheese, but you can add more for the last baking process if you like. Just the right amount of sauce and topping...enjoy!


...and some other photos to share!

My newest little friend, who lives with his family in our courtyard...in the coconut palm trees...comes to visit me every morning on my balcony, for his peanuts; I named him Alvin!
Caught a glimpse of the lunar eclipse on the following morning...at 7:15 AM...missed it at night, on Oct. 8 before; too many clouds at night~ photo taken on our private beach, in Palm Beach, FL.
Notice the white streak in the sky? An airplane flying through the sky...how awesome is that?!
Finally, at 7:40 AM...this is how the sky and the ocean appeared!
Wherever one is at any given moment...we are seeking connection with the Divine~

Friday, April 29, 2011

Teresa's Zucchini Quiche, and More!

Now that Teresa and Domenico (my daughter's in-laws) departed for Italy, it's been real quiet at my daughter's household...not that they were noisy, but a lot of cooking and baking going on, a lot of "hustle and bustle"...only Italian language heard.

I went there yesterday, to help organize all the many frozen and canned items she made to last for several months. We all miss them, and our Italian language has improved a lot...LOL

Since I attempted to make my last dish, which was the Cayman Fish, I must say I have not cooked anything, because every day my son comes over to the beach to go surfing at lunch time, before he goes to his classes at the local University, working for his Masters degree.

He brings me so much food, all ready to be re-heated, that's all I have to do...literally.
My ankle is improving tremendously, I don't even have to use the walker any more...it's folded up, and will be donated to Goodwill. My diagnosis is all good...no blood clots, no vascular problems...just had to see my chiropractor, because my back, my shoulders, my neck was all "out of line"...a few cracks of the ribs, and everything is back to normal...but I'm still just "tippy toeing" on that foot, yet...in time, all will heal!

Getting back to the Quiche, which is part of the Easter tradition, whether it's in a pie form, filled with meats, or just vegetarian, and most of the time, filled with generous amount of grated cheese of your choice. Different regions of Italy, have different traditions, but they all agree that the use of the eggs are the real purpose, for the use of the Easter Pie...Pastiera...or Quiche, even pizza is considered as part of the tradition, especially, in Naples. Teresa made this beautiful Zucchini Quiche, also 2 kinds of pastas, one vegetarian, and a mostaccioli with little meat balls, mozzarella cheese, chopped hard boiled eggs, and with her homemade tomato sauce...amazing.
I want to share my recipe to the quiche which was quite similar to this quiche...the only difference is that this quiche was made with puff pastry dough, but my recipe which I use...and "tried and true" every time, is a Mark Bittman's recipe, for both the Quiche, and the crust!


Here's the recipe that I use for the Quiche: You can add sauteed vegetables, and/or diced ham, crumbled bacon, or, crumbled cooked sausage if you like...the choice is yours.

Basic Cheese Quiche
How to Cook Everything, by Mark Bittman

1 Recipe Generous Pie Shell, or Rich Tart Crust, without sugar,
in a 10-inch tart pan, or 9 inch tart pan, or a 9 inch deep pie pan-chilled

6 eggs, at room temperature
2 cups grated Emmenthal, Gruyere, Cantal, Cheddar,
or other flavorful cheese
2 cups cream half-and-half, or milk, gently heated, just until warm
1/2 teaspoon salt
1/4 teaspoon cayenne

Preheat the oven to 425 degrees F. Prick the crust all over with a fork. Line it with tin foil
and weight the bottom with a pile of dried beans. Bake 12 minutes. Remove from the oven
and carefully remove the weights, and foil, and turn the oven to 325 degrees F.

Combine eggs, cheese, liquid, and seasonings and beat until well blended.
Place the baked crust on a baking sheet. Pour the egg mixture into the crust, right to the top.
Carefully transfer the baking sheet to the oven and bake 30 to 40 minutes, until the mixture
is set, but is still moist; it should still jiggle just a little in the middle. Cool on a rack and serve
warm, or at room temperature. Serves 6-8.

Not too "shabby"...this gorgeous Lamb Shank, made by son-in-lawExecutive Chef  Fabrizio... over a bed of basic Risotto...(Melt in your mouth)...Sinfully delicious, and beautiful!  He made 8 of these, and this is supposed to be a portion for 1, no way!...(enough for 4 servings)
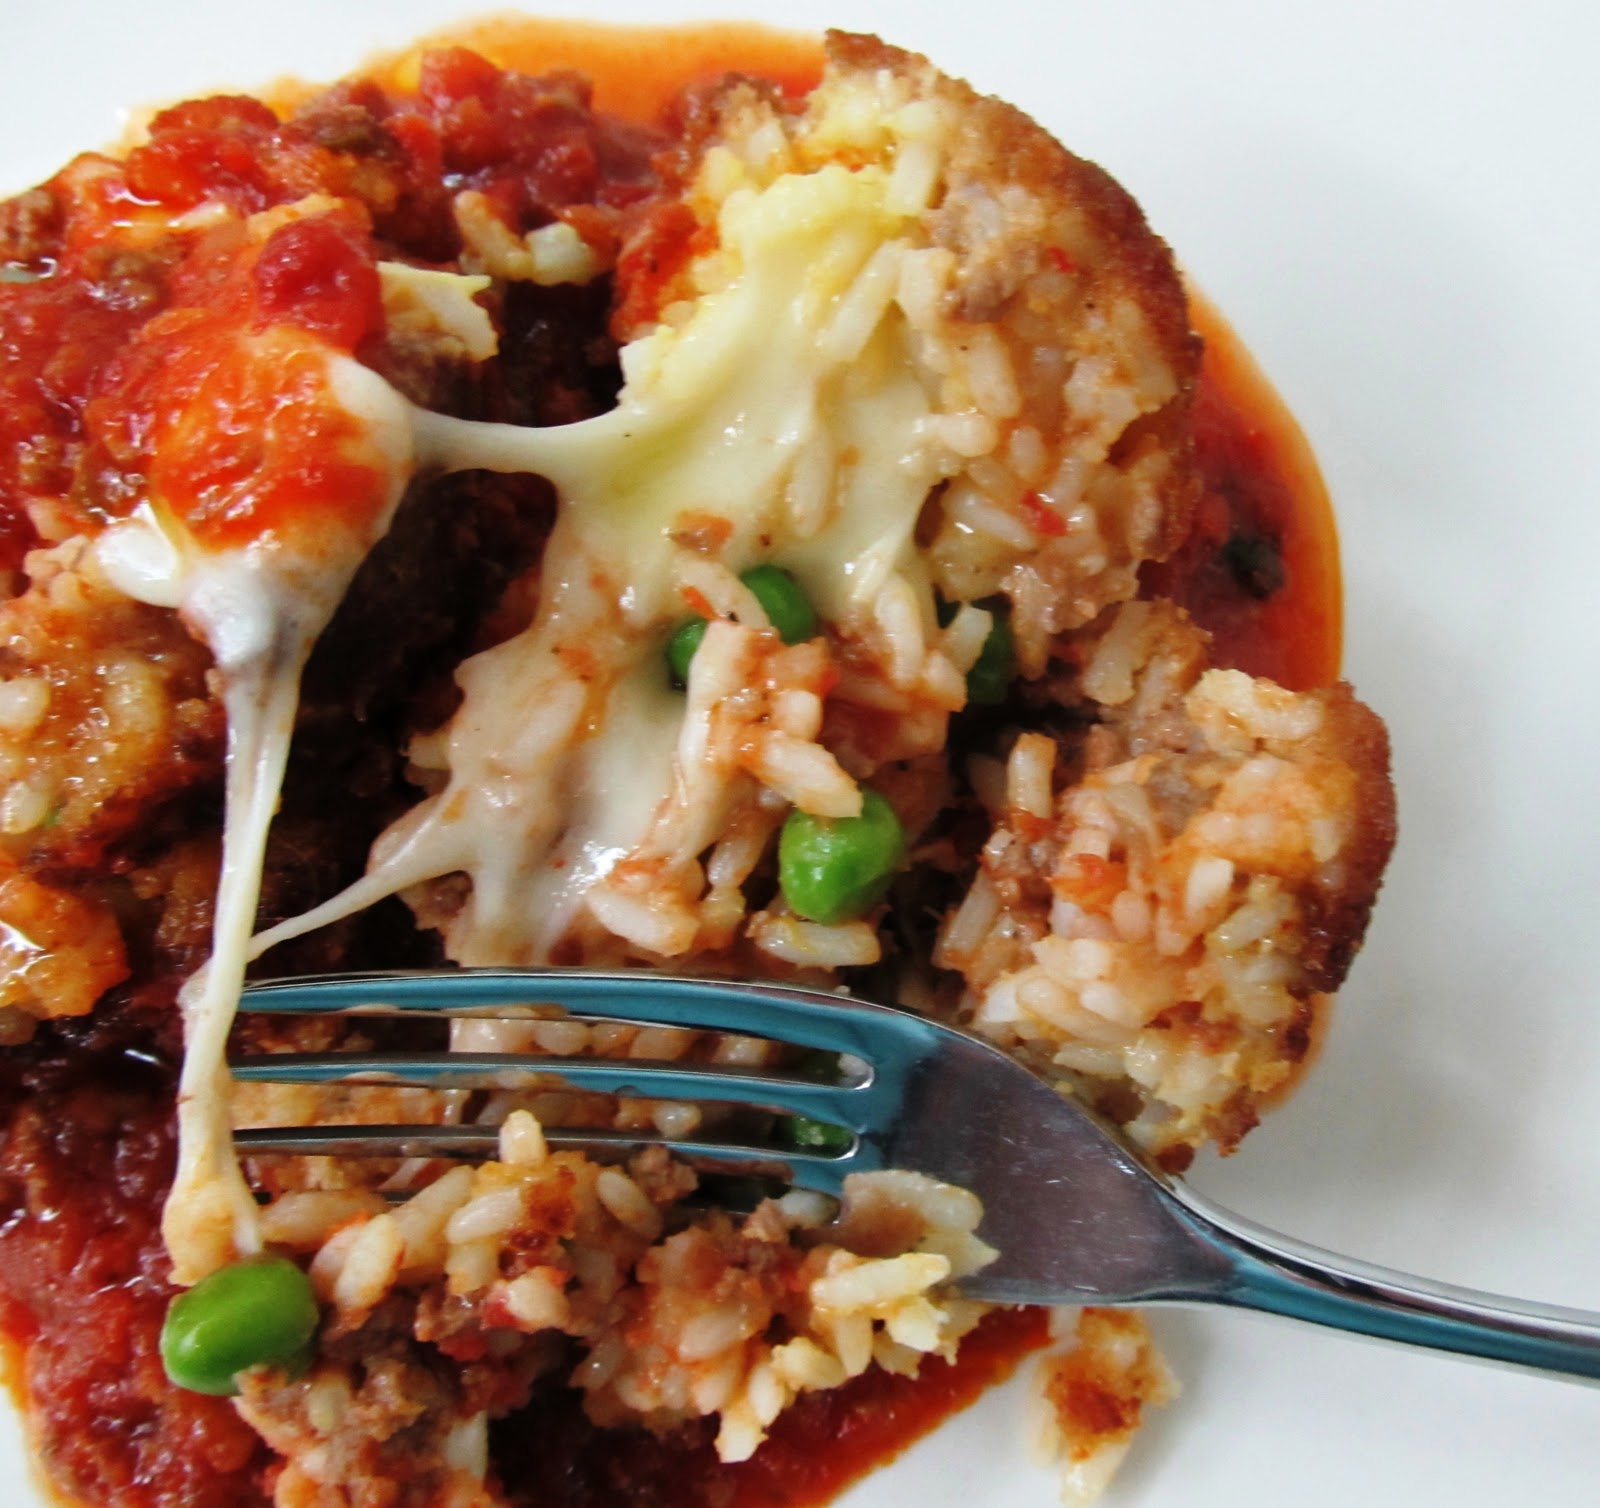
Pasta al Forno, made by Teresa, Fabrizio (son-in-law's mom)...Baked Rigatoni, with homemade tomato sauce (from real tomatoes-not canned)...with tiny meatballs, chopped hard boiled eggs, and the most amazing combination of cheeses. Yumm!!!
Teresa's Italian Fig Cookies...proudly holding the tray... by my sweet granddaughter Sophia (requested not to take her photo)...OK, LOL, just the platter, Sop

Lora sitting on left, m-in-law Teresa, f-in-law Domenico, hubby, Fabrizio...enjoying a nice Easter Sunday "early bird" dinner...at my daughter, and son-in law's house!
Enhanced by Zemanta

Thursday, March 3, 2011

Arancini di Riso-Sicilian Rice Balls


If you are familiar with the Arancini, which literally means, "little oranges" then you would know what this authentic, Sicilian, or Calabrian delicacy is. It is called Rice Balls. You can make it two ways, the first one which we all are familiar with are with a scoop of ground meat, w/sauce, and a cube of mozzarella cheese, and let's not forget the green peas. You can also make it vegetarian style, with just the mozzarella cheese in the middle, served over plain Marinara sauce. Either way, you've never tasted any Italian comfort food, which is usually served as a snack in the middle of the afternoon, or an appetizer, for a few, or a crowd that will disappear faster than pizza. I had the opportunity to learn about this yummy dish, firsthand when I lived in Sicily, and also visiting family in the recent years. Nowadays, as in the past, it is still a very popular tasty treat, made in every pizza place, or in cafes, and mostly it's a tradition to make on a Sunday afternoon.


There really isn't much difficulty in making the Arancini if you have all your ingredients organized, your meat, or plain sauce ready, and all you have to do is to just assemble them together, and ready to fry...yes, fry! and not bake. You will not be required to deep fry them, as long as you have a couple inches of fresh vegetable oil sizzling in a large heavy duty deep skillet, you will have the most crunchy, and delicious tasting Arancini, dipped into extra sauce, or just eat them just like the way I am holding a yummy piece!

Arancini-Sicilian Rice Balls
 my own recipe

2 cups of raw long grain rice
2 Tablespoons butter
4 eggs separated
1/2 cup grated Romano cheese
salt and pepper to taste
1 cup fined bread crumbs
Vegetable oil for frying

Cook rice until firm (not tender). Drain. Place rice in a large bowl. Add butter, cheese, salt, and pepper.Let it cool down for about 20 minutes. Add the egg yolks, and mix well. Spread out on a large platter and let it cool down in the fridge for about 30 minutes, up to an hour. Next, make your meatsauce, or Marinara sauce, according to your favorite recipe. For the meatsauce, use at least 1 lb. of ground lean beef. You will have plenty of extra meatsauce or plain sauce leftover, from a good batch of sauce.

This is basically how you form the rice balls.
The only problem was, that I didn't let the rice cool down enough, and probably added too much meatsauce.
The frozen peas do not have to bee boiled, just let them thaw out. I placed another portion of rice on top of this, and rolled it into a ball, then I dipped it in the remaining 4 egg whites, which has been mixed with about 1/4 cup water, and dipped it into the bread crumbs, rolling it into a ball, and frying it till it was nice, and golden brown.


Filling for the Arancini

Scoop out a good amount of the ground beef with a slotted spoon, into a separate bowl, and get your set up ready. You need about 1 cup frozen peas, thawed out at room temperature, and about 1 cup small cubed, or even shredded mozzarella will work. Put 1 heaping tablespoonful of rice in the palm of your hand. Flatten slightly, then place about 1 or 2 teaspoon of the meat filling, about 1 teaspoon of the peas, and a cube of the cheese. For the meatless version, do the same with the plain sauce, the cheese, and the peas, or you can just use the cheese, and omit the peas. Add another heaping tablespoon over the top, and enclose it packing the ingredients well to stay inside. Beat the remaining egg whites with 1/4 cup water till frothy, then roll the rice balls into the egg whites, and dip into the breadcrumbs, that has also been seasoned with salt, pepper, and Romano cheese. Fry in about half filled skillet, with vegetable oil, or in a deep fryer. until golden brown, Drain on absorbent paper towel, and serve over a bed of extra sauce, or by itself. Serve hot, or at room temperature. Makes about 12 to 16, depending the size you make. Oh, so delizioso...Mangia!
If you love Italian food, I promise you that you will want to have this ridiculously, and totally amazing Arancini to make. It really is worth the precious time, and effort!
Enhanced by Zemanta

Monday, February 21, 2011

Pizza...Awards...and PGA Mall

Last Friday...as almost every Friday, Lora made this amazing pizza dough that has become a staple meal, with a side salad, or a vegetable dish. In this case she had the green beans, and leftover pancetta, to add to the pizza topping...and oh, yes caramelized onion, and homemade sauce that she always has on hand for a quick pasta dish. I keep bugging her to post the pizza photos, but she not only does not take photos of it, I always end up taking the photos. Her pizza dough is the easiest and best, made with all, or half whole wheat flour, and half bread flour. Here's Lora's homemade pizza recipe, @cake duchess
Just look at this yummy goodness...Sweet caramelized onions, crispy pancetta homemade tomato sauce, and ooey-gooey mozzarella cheese topping the thin, crispy, crunchy fresh, hot, homemade pizza dough. Trust me on this one...no comparison to take-out!...now, for the lovely blue dish of  Lora's. Long story behind this set of 12 English china set, that was a gift to daughter's hubby, from a lovely English young lady that was a mutual friend to both Lora, and Fabrizio, that he brought into the marriage 10 years ago. They still manage to have most of the set, even if a plate or two breaks, lucky me...I find the same dishes at my thrift finds, but not cheap. Each plate costs $2.99. My daughter finally told me after I replaced 4 plates..."please mom, don't get any more, I'm trying to get rid of these, so I can get a new set"...

...and now, for the Awards!

I have not received such a lovely award as this, so far. This award came from my sweet friend, Mateja @Indulging Life. She actually designed this award herself, and personalized it. She really put her "heart and soul" into this. Do visit her beautiful blog, and make friends! I'm simply quoting what she said in her own words, when she completed the award, and what it meant to her. I am so honored by this...Thank you, Mateja!
This is what Mateja said:

February 1, 2011I think it is time for me to create my own appreciation award. And I was sitting and sweating, working hard on creating that perfect picture that would express exactly what I wanted to say, adding and removing, than adding some more. (ratatatata- drums) So here it is, "Most Deserved Award", the award for all my friends who make me feel like home, who spark the most beautiful memories from my childhood, inspire me, support me, introduce me to new foods, teach me new cooking/baking techniques, and challenge my imagination! 

These next 3 lovely awards, I received from a sweet couple,Anu Santanu who I recently befriended. They were ever so kind to honor me, not just with one award, but three! These come with rules, and I've been down the road before on the rules, from the previous ones. As far as promoting them to 15 bloggers, which I have done in the past, not just 15, but 30 or more at one time, and letting them all know...or not letting them know, some have not even responded even when I let them know...and some I left out, not on purposely...it's difficult to keep track on paying it forward.
Thank you, Satu Santanu, for giving me theses generous, and lovely awards!

I regret to break the rules, and just let everyone take for themselves. and pay it forward if you would like to do so, with my "blessings"...You all deserve the awards, All of you who are out there all over the world, in different countries, states, or even local ones! Blogging is "time consuming" but so well worth it to stay in touch with other bloggers who have similar interests, and making friends to me is so important in this fast moving world, with so much happening, and ever changing events that changes our lives...forever!


Rules to claim and share these awards:....(optional)
  • Thank and Link the blogger who has given you the award.
  • Copy and paste the Logo in your blog.
  • Share 7 things about yourself.
  • Nominate 15 other Great Bloggers
  • Comment and let them know of the award.
Last amazing and unique award, I received from my dear friend, Toni, @Boulder Locavore. She is also a very talented blogger, and has such a lovely blog, so interesting and unique...you have got to check her blog out!
Thank you Toni, for giving me this lovely award, I appreciate your kindess!


Help yourselves to the awards...take one, or take them all, pay it forward, or just keep it for yourselves!

I would like to show of one of the most beautiful malls of all the malls I've seen. It's the Palm Beach Gardens Mall, in Palm Beach Gardens, Florida, about a 30 minutes drive from us. Lora and I went there last Friday morning to exchange her Valentine's necklace that she was allergic to...(funny, but not so funny)...here's this amazing little fun jewelry and gift shop that is totally affordable. Loved everything in there! Such a relaxing shopping mall, so beautiful, and they have everything there...not to mention, great sales!
Just look at the natural "sky light"...very efficient in saving electricity.
That's the store...SWAROVSKY...love it!
They have such fun things like these little crystal fishies, for only $86.00.
Crystal Butterflies...$110.00.
 Now, we're getting into the "bling"...a little more expensive, like this beautiful silver, or is it white gold bracelet?
for $475.00

Crystal beads...baubles, or little disco balls?...not exactly what I would hang in my living room, or on the car rear view mirror, but they're fun!
At last, have some early lunch, the Cafe at the Gardens Mall was really enjoyable, a lot of food courts to choose from. We had Chinese, which was pretty decent...somehow all the foods at these food courts, or cafes, as they call them leaves you reaching for the Pepto Bismol...the minute you get home, promising not to eat there, again!

Enhanced by Zemanta

Wednesday, October 13, 2010

Home made Pizza

I should really be calling this a Sunday Pizza because that's the only day I get to make this for a quick bite for the family, and it's a great little satisfying lunch with just salad on the side...perfectly even cut little squares on the one side, as you can see, it's just plain, with organic tomato sauce topping, and  (not so organic) shredded mozzarella cheese. On the smaller side, is topped with sauteed, sliced onions, pitted kalamata olives, and pepperoni (my favorite...sorry, not so light and healthy, but oh, so good! The crust is the best part made with the most awesome flour, even better than bread flour for the pizza, called, Eagle Mills, all Natural all Purpose, unbleached flour...a wholesome blend of white, and ultra grain flour. Pizza was devoured, within a few minutes.
Home made Pizza  Dough
1pkg active dry yeast
1/2 teaspoon sugar
1 cup of warm water
3 cups of unsifted Eagle Mills all Purpose unbleached flouror 1 1/2 cup whole wheat flour,  and 1 1/2 cup all purpose flour
2 teaspoons salt

In a small bowl, dissolve the yeast in the 1 cup of warm water, with sugar. Let stand 5 minutes until foamy. In a large bowl, combine flour and salt. Add yeast mixture with fork, stir until dough forms. Turn dough out onto a lightly floured surface. Knead dough for 10 minutes, or until smooth and elastic. Grease a large bowl all around the surface, with the olive oil. Place the dough into the bowl, and turn to coat. Cover with a plastic wrap, or a towel, and place in a draft free place for about 1 to 2 hours, until doubled in bulk. Punch dough down, and place the dough on to the floured surface, cover it by placing the bowl over it, and let it rise again, for an additional 1 hr. Now, you can roll the dough out with a rolling pin,  and place it on a 12 in round pizza pan, or you can make a rectangular form, and place it on a 9x13 flat baking sheet. Preheat oven to 500 degrees and pre-bake for 10 minutes, so when you put the topping on it it won't come out soggy, underneath the topping. Top with basic sauce, and cheese, or with your favorite toppings, and bake for an additional 12-15 minutes until dough get nice and crunchy, and cheese is melted, and bubbly. Serves 6
note:
click on the highlighted portion of the Eagle Mills flour to get more information, regarding this wonderful flour.

Basic Pizza Sauce 
1 can of 28 oz. organic tomato sauce
or tomato sauce of your choice
3 Tbsp. olive oil
salt and pepper to taste
dry herbs of your choice, or leave plain
( I just used 3 large whole fresh basil leaves in the sauce)
Fresh basil leaves for decoration (optional)
In a large saucepan, heat ingredients till simmering, Cook stirring occasionally, 15 minutes, or until thickened. Cool before spreading on pizza dough.
Enhanced by Zemanta