Tuesday, June 28, 2011

Mark Bittman's Perfect Pancakes

This is my Part 3 project of my blueberries!...pancakes! Who doesn't love pancakes? ...especially when they are homemade, and it's so easy to make. Why would you want to buy the boxed kind? Mark Bittman's How to Cook Everything is my "Bible" of cooking. Everything is simplified, just like the book title says: "Simple Recipes for Great Food"...it is so, so, true. I have the huge paper book version of this fabulous book, and it was the best thrift find of my entire life...that's how strong I feel about it. Got the book at Goodwill store for a mere $.79 (79 cents...a steal)
I have mentioned this last year on my blog. There is no way "under the sun" you can ever find a brand new paper book at Goodwill for this price...at least, not at my local store. Now they are selling them on E-Bay, so that's the end of that!
Finally, I was able to copy and paste the recipe...sorry for any inconvenience!

From the book How to Cook Everything (Completely Revised 10th Anniversary Edition) by Mark Bittman

Basic Pancakes

Serves 4 to 6

Total Time 20 minutes


Introduction

Fast, easy, and fluffy, these pancakes should make you forswear boxed mix forever.


Ingredients

2 cups all-purpose flour

1 Tbsp. baking powder

½ tsp. salt

1 Tbsp. sugar

1 or 2 eggs

1½ to 2 cups milk

2 Tbsp. melted and cooled butter (optional), plus unmelted butter for cooking, or use oil

1 tsp. vanilla (optional)


Steps

Preheat a griddle or large skillet over medium-low heat while you make the batter.

Mix together the dry ingredients. Beat the egg(s) into 1½ cups of milk, then stir in the 2 tablespoons melted cooled butter and vanilla (if you are using them). Gently stir this into the dry ingredients, mixing only enough to moisten the flour; don’t worry about a few lumps. If the batter seems thick, add a little more milk.

If your skillet or griddle is nonstick, you can cook the pancakes without any butter. Otherwise, use a teaspoon or two of butter or oil each time you add batter. When the butter foam subsides or the oil shimmers, ladle batter onto the griddle or skillet, making any size pancakes you like. Adjust the heat as necessary; usually, the first batch will require higher heat than subsequent batches. The idea is to brown the bottom in 2 to 4 minutes, without burning it. Flip when the pancakes are cooked on the bottom; they won’t hold together well until they’re ready.

Cook until the second side is lightly browned and serve, or hold on an ovenproof plate in a 200-degrees oven for up to 15 minutes.


This is The Basic Pancakes recipe by Mark Bittman, and I have followed this exactly...and adapting it a little by adding the blueberries...oh, so yummy. The secret of not bruising the delicate berries is: do not fold the berries into the batter...just follow my step-by-step method!..
Note: The important thing I wanted to explain, is I don't fold the blueberries into the batter, so it doesn't get smashed, or bruised, I add them separately piece by piece into the individual pancakes, and when I turn them over gently it stays nice and firm...does not get squished.
1Tbsp butter added to 1/4 cup Agave syrup, heated in microwave

or not!...yesterday, I spent at least 2 hrs. on my step-by-step photos post at my beach apartment...as you know, I'm house/dog watching for my daughter Lora (Cake Duchess) while they are vacationing in Italy, but I do not upload photos on their computer..I only use theirs to check e-mail, and comments on theirs.

 If you are familiar with Zemanta program, which highlights the words, and you can check the sources, also puts the words for your "labels" in for you...but beware of the actual symbol "Zemanta"...once you delete that while it's on your post, you will delete your own content, and photos, to have to upload them again...sigh!
That's exactly what happened to my step-by-step-recipe photos.
I copied and pasted Mark Bittman's recipe for you...didn't even know it was out there...sigh of relief...phew!...

Friday, June 24, 2011

French Toast filled with Blackberries...Friends!


I was so inspired by another food blogger who posted a berry stuffed French Toast...as usual, I have been mentioning lately and actually following through that I would like to make it also, and link it back to the blogger who inspired me...but my memory "failed" me...can't remember who it was because I did not receive a reply, or having the person comment back on my blog. I feel so weird about this, because now, I actually made the French Toast...not the same way, but being inspired with the use of the berries.
My second inspiration came from my friend Mari, @Mari's Cakes...all the way from the Dominican Republic. She was inspired from my previous post from the Father's Day breakfast we had out at Howley's...again, the French Toast, and the home fries. She wrote to me in e-mail, that she made it, and even included photo of it...I was so hungry this morning, so right after reading her e-mail, I wrote her back, that I'm inspired as well, to make the plain French Toast, and the home fries, since I have everything on hand. I used the medium sized red potatoes, and left the skins on....mmm...so good! Thanks for the inspiration Mari, and to all my food blogger friends who constantly inspire me with your delicious, and amazing dishes, and desserts. I just wish I could make a different dish and dessert every day!


French Toast Filled with Blackberries
my own recipe

2-4 slices of thick white or bread of your choice (I used oatmeal bread)
1 cup whole milk
2 large eggs
dash of salt
1 teaspoon sugar
2 Tbsp. unsalted butter
2 Tbsp. vegetable, or canola oil

For the macerated fruit, and syrup

1 pint of berries of your choice-divided
(I used blackberries)
1/4 cup cornstarch mixed with 3/4 cups water
1 Tbsp. sugar
Grated lemon, and also juice of 1 lemon

In a medium bowl, whisk, eggs with milk, add dash of salt, and sugar, and transfer to a lasagne pan, or another dish, about 9x13, to dip bread into it on both sides. Let the egg mixture soak up the milk and egg mixture.


This is the "misen plaz"=set up for my plain French Toast, in my 2n'd recipe, with the home fries on the side.
Same procedure, as in the first one


This method is for the plain French Toast

Heat butter, and oil, on medium high heat, and cook on the first side for a few minutes, until it gets golden brown as in the photo. Turn heat down to medium, flip over, and cook and the other side same way, until nice golden, and crispy on the edges.

(Don't use butter alone, and make sure you don't use too much oil, either. Follow the recipe, and it will end up like this, otherwise it will get too soggy, if too much oil, or butter is used.)


In a medium saucepan, add the cornstarch mixture, and the sugar. Heat to dissolve, and add half portion of the fruit, stir and let the fruit get softened. Add the grated lemon, and the juice, cook until sauce get to a somewhat thick consistency.

Do not discard the sauce, just spoon out the fruit. You will need the sauce to make the syrup for the French Toast.


Follow the same method for cooking the French Toast, as in the plain one, but just cook only one side, until golden. With a slotted spoon, spoon the fruit on the French Toast while it's still in the pan. Carefully place second slice on it, gently pat it down, and carefully flip over to the other side to cook until golden.


With a slotted spatula, carefully place on a cutting board, and with a sharp knife, cut in half. Just look at the gorgeous golden color, and how fluffy it is!


This is how it's going to look like when you carefully slice it in half. Just look at the beautiful fruit oozing out.Carefull place the French Toast on a serving dish, and drizzle the berry syrup on it.
Yummm!!!


If you don't wish to use Maple syrup, you can use organic Agave syrup in place of it.


Add about 1/4 cup of real Maple syrup into the pan with the berry sauce, and heat up together until it gets to a boil,


Pour the syrup into an espresso cup, or a tiny pitcher,  sprinkle with powdered sugar, and drizzle on the desired amount


I must confess this was the best French Toast I have ever tasted in my life...seriously! I was so thrilled to share this with you! I will be posting my home fries recipe on my next post. Have a wonderful weekend, my friends, Hugs!


I  want to share with you, the e-mail I received from my sweet and talented professional cake baker friend, Mari. You must visit her blog, her cakes, and decorations are to "die for"...so beautiful...talk about inspiration, if she doesn't inspire you, than I don't know who will, and to be perfectly honest, every food blogger is certainly inspiring. All work so hard to keep up the food blog, the cooking, baking...the most difficult is the "staging" of the food, the lighting, and last, but not least the photographing...and oh, yes, the posting, uploading your photos. A lot of work goes in to all that, and we all deserve appreciation!


I just wanted for you to see....your pictures were inspiring.

I did a breakfast lunch today. I had to have french toast and home fried potatoes!

have a great afternoon.

Mari
Mari's Cakes & Vivir en la Gracia de Dios


Enhanced by Zemanta
I haven't had the chance to post the recipes, as of yet, for the French Toast, and the
home fries, but will post tomorrow morning!
 My schedule with the house and dog-watching, and the back-and-forth trip to my place every day, does interfere somewhat in keeping up with my blog.

Monday, June 20, 2011

Chocolate Eclair Cake, and Father's Day!


I realize that I should have uploaded Part 3 of my blueberry creation, and after that was a blackberry creation...just wanted to take a little brake from all the berries, and concentrate on this super yummy dessert that inspired me from Lizzy's blog...That Skinny Chick Can Bake!!! 
I mentioned to her that I cannot get the Whip it whip cream stabilizer, although I did want to make this dessert desperately. She is such a wonderful and caring friend, she sent me a couple packets of the product that I was supposed to receive it by Saturday so I can make this for Father's Day. Unfortunately, I had to make drastic measures to find a different route of make stabilizer for whipped cream, other than the gelatin method.

 Stabilizer Whipped Cream
source: Rose Levy Beranbaum
 
For 1 cup of heavy whipping cream, use 2 Tbsp of powdered sugar, and 1 teaspoon of cornstarch and add 1/2 teaspoon of pure vanilla extract.
Bring to a boil, stirring constantly, and simmer for just a few seconds, until liquid is thickened. Scrape into a small bowl, and cool completely to room temperature. Now, add the vanilla, and stir. When you are ready to whip your cream, beat 3/4 cup of heavy whipping cream, until it starts to thicken, and add in a slow stream, the cornstarch mixture, and whip until stiff peaks form when the beater is raised.

I followed Lizzy's exact recipe...the only difference was, that for the whipped cream I substituted corn starch, powder sugar, diluted with heavy whipped cream (not whipped) and when cooled, added to the custard.
So if I can inspire you with this amazing delight that truly looks like an eclair cake, and also reminds you of Napoleons, but really...just think! perfect summer dessert...a NO-BAKE...without the excessive heat in the kitchen.
I have never made a custard without eggs, or pudding powder...the custard in these layers are from pure heavy cream, butter, pure vanilla, delicately layered with...of all things, graham cracker cookies!

 I just went downstairs to check my mail, since I saw the mail truck pull up, and wouldn't you know?...Yeayy! I got my Dr. Oetker Whip it ...stabilizer for Whipping Cream:D I am so, so, happy that I have such nice and generous friend. Thank you so much Lizzy!... so gracious and kind to help me out, but I already made it from my homemade "scratch" stabilizer, so I will use it next time. I'm telling you this dessert looks like you "slaved away" for hours making this droolworthy dessert, with the decadent chocolate smooth as silk, ooey, gooey topping, and the cream is heavenly.
I could not wait for six hours to cool off, I made space in the freezer and chilled it for nearly an hour. So, if you want to try this dessert, click on the recipe.. and I guarantee you will stay on to browse for more of her amazing dishes, and fabulous desserts!

So on Father's Day, breakfast, my son Joe took us out for a casual, and fun breakfast, right in the nearby area called, Howley's
in West Palm Beach. The eatery is very popular, and has been for decades. It is another 50's style so cool and casual, original building, still with the same counter, and 50's soda fountain stools, and booths.


 So laid back and such a relaxing place for breakfast, lunch, and dinner...and certainly affordable prices.
Really interesting artwork displayed inside. The cool artwork of the skinny lady w/the blue hair is for sale for
$350.00


Sophia opted for the French Toast...really so fluffy...yumm!


 I ordered the omelet, with tomatoes, mushroom, onions,and bacon, with home fried potatoes. (3 of us shared the potatoes, so much!)
Enhanced by Zemanta

Thursday, June 16, 2011

Lemon Blueberry Bread, Part 2...(forgotten awards)

Here we are, in the midst of a beautiful summer for most of us...I should say for all of us?...with all the scorching heat everywhere, we shouldn't complain here, in South Florida, because our record temperatures only go about as high as 95 degrees, and most of the time a nice breeze, especially by the ocean, or the Intracoastal  waterway, where you see people line up on the bridge, fishing, from morning till night. We are having an abundance of berries all over, not just here, but just about all over the globe. I'm noticing more and more berries recipes on food blogs.
Having the huge container of blueberries...
I was not about to waste one berry, and determined to make 3 different recipes with it, so here we are on Part 2. a light, lemony, blueberry bread, topped with yummy crunchy topping...a bread that also doubles for  a "fragrant tea cake" with crunchy topping. Here's the recipe, I promised!

LEMON BLUEBERRY BREAD
adapted  from The New Basic Cookbook

TOPPING
 1/2 cup sugar
1/3 cup un-bleached all purpose flour
4 Tbsp=1/2 stick unsalted butter, at room temperature
1 Tbsp grated lemon zest
1  teaspoon ground cinnamon

Stir the topping ingredients together in a small bowl, and set aside.

For the Bread/Tea Cake:

3/4 cup sugar
1/2 cup milk
1/3 cup sour cream
4 Tbsp=1/2 stick unsalted butter, at room temperature
2 eggs
2 cups unbleached all-purpose flour
2 teaspoons baking powder
1/4 teaspoon salt
2 cups fresh blueberris
Zest of 1 lemon
after zesting lemon, use the juice from it

Preheat oven to 375 degrees F. Spray a 9x5inch loaf pan with cooking spray
In a medium bowl, stir the sugar, sugar, milk, sour cream, butter, and eggs together, until smooth.
In a larger bowl, toss together,. the flour, baking powder, and salt. Stir the wet ingredients into it, and add the juice of the 1 lemon.
Carefully, fold in the blueberries, and the lemon zest, to combine.

Transfer the batter to the prepared loaf pan, and sprinkle with the topping, carefully patting it down a little.
Bake on 375 degrees for the first 30 minutes...lower the temperature to 325 degree F. and bake for an addition 25 minutes until topping is deep golden, and has formed a nice crunchy and thick crust.
Cool in the pan for about 10 minutes on a wire rack and transfer the loaf pan to continue cooling. Makes 1 loaf

 I would like to show off my new thrift find...a "fire king" oven proof blue glass loaf pan that I purchased at Goodwill, for $1.99. It's not as deep as your "pyrex" glass loafpans, but it really is pretty, and has a nice design on it. Besides the fact that it's such a bargain, this seems to be an antique from the sixties, or seventies. Have not seen one like that at all.


First, I made the topping for the Lemon, Blueberry Bread, and set it aside.


Next, I combined all the ingredients, according to the recipe, and at the end. carefully folded in the fresh blueberries. Notice how thick the dough is, but not too thick, but thicker than a cake dough.


Now, you're ready to fold the dough into an oil sprayed loaf pan. A glass loaf pan works best. Just fold in, and carefully smooth down with a spatula.


Now, you're ready to spoon the best part...the topping. So crunch, just the right sweetness, and so yummy!


Now, it's ready to go into a 375 degree F. oven for 30 minutes, and it's important to turn the temperature down to 325 degrees, because you will need an addition 25 to 30 minutes longer to bake. (Recipe call for 375 degrees all the way through)...but if you follow the high temperature all the way through, top will start to burn after the 30 min. time, and it will be way too brown.


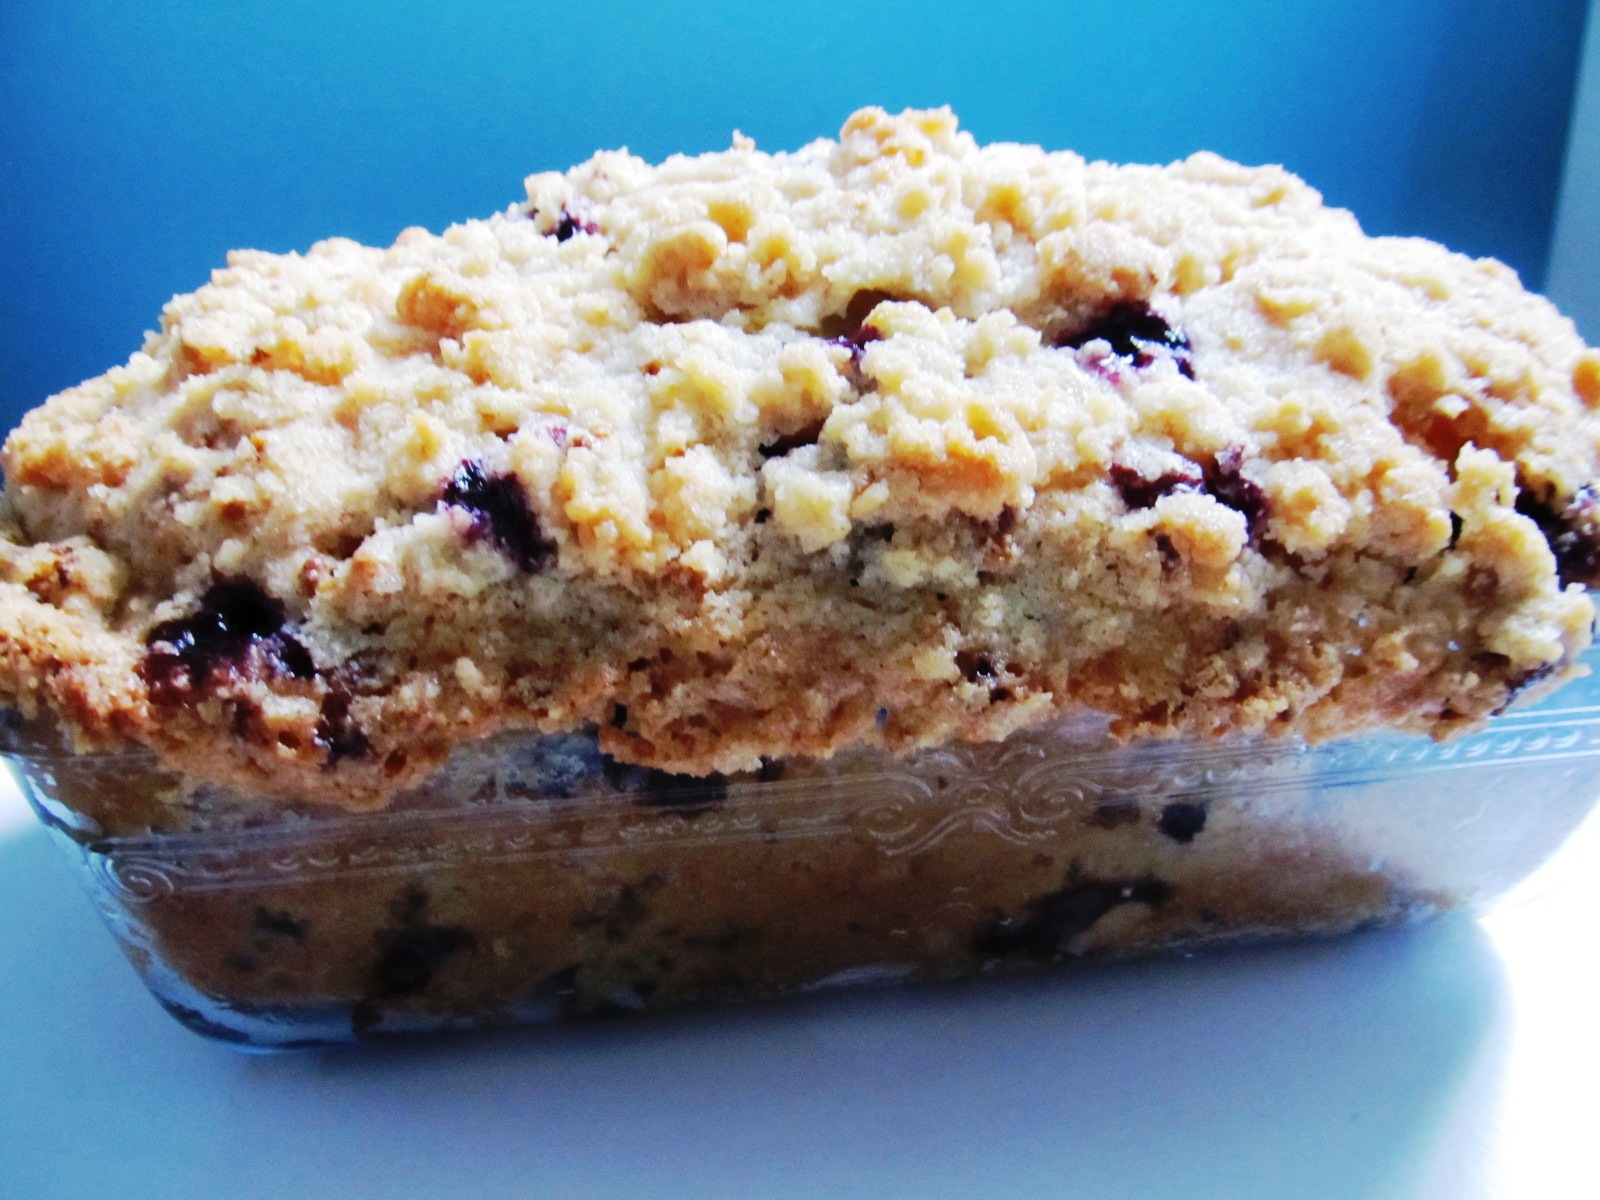
The finished product...crunchy, yummy, and oh, the aroma...so fragrant. Almost ran over a little, because loaf pan is not deep enough.


Seriously...have you ever seen anything so crunchy, and delicious looking? Is it a bread, yes!...is it a tea cake?...certainly yes! I would have called it a tea cake, but recipe calls for bread...so it's a Tea Cake, and Bread!

When it's almost cooled, you can put a large serving plate, or a rectangular platter like I did, and flip it over, and again, over to the correct side. (Crunchy topping will not get ruined.)


Now it's ready to be sliced and enjoyed!


If you follow my adapted recipe, and step-by-step photo method, you will not go wrong. (Just leave my kitty)


Last, but not least, I took only one slice to keep for myself, and shared the rest with my family. As I was driving from the island over the Southern bridge, to West Palm, the bridge was up, as you can see cars lined up...you can see the dry grass on the right...lack of rain...total drought, worst in years! The people on the right, chilling out, and some fishing on the bridge (you can't see on the photo, no)...also fishing in the water, where you can walk out for miles, before it gets deep.
So, that's it my friends...took you on a little journey again...have a wonderful weekend, and

HAPPY FATHER'S DAY... TO ALL THE DADS!

Just wanted to remind you that I did mention about paying forward the latest award to the first 30 commenters but each and every one has missed my message regarding the awards, so I am copying and pasting, not 30, but 32 friends' comment to please accept the award, and pay it forward if you like!

Congratulations...you all deserve it well!

I will post Lemon Blueberry recipe later...but I wanted to get this post out and to let you know again about the Awards. Take one, or take both...they are lovely awards, for lovely blogger friends...and then some!!!

This beautiful  Hundred Hearts award was given to my by my dear friend Mina,

@Angellove's Cooking. Such a talented cook, and baker, she make such beautiful cakes, yeast breads...also unusual, colorful and delicious entrees, and salads. Thank you Mina, I really appreciate it!

Благодаря Зиче!!! 

I would like to thank my dear friends Nancy, and Veejay, from Kitchen Gypsies  for this Lovely Blog Award...it's way overdue to mention it! They have a beautiful blog, mostly Indian inspired cuisines, with various other American yummy dishes, and  wonderful desserts.
It's vegetarian, and truly inspiring! I truly appreciate this award...thank you for honoring me with it!

32 comments:


laurie
 
 
Emma
 
 
Pegasuslegend  
 
 
Melynda
 
 
Mari 
 
 
Tina (PinayInTexas)
 
 
Nancy and Vijay
 
 
Angie's Recipes
 
 
Kathy
 
 
Lizzy
 
 
Magic of Spice
 
 
aipi
 
 
http://scrambledhenfruit.blogspot.com/


Swathi

 
http://www.blogger.com/profile/17104033889937635168
 
 
Anna C
 
 
Junia

hmariek

 
Pachecopatty

A Busy Nest

 
Boulder Locavore

 
Lin Ann

 
Lilla
 
 
honey82


Veronica's Kitchen

 
mangiabella

 
Dulce Dough

 
KB and Whitesnake
 
Gina
 
 
Michael Toa
 
 
Angellove's Cooking
 
 
Raksha's Kitchen


Enhanced by Zemanta